096 Room Paint Bomb
Chris McKeown / July 1, 2025
Painting
Overview
Room Paint Bomb reads material values stored on room parameters and applies those materials to the surrounding boundary faces (walls, floors, ceilings, roofs, and columns) using the Revit face paint API. Configure which room parameter drives the material for each surface type, optionally enable per-face or Do Not Paint overrides, choose the rooms to process, and click OK — the tool paints every boundary face in a single transaction. This replaces the laborious process of manually painting individual faces room by room.
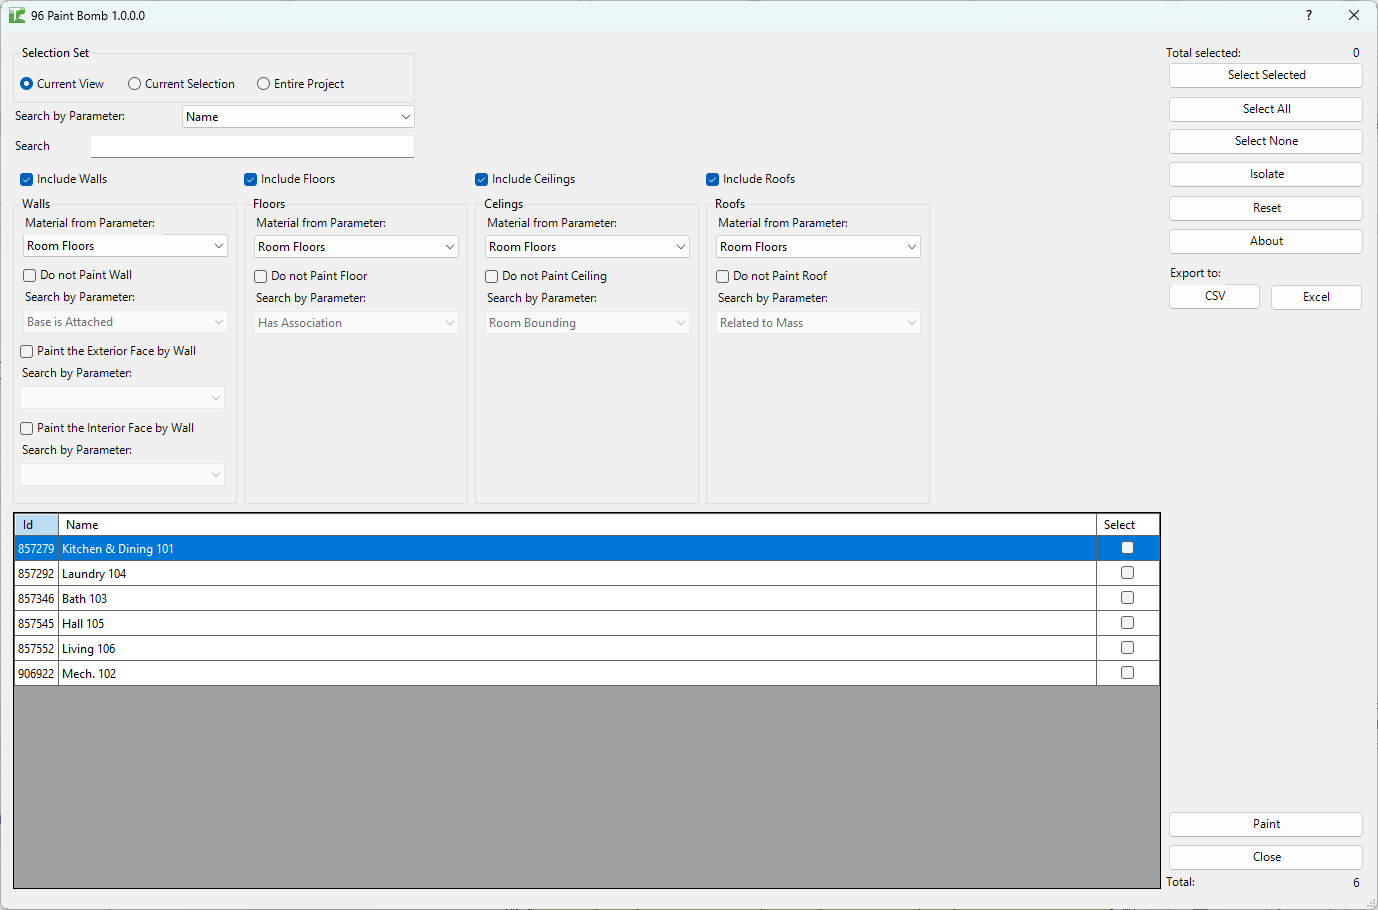
Table of Contents
Key Features
- Paints boundary surfaces for Walls, Floors, Ceilings, Roofs, and Columns
- Per-surface-type configuration:
- Material parameter — dropdown selecting which room parameter holds the material name
- Do Not Paint checkbox + Yes/No room parameter — optionally skip painting a surface type based on a room parameter flag
- Face-specific paint checkbox + room parameter — use a different material for a specific face type (e.g. floor face only)
- Room grid: Id, Name, Select — choose specific rooms or select all
- Three scope options: Current View, Current Selection, Entire Project
- Select Selected / Select All / Select None buttons for the room grid
- Progress bar with Cancel
- Transaction: "Paint Rooms"
- Completion message with per-type counts
Requirements
- Must be run in a project document (not a Family document)
- Rooms must exist in the model (placed room elements, not unplaced)
- Room parameters of type Text must be populated with material names that match materials in the project
- A valid Kiwi Codes Bonus Tools licence must be active
Running the Tool
Launch
Find Room Paint Bomb on the Bonus Tools Ribbon or use 115 Search Tools.
Step 1 — Set the scope
Choose the scope for which rooms are included:
| Option | Behaviour |
|---|---|
| Current View | Includes rooms visible in the currently active view (default) |
| Current Selection | Includes only rooms currently selected in Revit |
| Entire Project | Includes all rooms across the whole model |
The room grid loads the matching rooms automatically.
Step 2 — Select rooms
In the room grid, tick the Select checkbox for each room to process. Use the Select All or Select None buttons for fast selection. The grid shows Id, Name, and Select for each room.
Step 3 — Configure surface types
For each surface type (Walls, Floors, Ceilings, Roofs, Columns), configure the material mapping:
Material parameter — select the room parameter that contains the material name to paint. The material name in the parameter must exactly match a material that exists in the Revit project.
Do Not Paint — enable to skip painting this surface type for rooms where a specified Yes/No parameter is set. Choose the Yes/No room parameter from the dropdown.
Face-specific paint — enable to paint only specific faces of the surface type using a separate room parameter for the material. For example, paint only the floor-facing side of a wall with a different material than the wall face.
Step 4 — Execute
Click OK. The tool iterates over each selected room, uses the Revit spatial element geometry calculator to identify boundary faces, and applies the configured material to each matching face.
A progress bar tracks processing. The transaction is named "Paint Rooms".
When complete, the Output log reports per-type counts (walls painted, floors painted, etc.) and any failures.
Tips and Best Practices
- Material names in room parameters must match exactly. The tool matches material by name — a typo, extra space, or capitalisation difference will cause the paint to fail for that room. Use a list-based parameter or schedule to enforce consistent values.
- Use a Yes/No "Do Not Paint" parameter for exceptions. Rooms that share a space with another room (e.g. an open-plan area) often need individual surface overrides — the Do Not Paint checkbox handles this without needing to uncheck every room manually.
- Test on a single room first. Select one room, configure the mapping, run, and verify the painted result before running on the entire project.
- Ensure materials exist in the project before running. If the material referenced in the room parameter does not exist in the Materials library, that face will not be painted. Pre-populate the project with required materials.
- Combine with 97 Room Paint Report. After running, use tool 97 to generate a report of what materials are painted on room boundaries — useful for confirming the operation completed as intended.
Common Use Cases
Interior fitout — painting walls by room finish schedule — Add a "Wall Finish" parameter to rooms and populate it from the room finish schedule. Run Room Paint Bomb to apply those finishes to wall faces automatically.
Painting floor finishes from room data — A room has a "Floor Material" parameter set to the required tile or carpet material. Run the tool to paint all floor faces in matching rooms.
Applying material overrides for rendering — Before a rendered walkthrough, bulk-apply materials to all room boundary surfaces in one step using stored room parameter data, rather than manually painting each face.
Room-by-room ceiling material application — Different room types have different ceiling materials defined in a "Ceiling Finish" parameter. Run the tool with the ceiling surface type configured to apply all ceiling finishes simultaneously.
Troubleshooting
"No Rooms found in this Project." The project contains no placed room elements in the selected scope. Place rooms and re-run, or change the scope.
"No Material parameters attached to Rooms." No text-type parameters exist on rooms in the project. Add a project or shared parameter of type Text to the Rooms category before running.
"Paint Rooms failed. Gain ownership of elements and try again." The transaction failed due to a worksharing conflict. Use Revit's SWC tools to gain ownership of the room and boundary elements, then re-run.
Some faces are not painted after running The material name in the room parameter does not match any material in the project, or the room boundary element does not expose accessible solid geometry faces via the Revit API. Check material names for exact spelling matches.
Painted materials appear on walls from an adjacent room Room boundary geometry is determined by Revit's spatial element calculator — walls shared between two rooms will be painted with the material of the room processed last. Run rooms in a deliberate order if this matters, or use the Do Not Paint option for shared boundaries.