088 Element Properties
Chris McKeown / July 1, 2025
Parameters
Overview
Element Properties displays comprehensive metadata for any set of Revit elements in a filterable, sortable grid. Load elements from the current selection or by pasting element IDs directly. From the grid you can zoom to elements in the model, select them back into Revit, export to CSV or Excel, or delete them — all without closing the tool.
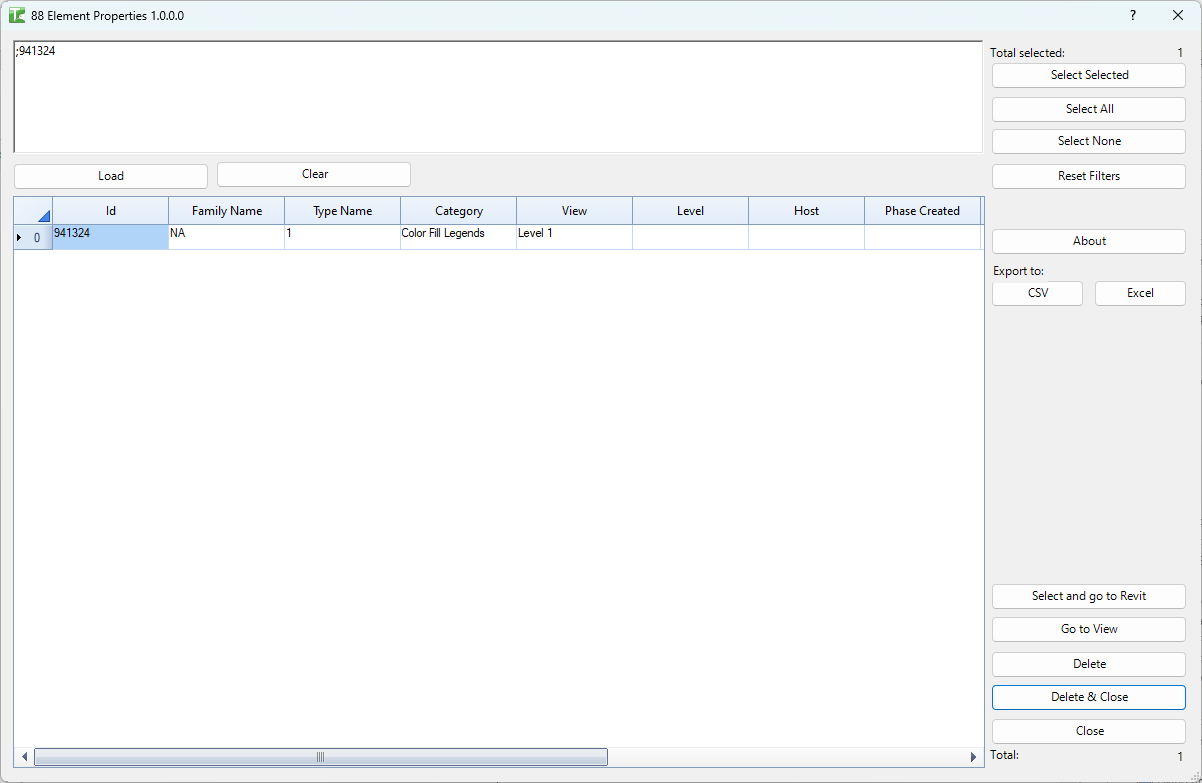
Table of Contents
Key Features
- Loads elements from the active Revit selection, from a pasted list of element IDs, or from other tools (e.g. 139 Pinned Elements)
- Displays 13 properties per element: Id, Family Name, Type Name, Category, View, Level, Host, Phase Created, Phase Demolished, Location, Is Grouped, Workset, and Select
- Built-in column filtering with auto-scan and a Reset Filters button
- Bulk selection with Select All / Select None / Select Selected
- Zoom to selected elements in Revit (Go to View) while keeping the tool open
- Return selected elements to Revit's selection set (Select and go to Revit) and close
- Delete with confirmation (tool stays open) or Delete & Close for quick cleanup
- Export the current grid view to CSV or Excel
Requirements
- An open Revit project with elements to analyse
- Elements selected in Revit before launching, or element IDs ready to paste
- Write permissions and workset ownership for any deletion operations
Running the Tool
Launch
Find Element Properties on the Bonus Tools Ribbon or use 115 Search Tools. The tool opens and immediately loads whatever elements are currently selected in Revit.
Step 1 — Load elements
Elements can be loaded two ways.
From selection (automatic): When the tool opens, the IDs of all currently selected elements are placed in the text box and the grid populates automatically.
From element IDs (manual): Paste a semicolon-separated list of IDs into the text box, then click Load. Use Clear to empty the field first if needed.
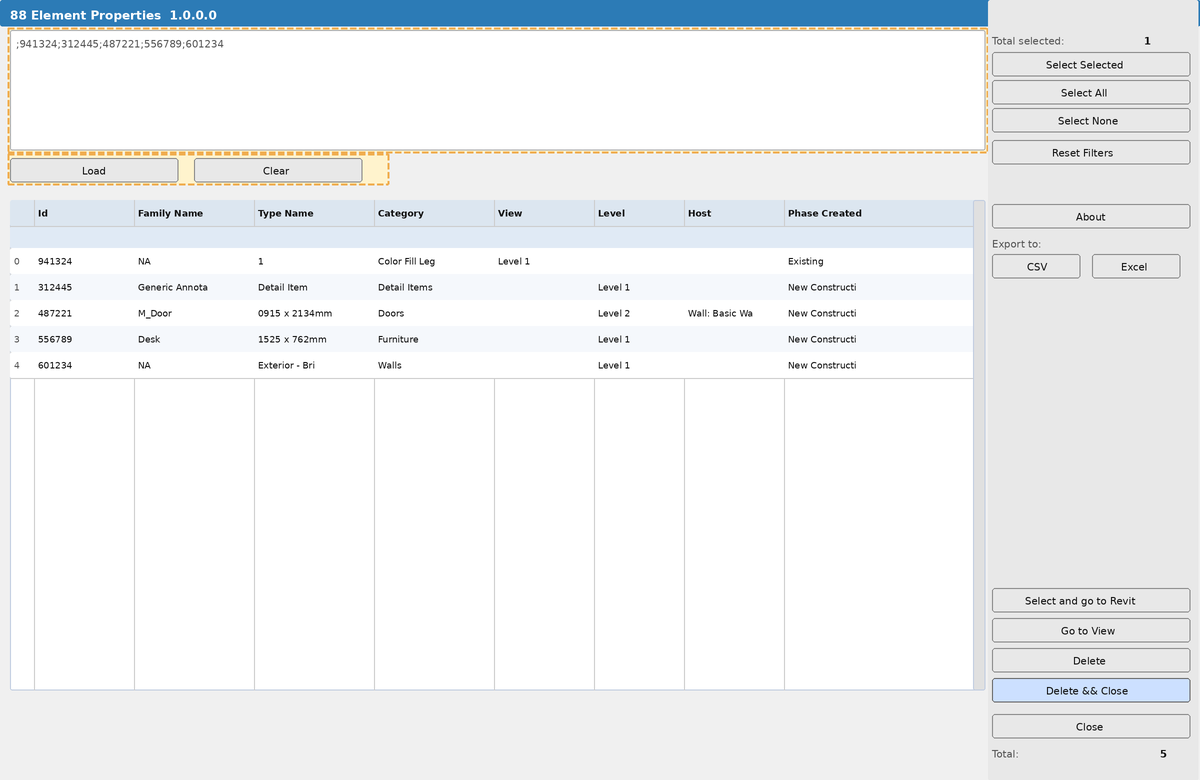
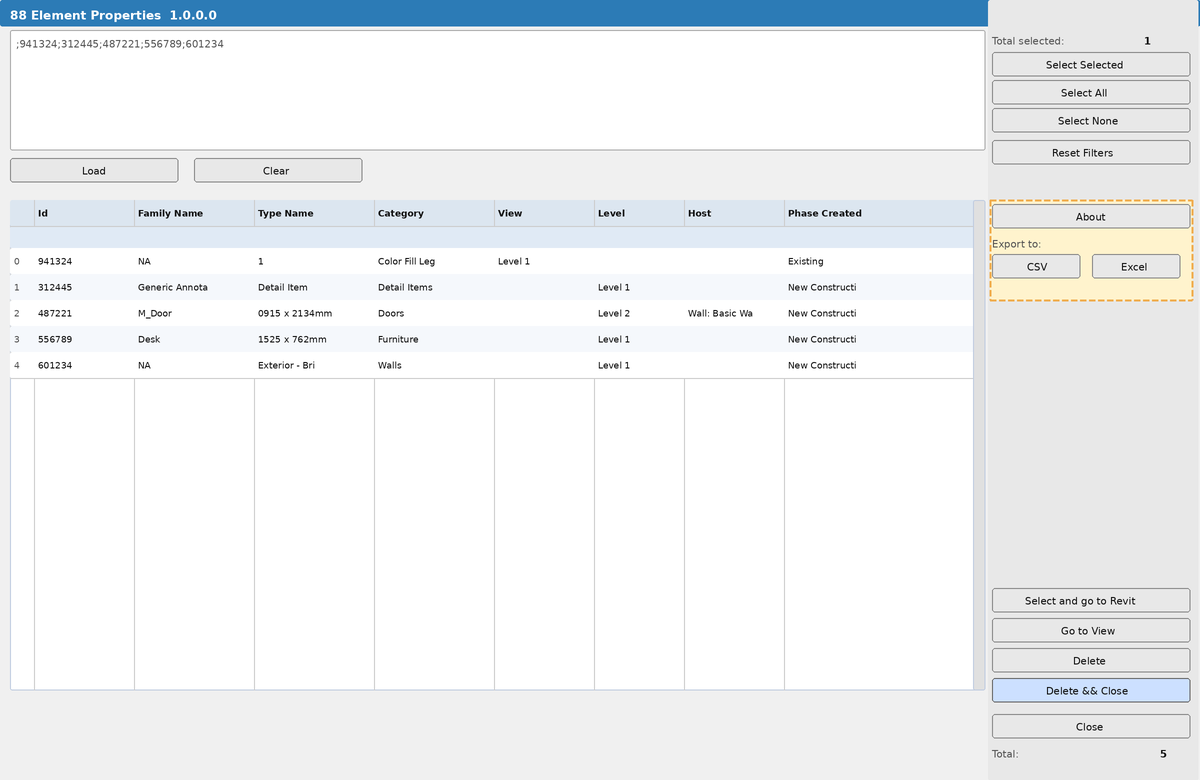
IDs are separated by semicolons with no spaces required — e.g. 941324;312445;487221. A progress bar appears while large sets are loading. The Total counter in the bottom right updates when loading completes.
Step 2 — Review and filter
The grid shows up to 13 properties for each element. Scroll right to see all columns — Phase Demolished, Location, Is Grouped, and Workset are off-screen to the right by default.
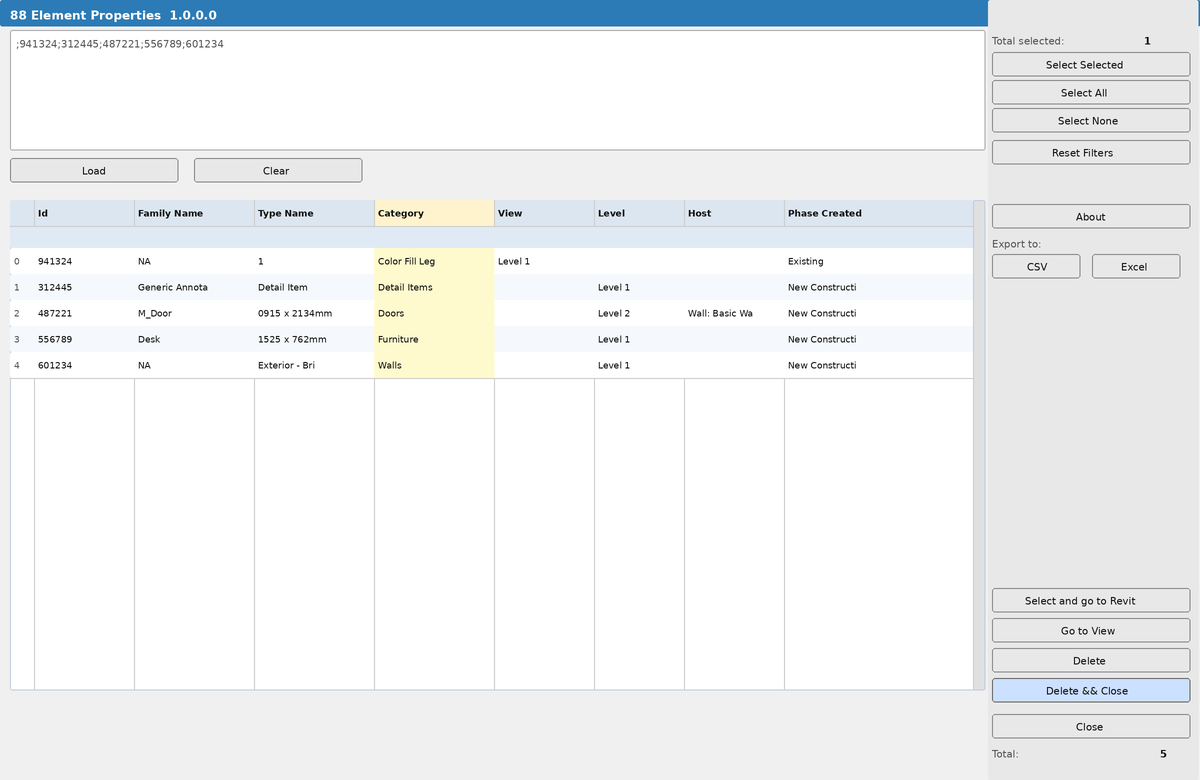
Click any column header to sort. Type into the filter row beneath each header to filter by that column. Click Reset Filters to clear all active filters and restore the full row count.
Understanding property values:
- Family Name = NA — the element is a system family (wall, floor, ceiling) rather than a loadable family instance
- View — only populated for view-specific elements such as detail items, tags, and annotations
- Host — for tags shows the tagged element's name; for dimensions shows all referenced element names; for hosted families shows
ID : Name : Category - Is Grouped = NA — the element is not in a group; if grouped, shows the group name
- Location — X, Y, Z coordinates in internal Revit units (decimal feet); empty for non-point elements
Step 3 — Select rows for action
Use the checkboxes in the Select column (rightmost, scroll to see) to mark rows for action. The Total selected counter at the top right updates live.
- Select Selected — toggles the Select checkbox for whichever rows are currently highlighted (blue) in the grid. Use Ctrl+Click or Shift+Click to highlight multiple rows first.
- Select All — checks all visible (non-filtered) rows
- Select None — unchecks all rows
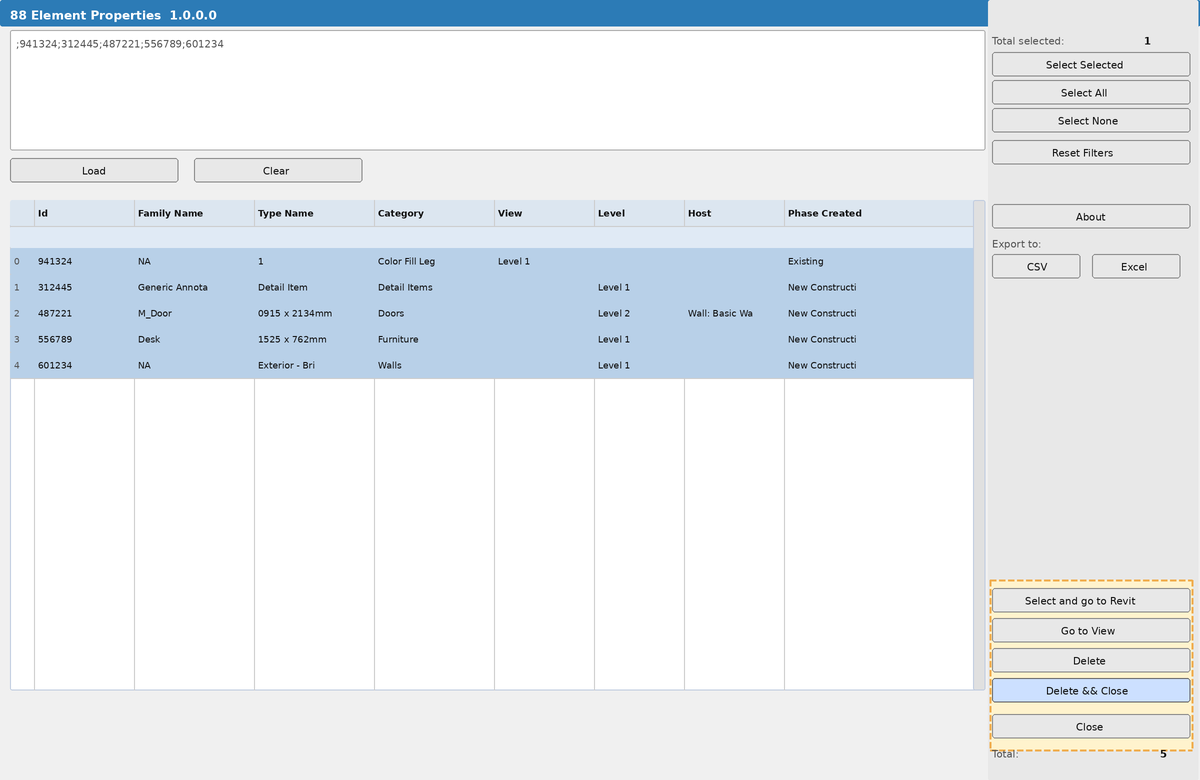
Step 4 — Act on the selection
With rows checked, choose an action from the right panel.
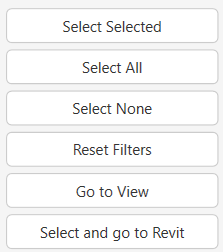
Select and go to Revit — selects the checked elements in Revit and closes the tool. Use this when you want to act on the elements in Revit directly (change workset, move, modify properties).
Go to View — zooms the active view to the checked elements and keeps the tool open. Use this to inspect elements in context without closing.
Delete — shows a confirmation dialog, then deletes checked elements using sub-transactions (one failure doesn't stop the rest). Deleted rows are removed from the grid. The tool stays open for further operations.
Delete & Close — deletes checked elements without a confirmation dialog, then closes the tool. No success/failure count is shown. Best for quick cleanup when you're confident in the selection.
Step 5 — Export (optional)
Click CSV or Excel under Export to: to save the current grid (respecting active filters) to file. Export before any deletion as a record of what was removed.
Tips and Best Practices
- Export before deleting. The CSV export gives you a complete record of what was in the grid before a bulk delete. One click before a destructive operation is good insurance.
- Filter, then Select All. The most efficient way to select a subset is to filter one or more columns to narrow the list, then click Select All. Only visible (non-filtered) rows are selected.
- Select All vs Select Selected. Select All works on all non-filtered rows regardless of grid highlight. Select Selected toggles checkboxes only on the rows you've highlighted with mouse clicks — useful for finer-grained selection.
- Delete vs Delete & Close. Use Delete when you want to review the output window for success/failure counts before closing. Use Delete & Close only when you're certain every checked element can be deleted cleanly.
- Sub-transactions protect partial batches. When using Delete, each element is wrapped in its own sub-transaction. If one element fails (pinned, in a group, on a borrowed workset), the others still delete successfully.
- Scroll right for more columns. Phase Demolished, Location, Is Grouped, and Workset are not visible in the default column width — use the horizontal scrollbar at the bottom of the grid.
- The tool is also opened by other tools. 139 Pinned Elements launches this tool pre-loaded with all pinned elements in the model, bypassing the need to select them manually.
Common Use Cases
Auditing elements from a schedule or warning report — Copy element IDs from a Revit schedule or warning dialog, paste into the ID text box, load, and immediately see all their properties in one place. Filter by Category or Phase to focus on a subset.
Identifying elements on the wrong workset — Load a selection, scroll to the Workset column, and filter to the incorrect workset. Select All filtered rows, then use Select and go to Revit to return them to Revit's selection set and use 153 Workset Mover to reassign them.
Reviewing hosted elements before deleting a host — Before deleting a wall or floor, load it by ID and check the Host column to see what elements reference it. This reveals tags, dimensions, and hosted families that will be affected.
Cleaning up view-specific annotation — Filter the View column to a specific view name to see all annotations owned by that view. Bulk select and delete stale detail items, tags, or legends without having to open the view.
Phase cleanup — Filter Phase Created or Phase Demolished to find elements from abandoned phases. Export the list, review it, then delete the unwanted elements.
Checking grouped elements — Filter Is Grouped to exclude "NA" to see only elements that are inside groups. Use this before a bulk delete to avoid accidentally attempting to delete elements that can't be individually removed.
Pre-deletion record keeping — Any time you're about to do a bulk delete, export to CSV first. The file timestamps naturally and gives you an audit trail of what was removed and when.
Troubleshooting
Grid is empty when the tool opens The selection was empty or was lost when the dialog opened. Close the tool, select elements in Revit, then relaunch — or paste element IDs manually into the text box and click Load.
Element IDs won't load / some rows missing Check that IDs are separated by semicolons with no other delimiters. IDs that reference deleted or non-existent elements are silently skipped. Try loading a small batch of known-good IDs to verify the format.
Some properties show as blank This is expected — not every property applies to every element type. Blank View means the element is a model element (not view-specific). Blank Level means the element has no level association. Blank Host means the element is not hosted.
Family Name shows as NA System families (Walls, Floors, Ceilings, Roofs) are not family instances and don't have a loadable family name. NA is the correct display for these categories.
Cannot delete selected elements Check the Output Dialog for specific errors. Common causes are: element is pinned, element is in a locked group, you don't own the workset (borrow it first), or the element has dependencies that must be removed first.
Delete partially fails The sub-transaction approach means successful deletions are committed even if others fail. Check the Output Dialog for the failure count and reasons. Try the failed elements individually to isolate the cause.
Go to View / Select and go to Revit does nothing No rows may be checked in the Select column. Scroll to the rightmost column and verify checkboxes are ticked, or click Select All and try again.
Export fails or file won't open Choose a save location where you have write permissions (Desktop or Documents). If the file is already open in Excel, close it before exporting. Try the other export format (CSV vs Excel) if one format fails.