084 Scope Box Map
Chris McKeown / July 1, 2025
Lists
Overview
Scope Box Map displays every scope box in the project with a count of how many annotatable views it controls. A Views Attached count of 0 immediately identifies unused scope boxes that are safe to delete. Select scope boxes and add them to the active Revit selection set, or bulk delete them in one operation with per-element sub-transactions. Export the full map to Excel for BIM audits or project documentation.
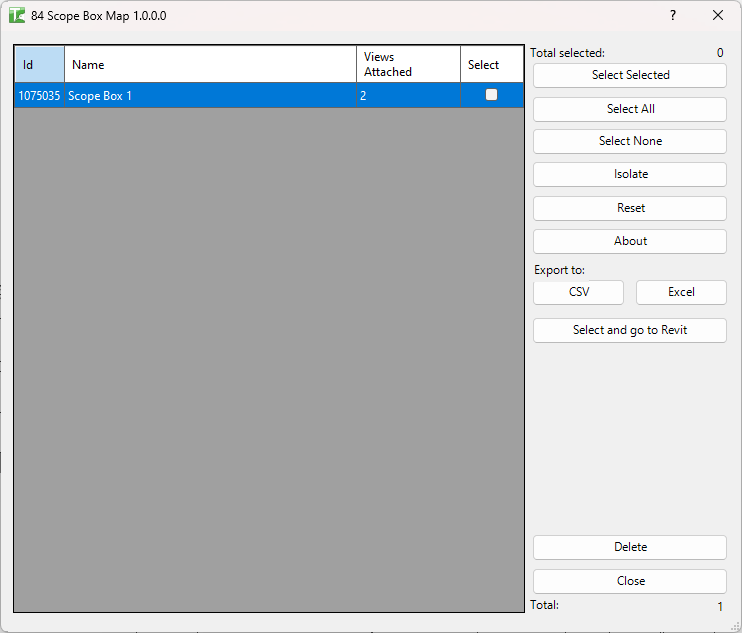
Table of Contents
Key Features
- Lists every scope box in the project with its Element Id, Name, and Views Attached count
- Views Attached is calculated by scanning all annotatable views for their Scope Box parameter
- Non-annotatable view types are excluded (schedules, legends, 3D views, sheets, renderings, drafting views, walkthroughs, and others)
- Select button — adds selected scope boxes to the active Revit selection set for inspection or manipulation in the canvas
- Bulk delete with per-element sub-transactions and confirmation prompt
- Export to Excel
- Select Selected / Select All / Select None buttons
- Total count and Total selected counters
Requirements
- Any Revit project document
- Scope boxes must exist in the project
- A valid Kiwi Codes Bonus Tools licence must be active
Running the Tool
Launch
Find Scope Box Map on the Bonus Tools Ribbon or use 115 Search Tools.

Step 1 — Review scope boxes
The dialog loads all scope boxes in the project. Each row shows:
| Column | Description |
|---|---|
| Id | Revit Element Id of the scope box |
| Name | Scope box name as set in Revit |
| Views Attached | Count of annotatable views that have this scope box assigned |
| Select | Checkbox — tick to mark the scope box for action |
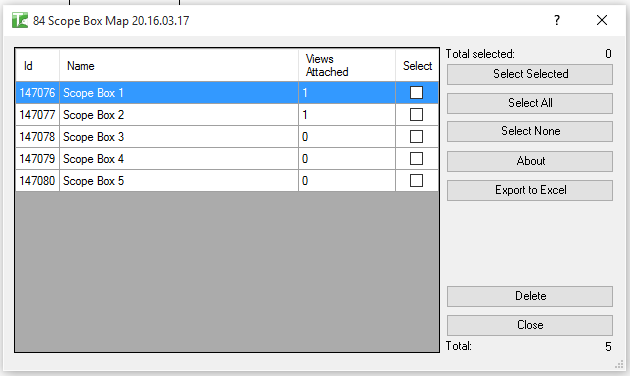
Click any column header to sort. A Views Attached count of 0 means the scope box is not controlling any views — it is a safe candidate for deletion.
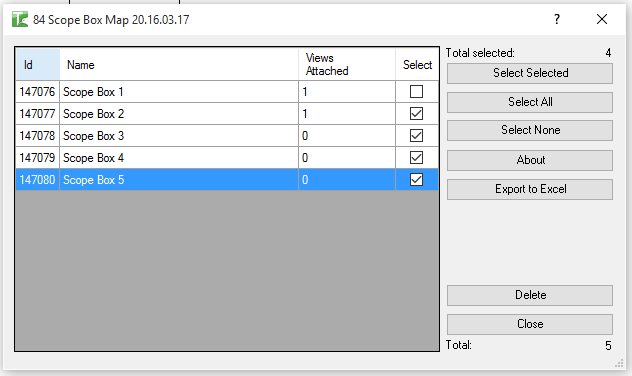
Step 2 — Select scope boxes
Use the selection buttons or tick checkboxes directly in the Select column:
| Button | Action |
|---|---|
| Select Selected | Toggle the checkbox for the currently highlighted row(s) |
| Select All | Check all scope boxes |
| Select None | Uncheck all scope boxes |
The Total selected counter updates as you make selections. To target unused scope boxes, sort by Views Attached ascending so all zeros appear first, then Select All and deselect any that should be kept.
Step 3 — Select in Revit (Optional)
With scope boxes checked, click Select to add them to the active Revit selection set. This lets you inspect their position in the canvas, rename them via the Properties panel, or manipulate them outside of Bonus Tools before deciding to delete.
Step 4 — Delete selected
Click Delete to remove the selected scope boxes. A confirmation prompt asks "Are you sure you want to delete selected items?" — click Yes to proceed.
Each scope box is deleted in its own sub-transaction. Results appear in the output panel:
- Each deleted scope box is listed by name in green
- A summary reports: "X passed. Y failed."
Step 5 — Export (Optional)
Click Export to Excel to save the scope box list with view counts for documentation or BIM audit records.
Tips and Best Practices
- Sort by Views Attached = 0 to find unused scope boxes instantly. Click the Views Attached column header to sort ascending. All unused scope boxes appear at the top — select them all and delete in one pass.
- Scope boxes drive crop regions — deleting them does not delete views. When a scope box is deleted, views that referenced it revert to their default crop state. Confirm this is acceptable before deleting boxes with Views Attached > 0.
- Use Select + Properties for bulk renaming. Click Select to add scope boxes to the Revit selection, then use the Properties panel to rename them in the canvas.
- Re-run after reassigning scope boxes. After adding or removing scope box assignments on views, close and reopen the tool to see updated counts.
- Export before deleting for a record. Save the Excel export before a bulk deletion so you have a reference of what scope boxes existed.
Common Use Cases
Cleaning up unused scope boxes — After design changes, scope boxes that no longer control any views accumulate in the project. Sort by Views Attached = 0 and delete all unused boxes in one pass.
Auditing scope box usage — Export the scope box map to Excel for a full record of every scope box and how many views it controls. Useful for project handover or BIM audits.
Identifying crop region assignments — On a complex project with many scope boxes, the Views Attached count gives an immediate overview of which scope boxes are doing work and which are orphaned.
Renaming scope boxes via Revit selection — Use the Select button to highlight scope boxes in the canvas, then use the Properties panel to rename them to a consistent naming convention.
Troubleshooting
"X passed. Y failed." with failures Some scope boxes could not be deleted. In a workshared model, the element may be owned by another user. Borrow or check out the scope box element before retrying.
"Scope Box deletion failed. Gain ownership of elements and try again." The transaction failed due to a worksharing conflict. Gain ownership of the scope box elements and retry.
"Operation Failed." An unexpected error occurred. Check the Revit journal for details.
Views Attached shows 0 but the scope box appears to be controlling views in Revit The Scope Box parameter may not be formally set on those views — some views may appear within the scope box boundary visually without having the parameter assigned. Check the view's Scope Box property directly in the Properties panel.
No scope boxes appear in the list The project contains no scope boxes. Add scope boxes via the View tab → Scope Box tool in Revit, then re-run.