083 Create Area Lines
Chris McKeown / July 1, 2025
Time Saving
Overview
Create Area Lines converts selected Detail Lines into Area Boundary Lines with a single command. This eliminates the manual process of redrawing area boundaries over existing linework — instead, you draw or import Detail Lines to define the boundaries, select them, and run the tool. On completion, a message reports how many lines were successfully converted and how many failed. The resulting Area Boundary Lines are placed on the current Area Plan's sketch plane and are immediately usable for area calculations.
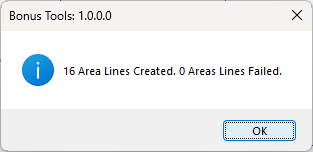
Table of Contents
Key Features
- Converts Detail Lines to Area Boundary Lines in one operation
- Processes all selected Detail Lines in a single transaction — undoable as one action
- Reports a pass/fail count on completion: "X Area Lines Created. Y Area Lines Failed."
- Works with any curve geometry supported by Detail Lines (lines, arcs, polylines)
- Only processes elements in the "Lines" category — other selected elements are skipped
- Transaction named "Create Area Line" — appears cleanly in undo history
- Cannot run in a Family environment
Requirements
- Must be run from an Area Plan view (a
ViewPlanassociated with an area scheme) - Select the Detail Lines to convert before running — the selection must be active when the tool launches
- The view must have an active Area scheme (Rentable, Gross Building, etc.)
- Must be run in a project document (not a Family environment)
Running the Tool
Launch
Find Create Area Lines on the Bonus Tools Ribbon or use 115 Search Tools.

Step 1 — Open an Area Plan View
Navigate to an Area Plan view. The tool only creates Area Boundary Lines in plan views associated with an area scheme — it cannot run in floor plan, ceiling plan, or 3D views.
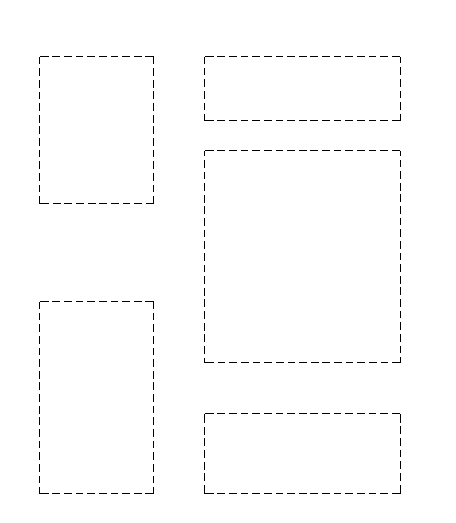
Step 2 — Draw or Import Detail Lines
If you do not already have Detail Lines, draw them using the Detail Line tool (Annotate → Detail Line), or import a DWG file and explode it to produce Detail Lines. Position the lines to match your desired area boundaries.
Lines imported from DWG files will be converted to Detail Lines after exploding — these are valid inputs for this tool.
Step 3 — Select the Detail Lines
Select all the Detail Lines you want to convert. You can use a crossing window, Select All Instances, or hold Ctrl and click individually.
Only elements in the "Lines" category are processed — walls, room separation lines, and other categories in the selection are skipped automatically.
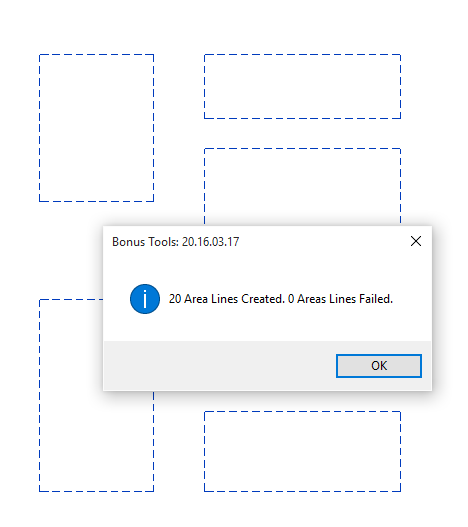
Step 4 — Run the Tool
Click Create Area Lines on the Bonus Tools Ribbon. The conversion runs immediately. When complete, a message box shows the result:
"X Area Lines Created. Y Area Lines Failed."
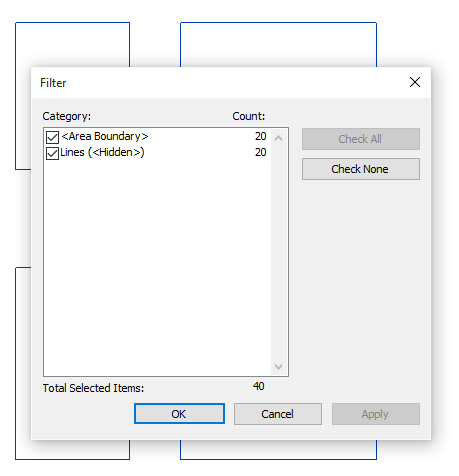
Step 5 — Verify the Result
After dismissing the message, select all lines in the view and use Revit's Filter to verify the converted elements are now categorised as Area Boundary Lines rather than Detail Lines.
Tips and Best Practices
- Work in the Area Plan view from the start. Detail Lines drawn in a floor plan are visible in the Area Plan of the same level — you do not need to redraw them.
- Convert DWG linework directly. Import a DWG floor plan, explode it, and use this tool to quickly turn the linework into area boundaries without any redrawing.
- Check the fail count. Lines that fail conversion are typically invalid geometry (zero-length, duplicate, or coincident with an existing boundary). If the fail count is higher than expected, review the Detail Lines for duplicates or overlapping segments.
- The original Detail Lines remain. The tool creates new Area Boundary Lines — it does not delete the source Detail Lines. Delete them manually after conversion if they are no longer needed to avoid visual clutter.
- Area boundaries must form closed loops for areas to calculate. After running, verify that the boundary lines form enclosed regions — any gap will prevent the area room from being placed or calculated.
- Undo removes all created lines at once. Because the operation runs in a single transaction, Ctrl+Z undoes all conversions in one step.
Common Use Cases
DWG import to area plan — Import a CAD floor plan, explode it to Detail Lines, select all, and run the tool. This replaces hours of manual area boundary drafting with a single operation.
Gross floor area calculation — Draw Detail Lines around the building perimeter in a Gross Building area scheme plan, convert them to Area Boundary Lines, then place area rooms inside each enclosed region.
Rentable area documentation — For commercial lease documentation, draw Detail Lines defining each tenancy unit and use this tool to convert them to boundaries ready for area tagging and schedules.
Area scheme migration — When adding a new area scheme to an existing project, trace the existing floor plan outlines with Detail Lines and convert them to the new scheme's boundary lines in one step.
Troubleshooting
"Please select at least one Detail Line to convert to Area Lines." The tool ran with no elements selected. Select at least one Detail Line before clicking the tool button. Note: this message can also appear if the selection contains no "Lines" category elements (e.g. only walls or other element types are selected).
"X Area Lines Created. Y Area Lines Failed." with a high fail count Lines fail when they are zero-length, duplicate, or create invalid geometry in the area scheme context. Review the source Detail Lines for overlapping segments, very short lines, or self-intersecting curves. Clean up the geometry and re-run.
No areas appear after conversion Area Boundary Lines must form completely closed loops for the Area tool to place areas inside them. Use Room Separation Line display in the view to check for gaps. Even a 1mm gap prevents area enclosure. Use Align or Trim tools to close any gaps.
"Action not available in the Family environment." The tool only runs in a project document.
Tool runs but creates lines in the wrong location The Area Boundary Lines are created on a sketch plane at Z=0 of the area scheme level. If the Detail Lines were drawn at a different elevation (e.g. from an imported DWG at a non-zero Z), the converted lines may be displaced. Ensure all Detail Lines are flat (Z=0) in the Area Plan view before running.