082 Detail Group To View Map
Chris McKeown / July 1, 2025
Sheet & View Manipulation
Overview
Detail Group To View Map lists every placed detail group instance in the project alongside the view it belongs to. The grid shows the group type name, host view (as ViewType : ViewName), whether the instance is pinned, and whether it is nested inside another group. From here you can select and bulk delete unwanted detail group instances, isolate them in the canvas, or export the full map to Excel for documentation.
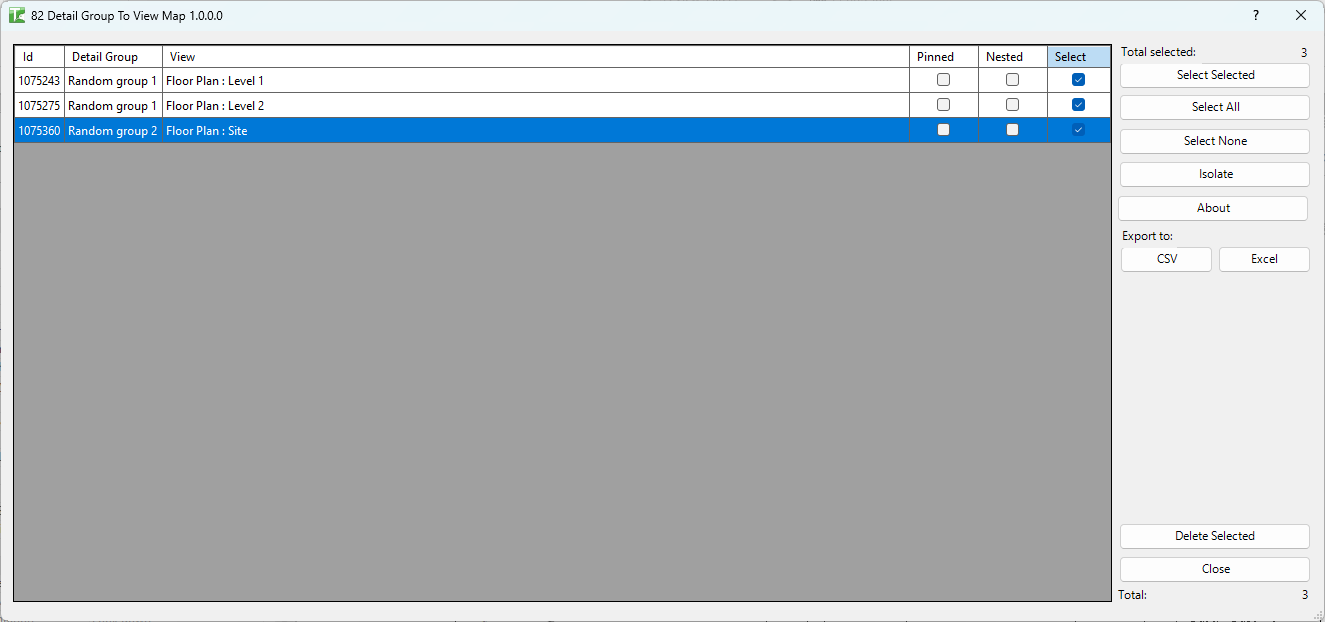
Table of Contents
Key Features
- Lists every placed detail group instance in the project (instances, not just types)
- Columns: Id, Detail Group, View, Pinned, Nested, Select
- Host view shown as
ViewType : ViewName(e.g.Floor Plan : Level 2,Drafting View : SD-01 Wall Detail) - Nested column — flags instances that are embedded inside a parent group
- Pinned column — flags instances that have been pinned in place
- Bulk delete — remove selected instances with per-element sub-transactions so a single failure does not block the rest
- Deletion confirmation prompt: "Are you sure you want to delete selected items?"
- Select Selected / Select All / Select None buttons for fast selection
- Export to Excel for the full instance map
- Total count and Total selected counters
Requirements
- Any Revit project document
- Detail group instances must exist in the project
- A valid Kiwi Codes Bonus Tools licence must be active
Running the Tool
Launch
Find Detail Group To View Map on the Bonus Tools Ribbon or use 115 Search Tools.

Step 1 — Review the detail group map
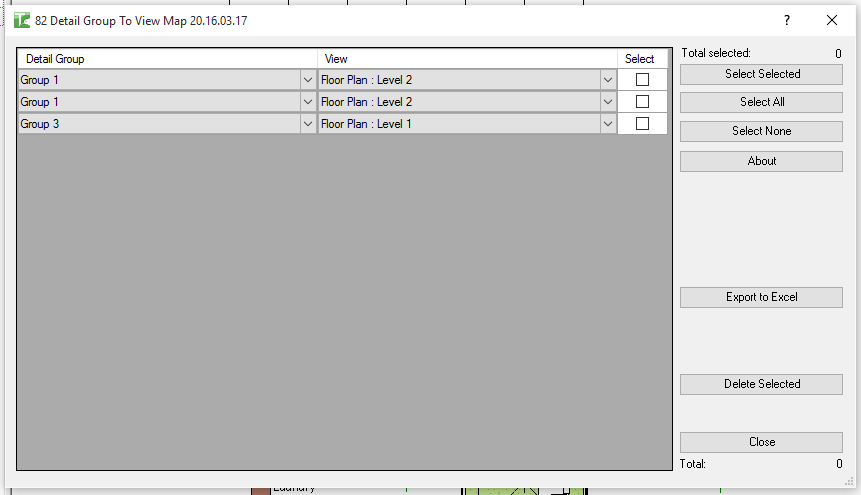
The dialog loads all placed detail group instances in the project. Each row shows:
| Column | Description |
|---|---|
| Id | Revit Element Id of the group instance |
| Detail Group | The group type name |
| View | The host view, formatted as ViewType : ViewName |
| Pinned | Whether the instance is pinned in place |
| Nested | Whether this instance is nested inside another group |
| Select | Checkbox — tick to mark the instance for deletion or other action |
Click any column header to sort. The Total counter at the bottom right shows the total number of instances loaded.
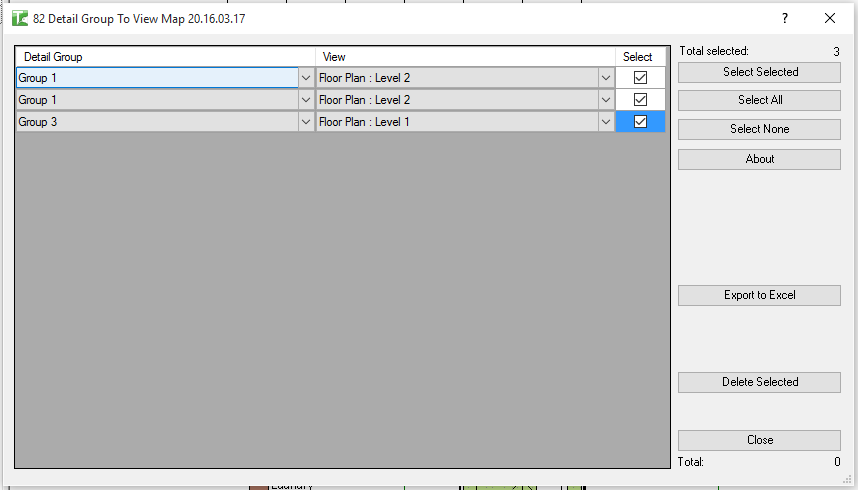
Step 2 — Select instances
Use the selection buttons or tick checkboxes directly in the Select column:
| Button | Action |
|---|---|
| Select Selected | Toggle the checkbox for the currently highlighted row(s) |
| Select All | Check all instances |
| Select None | Uncheck all instances |
The Total selected counter updates dynamically as you make selections.
Step 3 — Delete selected
Click Delete Selected. A confirmation prompt asks "Are you sure you want to delete selected items?" — click Yes to proceed.
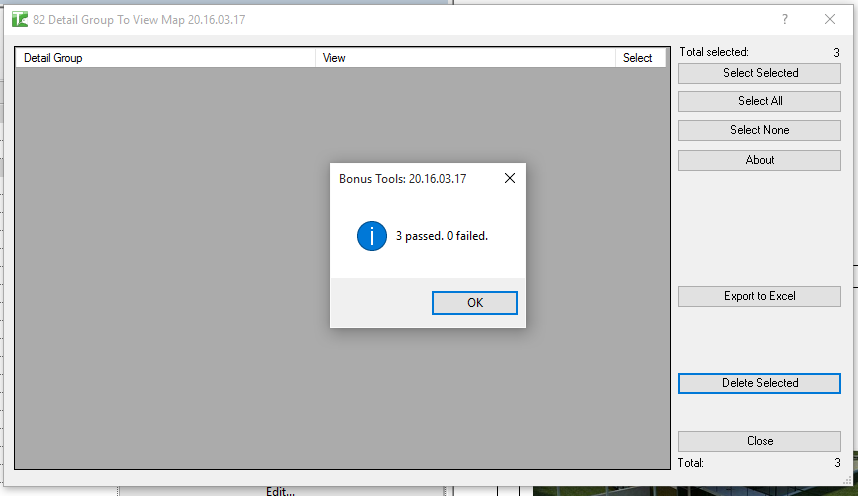
Each instance is removed in its own sub-transaction, so a failure on one does not prevent the others from completing. Results appear in the output panel with a summary: "X passed. Y failed."
Step 4 — Export (Optional)
Click Export to Excel to save the current grid contents. The export includes all rows currently shown in the grid — sort or filter first if needed.
Tips and Best Practices
- Check Nested before deleting. Nested instances are embedded inside a parent group and cannot be deleted independently — the parent group must be ungrouped first. The Nested column flags these rows so you can identify them quickly.
- Check Pinned before deleting. Pinned instances may have been intentionally locked in place. Confirm with your team before removing them.
- Sort by Detail Group to find all instances of a specific type. This makes it easy to see how many times a particular group type is placed and in which views.
- Sort by View to find all groups in a specific view. Useful for cleaning up a particular view or sheet before issue.
- Export before bulk deleting for a record. Save the Excel export before running deletion so you have a reference if questions arise later.
- Re-run after ungrouping. After ungrouping nested instances, re-run the tool to see the updated instance list before deleting.
Common Use Cases
Auditing detail group usage across the project — Before cleaning up a project, export the full map to Excel to understand how many instances of each group type are placed and in which views.
Removing orphaned detail group instances — After views are deleted or rearranged, detail group instances can be left behind. Use the map to identify and remove these in bulk.
Finding all occurrences of a specific group type — Sort by Detail Group name and review the View column to quickly see every view a particular group type is placed in.
Pre-issue clean-up — Before issuing drawings, confirm that no unwanted detail group instances remain in the drawing set by checking the map and removing any not needed.
Troubleshooting
"X passed. Y failed." with failures Some instances could not be deleted. Common causes:
- The instance is nested inside a parent group — ungroup the parent group first
- In a workshared model, the element is owned by another user. Borrow or check out the element before retrying.
"Detail Group removal failed. Gain ownership of elements and try again." The overall transaction failed due to a worksharing conflict. Borrow or check out the relevant detail group elements and retry.
"Operation Failed." An unexpected error occurred. Check the Revit journal for details.
No instances appear in the list No placed detail group instances exist in the project. Verify that detail groups have been placed in views (not just defined as group types in the Project Browser).
An instance cannot be deleted If the instance is marked Nested = True, it belongs to a parent group. Select the parent group in Revit, ungroup it, then retry the deletion.