080 Revision List
Chris McKeown / July 1, 2025
Lists
Overview
Revision List displays every revision in the Revit project in a single, sortable grid. Each row shows the revision sequence, number, date, description, issued status, and issued-by / issued-to values. Select any combination of revisions and delete them in one operation, or export the full list to Excel for documentation and project records.
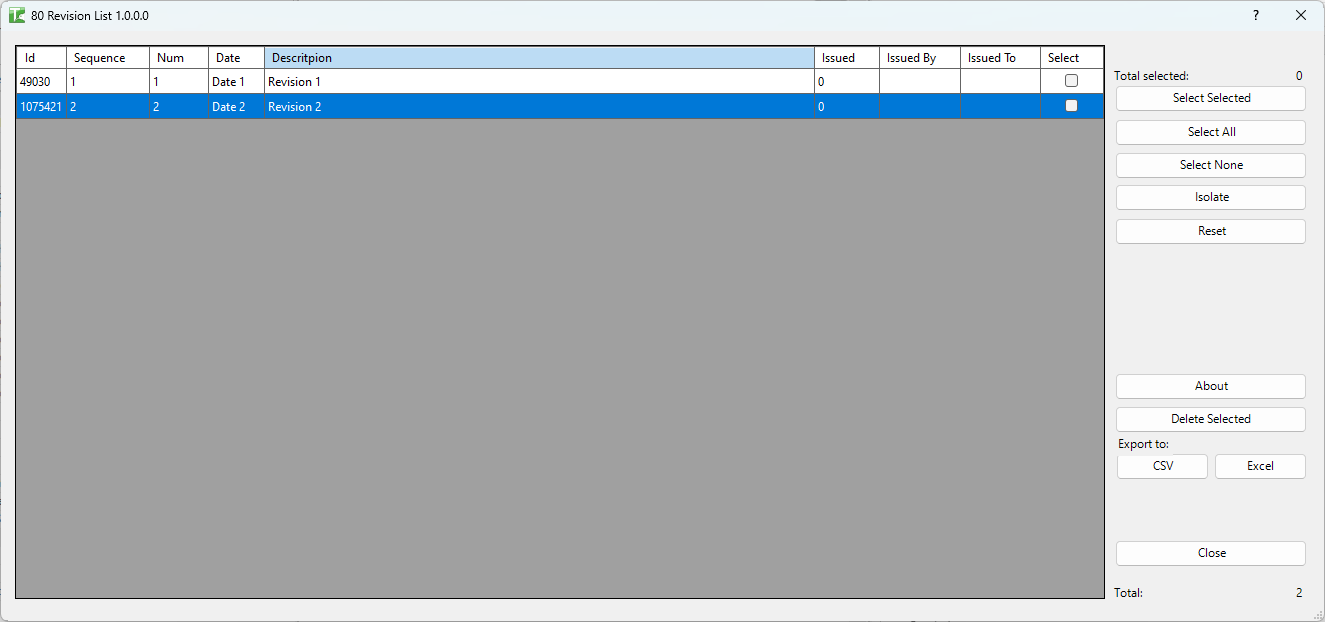
Table of Contents
Key Features
- Displays all project revisions in a sortable grid sorted by Revision Sequence on load
- Columns: Id, Sequence, Number, Date, Description, Issued, Issued By, Issued To, Select
- Bulk delete — select multiple revisions and remove them in one operation with per-element sub-transactions (one failure does not block the rest)
- Deletion confirmation prompt: "Are you sure you want to delete selected items?"
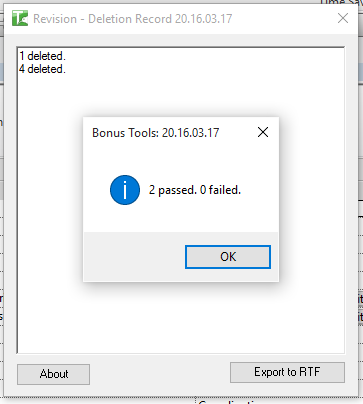
- Output log lists each deleted revision by sequence number
- Completion message: "X passed. Y failed."
- Select Selected / Select All / Select None buttons for fast selection
- Export to Excel — exports the full revision list for external tracking or documentation
- Total count display and Total selected counter
Requirements
- Any Revit project document
- Revisions must exist in the project (Manage tab → Sheet Issues / Revisions)
- A valid Kiwi Codes Bonus Tools licence must be active
- For deletion in workshared models: the revision elements must not be owned by another user
Running the Tool
Launch
Find Revision List on the Bonus Tools Ribbon or use 115 Search Tools.

Step 1 — Review revisions
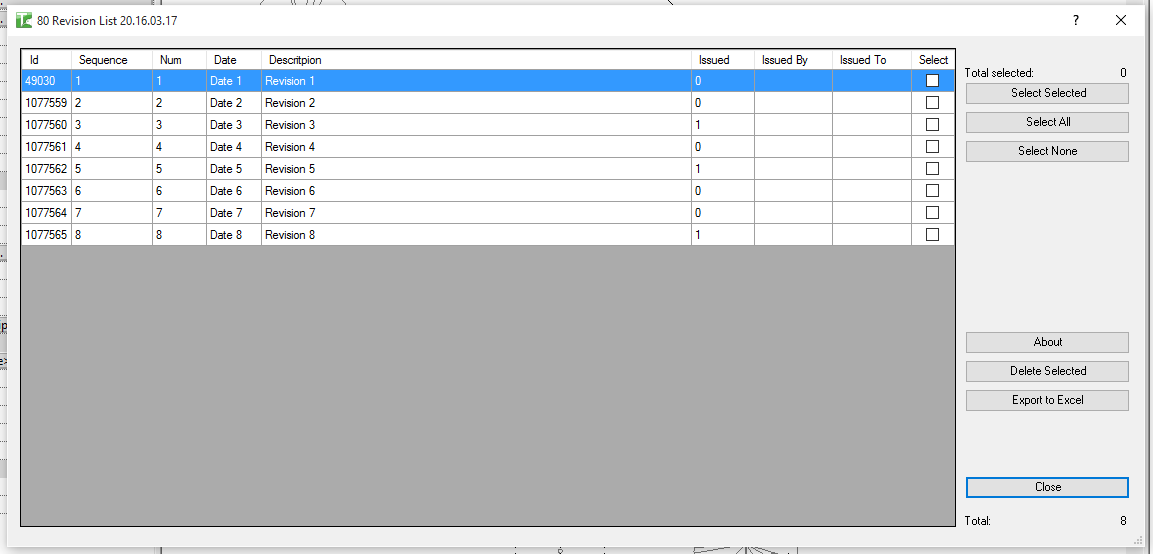
The dialog opens and loads all revisions in the project, sorted by sequence number. Each row in the grid shows:
| Column | Description |
|---|---|
| Id | Revit Element Id of the revision |
| Sequence | Revision sequence number |
| Num | Revision number (alphanumeric label) |
| Date | Revision date |
| Description | Revision description text |
| Issued | Whether the revision has been marked as issued (1 = issued, 0 = not) |
| Issued By | The team member or organisation that issued the revision |
| Issued To | The recipient of the revision |
| Select | Checkbox — tick to mark the revision for deletion |
Click any column header to sort. The Total counter at the bottom right shows the total number of revisions in the project.
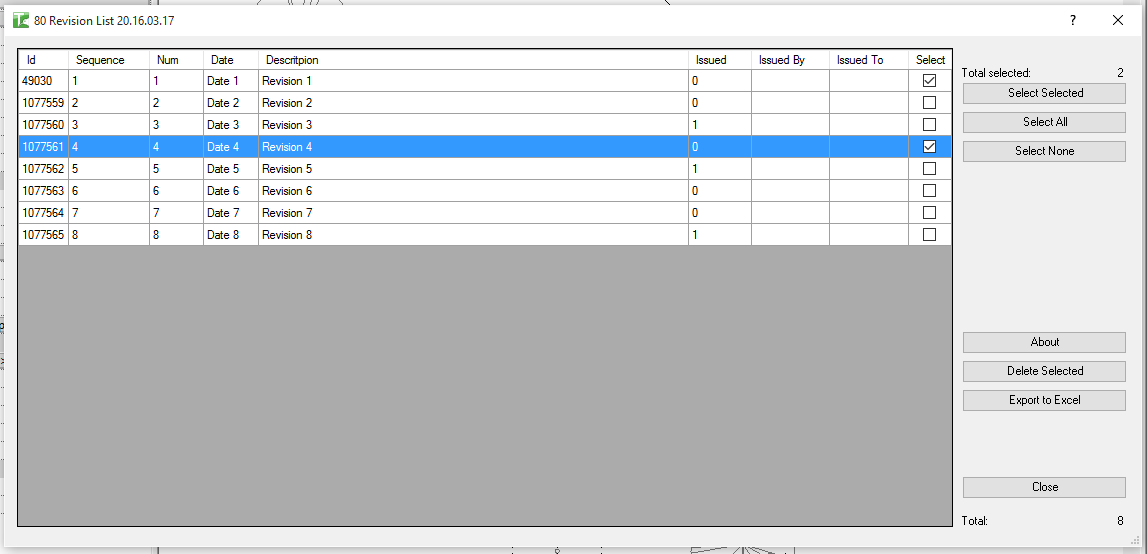
Step 2 — Select revisions to delete
Use the selection buttons in the right panel or tick checkboxes directly in the Select column:
| Button | Action |
|---|---|
| Select Selected | Toggle the checkbox for the currently highlighted row(s) |
| Select All | Check all revisions |
| Select None | Uncheck all revisions |
The Total selected counter in the top-right updates as you make selections.
Step 3 — Delete selected
Click Delete Selected. A confirmation prompt asks "Are you sure you want to delete selected items?" — click Yes to proceed.
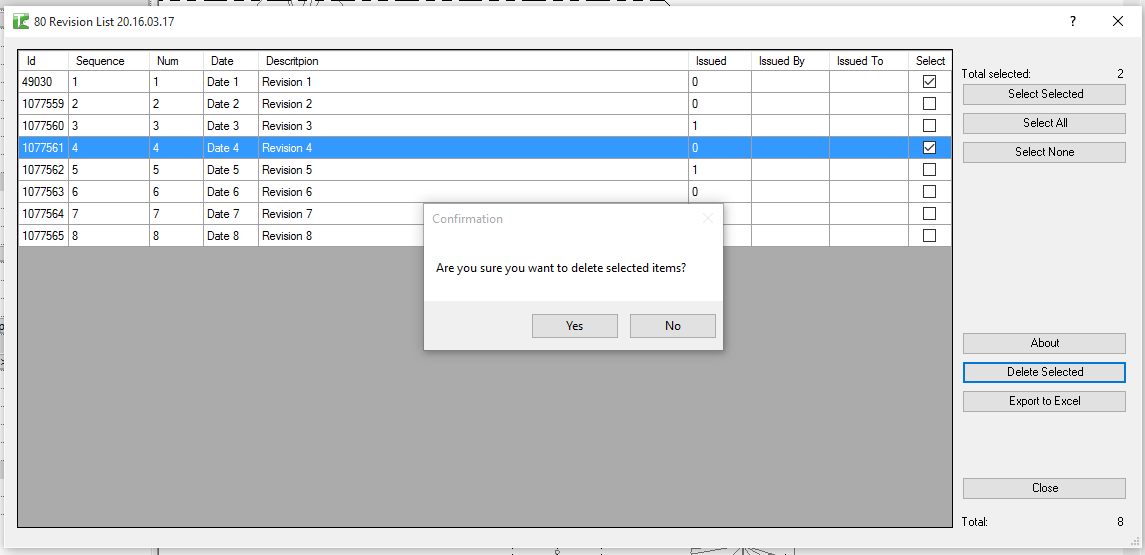
Each revision is deleted in its own sub-transaction, so a failure on one does not prevent the others from completing. An output log appears showing:
- Each successfully deleted revision listed by sequence number
- A summary popup: "X passed. Y failed."
Click OK on the summary to dismiss it.
Step 4 — Export (Optional)
Click Export to Excel to save the current grid contents for external documentation. The export includes all revision rows currently shown in the grid.
Tips and Best Practices
- Check issued revisions before deleting. Revisions marked Issued = 1 may be referenced on sheets and in transmittals. Confirm with your project team before removing them.
- Sort by Sequence to review in order. The grid loads sorted by sequence — this makes it easy to identify gaps or duplicate revision entries.
- Export before deleting as a record. Export the full revision list to Excel before running a bulk deletion so you have a record of what was removed.
- Workshared models: check out revision elements first. If deletions fail in a workshared model, gain ownership of the revision elements via Revit's worksharing tools before retrying.
- Use Select All then deselect to keep specific revisions. If you want to delete most revisions but keep a few, click Select All then manually uncheck the ones to keep.
Common Use Cases
Cleaning up test or placeholder revisions — Projects accumulate revision entries added during setup or testing. Use Revision List to select and remove all unwanted entries in one pass.
Removing superseded revisions before issue — Before issuing a drawing set, review the revision list and remove any revisions that were never attached to sheets or are otherwise redundant.
Auditing the revision history — Export the revision list to Excel for inclusion in a project record, handover document, or BIM Execution Plan deliverable.
Identifying duplicate revision numbers — Sort by Num or Description to spot duplicate entries that need to be consolidated before issuing.
Troubleshooting
"X passed. Y failed." with failures Some revisions could not be deleted. Common causes:
- The revision is referenced by revision clouds on sheets — remove all associated revision clouds first
- In a workshared model, the revision element is owned by another user. Borrow or check out the element before retrying.
"Revision Deletion failed. Gain ownership of elements and try again." The overall deletion transaction failed due to a worksharing conflict. Borrow or check out the revision elements and retry.
"Operation Failed." An unexpected error occurred during deletion. Check the Revit journal for details.
No revisions appear in the list The project contains no revisions. Create revisions first via Manage tab → Sheet Issues / Revisions.
A revision cannot be deleted Revisions that are still referenced by revision clouds on sheets cannot be deleted until all associated clouds are removed. Navigate to each sheet and delete the revision clouds, then retry.