075 Family Type Renamer
Chris McKeown / July 1, 2025
Power
Overview
The Family Type Renamer standardises Family and Type names across a Revit project by using Excel as the editing interface. Select one or more categories, export all elements to a spreadsheet, edit the new names in the New Family Name and New Type Name columns, and import the file back. Revit applies the renames in bulk, making it practical to bring an entire project's naming into compliance with standards in one pass.
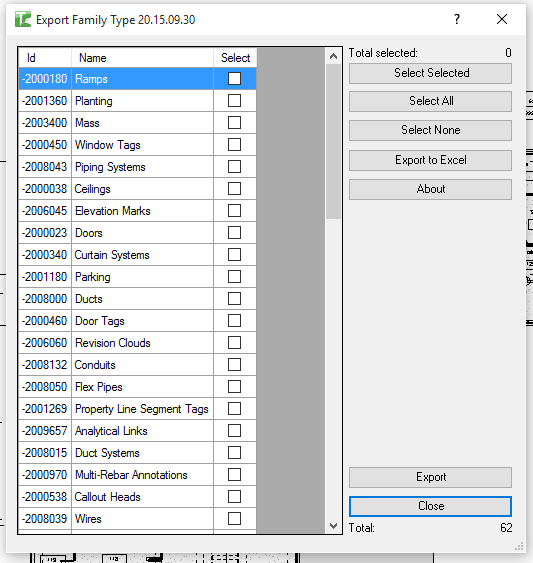
Table of Contents
Key Features
- Two-stage workflow: Export to Excel, then Import back
- Categories with elements are listed in a grid — select one or many for export
- Exported Excel file has one sheet per selected category
- Each sheet contains columns: ID, Existing Family Name, Existing Type Name, New Family Name, New Type Name
- New Family Name and New Type Name columns are pre-filled with the existing values — only cells that need changing require editing
- Import reads the Excel file and applies each rename using the element ID as the key
- Select All / Select None / Toggle Selected buttons on both Export and Import dialogs
- Progress bar with cancel support for large exports and imports
- Export filters to only include categories that have elements in the model
Requirements
- Microsoft Excel or a compatible application is needed to edit the exported file
- The user must have ownership of elements being renamed (in workshared models)
- Family names can only be changed for loadable families (system families cannot be renamed)
- Type names can be changed for both loadable and system family types where Revit permits
Running the Tool
Launch
Find Family Type Renamer on the Bonus Tools ribbon or use 115 Search Tools. A selector dialog opens with two radio buttons: Export and Import.
Step 1 — Export
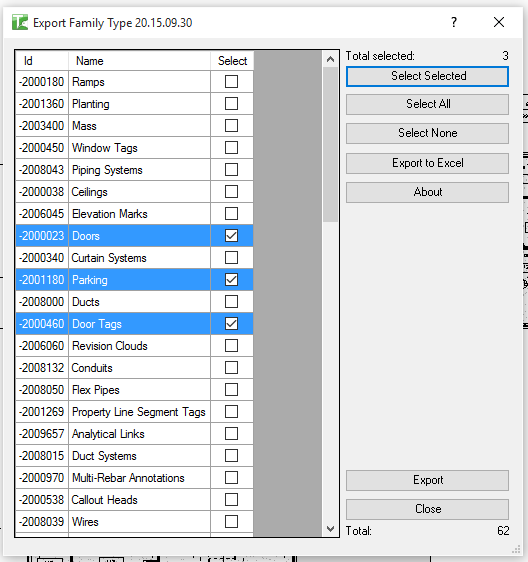
Select Export and click OK. The Export dialog opens showing all categories that have elements in the model.
Select the categories you want to rename. Use Select All, Select None, or individual checkboxes. Click Export and choose a save location. The tool generates an Excel file with one worksheet per selected category.
Excel file structure per category sheet:
| Column | Description |
|---|---|
| Row 1 | Category name (header) |
| Row 2 | Column headers (bold) |
| ID | Element ID (do not edit) |
| Existing Family Name | Current family name (read reference) |
| Existing Type Name | Current type name (read reference) |
| New Family Name | Edit this to rename the family |
| New Type Name | Edit this to rename the type |
Leave New Family Name and New Type Name unchanged for any element you do not want to rename. Only populated changes are applied on import.
Step 2 — Edit the Excel File
Open the exported file and edit the New Family Name and New Type Name cells as required. Save the file when done.
Do not change the ID column. The tool uses element IDs to match rows to Revit elements during import.
Step 3 — Import
Return to Revit and launch Family Type Renamer again. Select Import and click OK. The Import dialog opens. Browse to the saved Excel file. The dialog lists all category sheets in the file. Select which categories to import, then click Import.
The tool reads each row, looks up the element by ID, and applies the new Family Name and Type Name where they differ from the existing values.
A confirmation dialog shows the total number of elements renamed.
Tips and Best Practices
- Export only the categories you need to rename. Limiting the export scope reduces file size and makes the spreadsheet easier to navigate.
- Use Excel's Find and Replace. For systematic changes (e.g. replacing an old prefix with a new one), use Excel's Find and Replace across the New columns before saving — faster than editing cell by cell.
- Preserve the ID column. The element ID is the link between the spreadsheet and Revit. Do not sort, filter, or delete rows in a way that corrupts the ID values.
- Check naming conflicts before importing. If two elements of the same category will end up with identical Family + Type combinations after renaming, Revit may reject the change. Ensure target names are unique within each category.
- Test on a small category first. Export one small category, make a few edits, and import to verify the workflow before processing large categories.
- Save the Excel file as .xlsx. The tool uses EPPlus for Excel processing and requires the .xlsx format.
Common Use Cases
BIM standards compliance — At the start of a project or before model handover, export all loaded categories, apply the studio naming convention to each Family and Type, and import to bring the entire model into compliance.
Merging models with different naming — When combining models from two firms, export the categories in conflict, harmonise names in Excel, and import to resolve the inconsistencies.
Renaming after a family upgrade — When a family is replaced with a newer version under a different name, export the affected category, update the New Family Name column to the new name, and import to update all instances.
Audit and documentation — Export all categories and keep the file (without importing) as a record of Family and Type names at a project milestone.
Troubleshooting
Export produces an empty file or "No elements found to export" No elements of the selected categories exist in the model. Check that the categories selected contain placed instances or family types, not just category definitions.
Import fails for some elements Elements may be in a read-only state or owned by another user in a workshared model. Synchronise with central, ensure ownership of the relevant elements, and retry the import.
Family Name does not change after import Family renaming only works for loadable families. System families (e.g. Walls, Floors, Ceilings) cannot have their family name changed through the API. Only Type names can be changed for system families.
Duplicate name error on import The new Family/Type name combination already exists for another element in the same category. Adjust the New Type Name to make it unique and re-import.
Excel file opens as read-only Close any open instances of the file in Excel before importing. The tool needs to read the file and will fail if it is locked.