070 Folder Creator
Chris McKeown / July 1, 2025
Power
Overview
The Folder Creator generates placeholder Drafting Views and Sheets inside the Revit Project Browser, producing a visible folder structure that guides the team on where to file new views. The tool reads the active Browser Organisation and presents each grouping level as an editable text field, so folder names match the parameter-driven hierarchy already in use on the project.
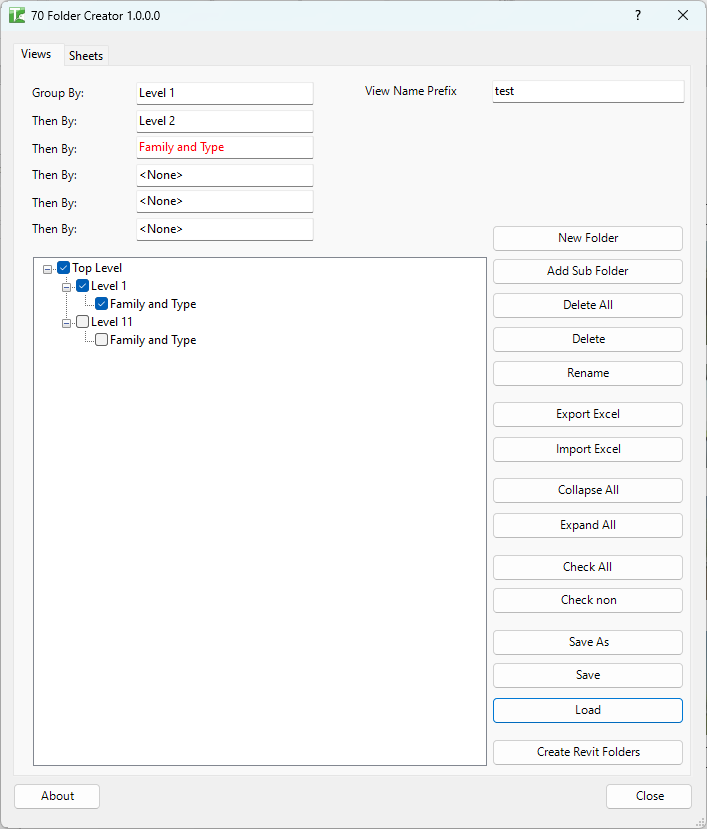
Table of Contents
Key Features
- Reads the current Browser Organisation and displays up to six grouping levels (Group By + Then By 1–5) for both Views and Sheets
- Red-highlighted parameter fields indicate read-only, Revit-determined values that cannot be set by the tool
- Tree view editor for adding, renaming, and deleting folder nodes before committing to Revit
- Supports nested folder hierarchies up to six levels deep
- View prefix field prefixes all created Drafting View names to keep placeholders distinguishable
- Sheet prefix field prefixes created Sheet numbers
- Title block dropdown selects which title block to use when creating placeholder Sheets
- Check All / Check None buttons for fast bulk selection in the tree
- Export and import folder structures as XML for reuse across multiple projects
- Progress bar with cancel option for large folder sets
Requirements
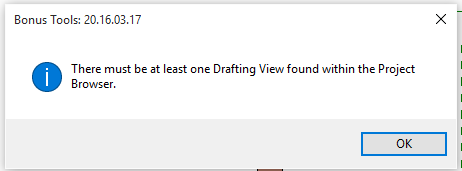
- At least one Drafting View must exist in the project before launching (the tool reads Browser Organisation from it)
- At least one Sheet must exist in the project for the Sheets tab to function
- Browser Organisation must use writable text parameters for the levels you want to control — built-in read-only parameters (shown in red) cannot be set by this tool
- Cannot be run from a Family document
Running the Tool
Launch
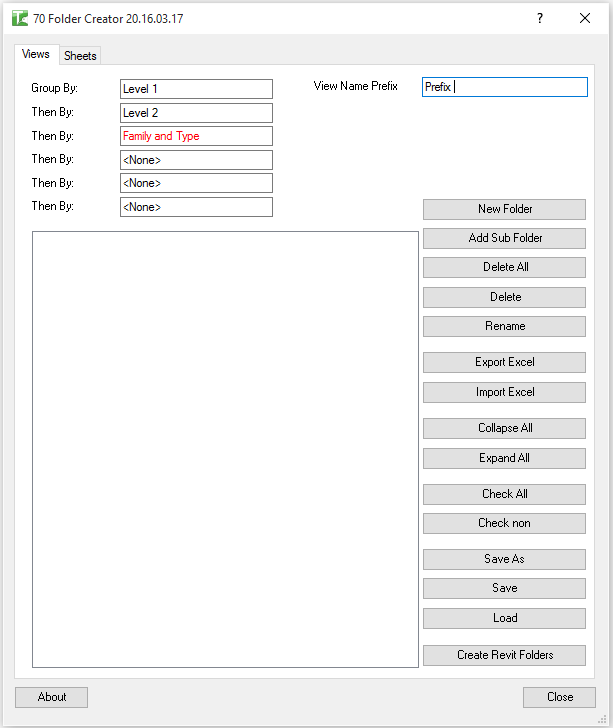
Find Folder Creator on the Bonus Tools ribbon or use 115 Search Tools. The dialog opens with two tabs — Views and Sheets — each showing the Browser Organisation hierarchy detected for that context.
Step 1 — Review the Detected Browser Organisation
When the dialog loads, the Group By and Then By fields are auto-populated with the parameter names from the current Browser Organisation. Fields shown in red are Revit-determined (read-only); fields shown in black can be set by the tool.
If all fields are red, the Browser Organisation is using only built-in parameters. Switch to a custom parameter-based organisation to use this tool effectively.
Step 2 — Set a View or Sheet Prefix
Enter a short prefix in the Name Prefix field. All placeholder Drafting Views created for this folder structure will be named with this prefix so they are easy to identify and filter in the Project Browser.
Step 3 — Build the Folder Tree
Use the tree panel to define the folder structure:
- Click New Folder to add a top-level folder node at the Group By level.
- Select an existing node and click New Sub-Folder to add a child at the next level.
- Select a node and click Rename to change its name.
- Select a node and click Delete to remove it and all its children.
- Use Expand All / Collapse All to navigate large trees.
- Use Check All / Check None to mark all nodes for creation, or tick individual checkboxes.
Step 4 — Import or Export a Template (Optional)
Click Import to load a previously saved XML folder template. Click Export / Save XML to save the current tree to an XML file for reuse. The tool remembers the last used path and pre-fills it on subsequent launches.
Step 5 — Create the Folders
With the desired nodes checked, click Create Revit Folders. The tool creates one Drafting View (or Sheet) per checked node, setting the appropriate Browser Organisation parameter values so views appear in the correct folders. A progress bar shows completion; click Cancel at any time to stop early.
A confirmation message reports how many folders were created.
Step 6 — Sheets Tab (Optional)
Switch to the Sheets tab to repeat the same process for Sheets. Select a Title Block from the dropdown before creating. The same import/export mechanism is available on this tab.
Tips and Best Practices
- Set up Browser Organisation first. The tool can only control parameter levels that use writable text parameters. Create and apply a custom Browser Organisation with user-defined parameters before running Folder Creator.
- Use a consistent prefix. A prefix like
_FOLDER_orzz_pushes placeholder views to the bottom of each folder and makes them easy to identify and delete later when no longer needed. - Save templates per project type. Export your folder XML after setting up a standard structure. Reuse it on the next project to ensure consistent Project Browser layouts across the team.
- Red fields are informational. They show which levels are controlled by Revit (e.g. View Type, Level). You cannot set these — plan your organisation around the writable levels.
- Sheets require a title block. Select
<None>only if your workflow accepts placeholder sheets without title blocks. In most cases, select the standard project title block. - Check before creating. Review the tree carefully — placeholder views and sheets must be manually deleted if you create too many.
- XML templates are portable. Store your template XML in a shared location so the whole team can use the same folder structure on every project.
Common Use Cases
Standardising a new project — On project setup, load the studio's XML template, adjust folder names for the project, and click Create. The team opens Revit to a fully scaffolded Project Browser ready for view filing.
Enforcing drawing series structure — Use the Group By level for drawing series codes (e.g. A, S, M) and Then By for discipline sub-folders. Placeholder views ensure no series folder disappears when all views within it are deleted.
Multi-discipline coordination — Each discipline lead imports the same XML template, so all models share an identical Project Browser structure, simplifying cross-referencing and sheet handover.
Template file preparation — Run the tool in a project template file to pre-populate the browser structure so every new project starts with the correct folders already in place.
Troubleshooting
Tool opens but all parameter fields are red Every grouping level in the Browser Organisation is using a Revit-determined (read-only) parameter. The tool cannot write to these. Create a Browser Organisation that includes at least one custom text parameter in the hierarchy.
"There must be at least one Drafting View found" message The project has no Drafting Views. Create a Drafting View manually, then launch the tool again.
"At least one Sheet must exist" message on the Sheets tab No sheets exist in the project. Create at least one Sheet, then switch to the Sheets tab.
"No Folders added" when clicking Create The folder tree is empty. Use the New Folder button to add nodes before clicking Create.
"All parameters are Revit determined values" message All detected Browser Organisation levels are read-only. The tool cannot create folders when there are no writable parameter levels.
"Please enter a folder prefix" message The Name Prefix field is empty. Enter at least one character in the prefix box before creating folders.
Folders not appearing in the Project Browser after creation Refresh the Project Browser (close and reopen, or use View → Project Browser). Also verify that the Browser Organisation applied to the project matches the one that was active when the tool was launched.