067 Extensible Storage List
Chris McKeown / July 1, 2025
Lists
Overview
Extensible Storage List surfaces all the Extensible Storage schemas that third-party add-ins and Bonus Tools have written into a Revit project. Schemas are normally invisible in the Revit UI but can bloat file size and cause issues when add-ins are uninstalled or updated. This tool presents every schema in a sortable grid — showing Schema Name, Vendor ID, Application GUID, GUID, Read Access Level, and Write Access Level — and lets you double-click any row to inspect the individual fields stored in that schema. Selected schemas can be deleted along with all their associated entity data.
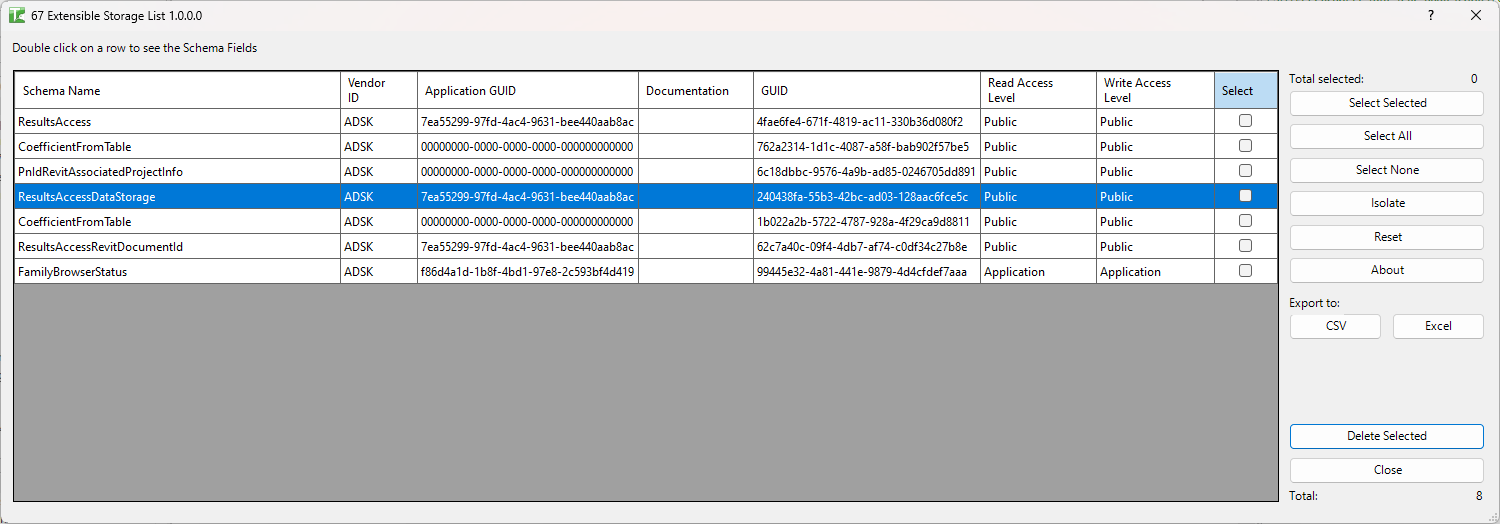
Table of Contents
Key Features
- Lists all Extensible Storage schemas registered in the active project
- Sortable grid columns: Schema Name, Vendor ID, Application GUID, GUID, Read Access Level, Write Access Level
- Double-click any row to open a schema field detail view showing Field Name, Key Type, Container Name, Value Type, Unit Type, and Sub Schema
- Select schemas individually or in bulk with Select All / Select None
- Delete selected schemas and all their entity data with a single confirmed operation
- Deletion requires confirmation dialog before proceeding
- Feedback message reports passed and failed deletions
- Export to Excel (.xlsx) or CSV for schema audit reports
- Isolate button filters the grid to selected rows only; Reset restores all rows
Requirements
- Must be run in a project document — not available in the Family Editor
- To delete schemas successfully, all other files that reference the same schema must be closed or have their links unloaded — deletion will fail if linked files hold references to the schema
Running the Tool
Launch
Find Extensible Storage List on the Bonus Tools ribbon or use 115 Search Tools.
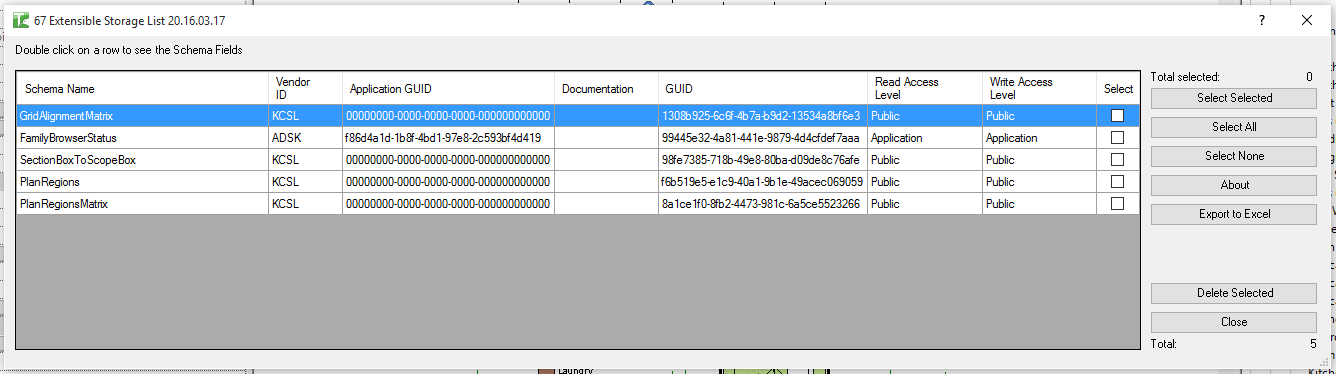
The dialog opens and immediately loads all schemas from the active project.
Step 1 — Review the Schema Grid
The grid shows one row per schema with the following columns:
| Column | Description |
|---|---|
| Schema Name | The registered name of the schema |
| Vendor ID | The vendor identifier set by the add-in author |
| Application GUID | The GUID of the application that created the schema |
| GUID | The unique schema GUID used to look up the schema |
| Read Access Level | Access level required to read entity data (Public, Vendor, Application) |
| Write Access Level | Access level required to write entity data |
Click any column header to sort. The count of loaded schemas appears at the bottom right.
Step 2 — Inspect Schema Fields (Optional)
Double-click any row to open the Extensible Storage Fields dialog for that schema. This shows every field defined in the schema:
| Column | Description |
|---|---|
| Field Name | The name of the field |
| Key Type | Data type for map-field keys (if applicable) |
| Container Name | Container type (SimpleField, ArrayField, MapField) |
| Value Type | Data type of the stored value |
| Unit Type | Unit type for dimensional values |
| Sub Schema | Nested schema reference (if applicable) |
This is useful for identifying which add-in owns a schema and what data it is storing.
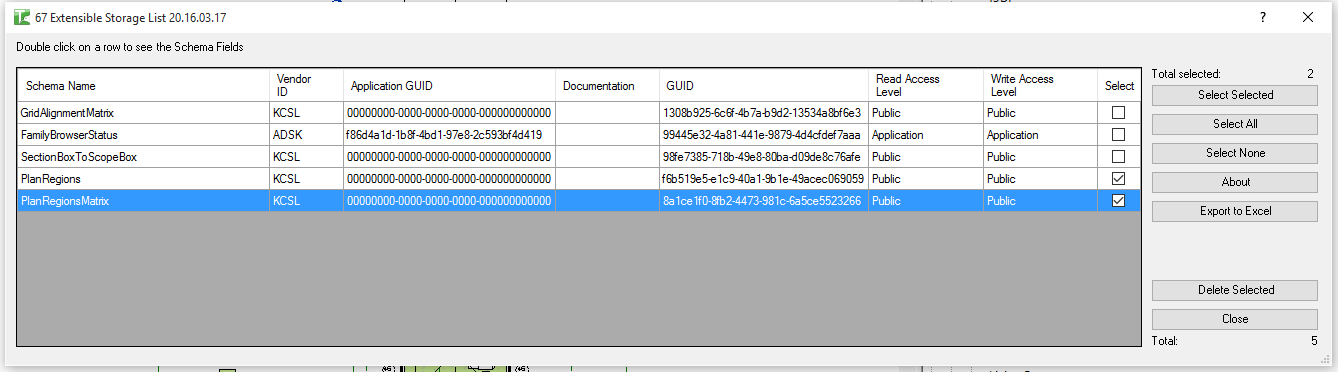
Step 3 — Select Schemas for Deletion
Choose which schemas to delete:
- Checkbox: click the checkbox in a row to select it individually.
- Drag + Ctrl: highlight multiple rows, then click Select Selected to toggle their checkboxes.
- Select All: selects all rows.
- Select None: clears all selections.
- Isolate: hides unselected rows (click Reset to restore all rows).
The Selected counter updates dynamically.
Step 4 — Delete Selected Schemas
Click Delete Selected. A confirmation dialog appears — click Yes to proceed. A progress bar tracks each deletion.
When complete, a message reports how many schemas were deleted and how many failed. Successfully deleted schemas are removed from the grid.
Tips and Best Practices
- Export before deleting. Use Export to Excel to capture the full schema list as a record before making any deletions. This provides an audit trail and allows you to check which schemas were present if issues arise later.
- Close linked files before deleting. If the deletion fails for all selected schemas, it is most likely because a linked Revit file has a reference to the schema. Unload or detach all links and try again.
- Do not delete schemas you do not recognise without checking. Some schemas store important data used by add-ins currently in use on the project. If a schema's Vendor ID or Schema Name is unfamiliar, check with the project team before deleting.
- Useful for file size reduction after uninstalling add-ins. When a Bonus Tools or third-party add-in is removed from a project workflow, the schemas it created remain in the file. Deleting orphaned schemas can reduce file size and clean up the project data.
- Double-click to identify ownership. The Application GUID in the fields view is the most reliable way to identify which add-in created a schema, especially if the Schema Name is not self-explanatory.
Common Use Cases
Auditing add-in data in a project — Run the tool on a project file to see exactly which add-ins have written data into it. Export the list for BIM management records.
Cleaning up after removing an add-in — After a team stops using a particular add-in, run the tool to find and remove its schemas, reducing file size and eliminating unnecessary data.
Diagnosing schema-related warnings — If Revit is displaying warnings related to unknown schemas or add-in data, run the tool to find and delete the problematic schema.
Checking schema access levels — Review the Read and Write Access Level columns to understand which schemas are publicly accessible versus restricted to a specific application or vendor.
File archiving preparation — Before archiving a completed project, use the tool to clean out any development or temporary schemas that are no longer needed.
Troubleshooting
"Failed. Please check all other files are closed and linked as closed or unloaded." All selected deletions failed. This is almost always because a linked Revit file holds a reference to the schema being deleted. Unload or detach all linked files and retry.
"Extensible Storage deletion failed. Gain ownership of elements and try again." In a workshared project, the elements holding schema entity data are owned by another user. Borrow or check out those elements (or request the owner release them) and retry.
"Failed to load." (when double-clicking a row) The schema could not be found in the current schema list — this can happen if the schema was deleted by another operation between loading the grid and double-clicking. Click Reset to reload the grid.
Grid is empty after loading The active project has no Extensible Storage schemas. This is normal for a project where no add-ins that use extensible storage have been run.
Tool not available The tool cannot run in the Family Editor. Open or switch to a project document and try again.