062 Copy Monitored Elements
Chris McKeown / July 1, 2025
Lists
Overview
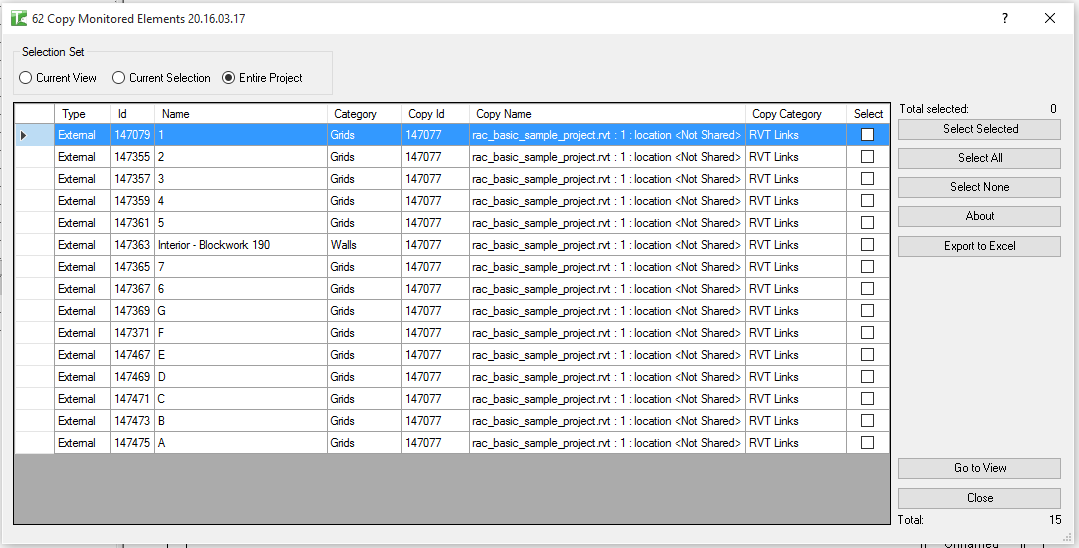
Copy Monitored Elements collects every element in the project that is part of a copy/monitor relationship and presents them in a sortable grid. Each row shows the element alongside its monitored counterpart — whether the source is an element in the same model (Internal) or an element from a linked Revit file (External). The tool gives you a single, comprehensive view of all monitoring relationships so you can audit them, navigate to problem elements, and export the list for coordination reports.
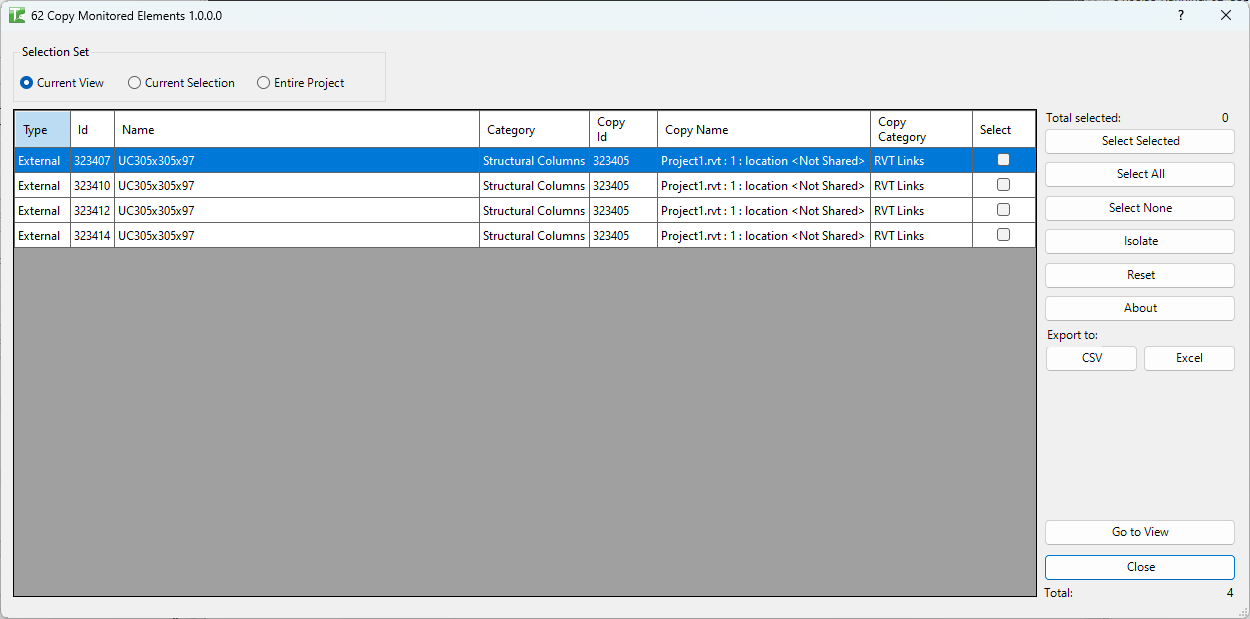
Table of Contents
Key Features
- Lists all elements with active copy/monitor relationships in the project
- Distinguishes Internal monitoring (within the same model) from External monitoring (from a linked file)
- Sortable grid with columns: Type, Id, Name, Category, Copy Id, Copy Name, Copy Category, Select
- Scope filter: Current View, Current Selection, or Entire Project
- Select elements individually or in bulk with Select All / Select None
- Go to View button navigates to and highlights selected elements in the Revit canvas
- Isolate button filters the grid to show only selected rows
- Export to Excel (.xlsx) or CSV for coordination reporting
- Progress bar with cancel support for large projects
Requirements
- Must be run in a project document — not available in the Family Editor
- Linked Revit files must be loaded for external monitoring relationships to resolve fully (Copy Name and Copy Category columns require the link to be loaded)
Running the Tool
Launch
Find Copy Monitored Elements on the Bonus Tools ribbon or use 115 Search Tools.
The dialog opens with scope set to Current View by default and immediately loads matching elements.
Step 1 — Set Scope
Select the radio button for the scope you want to search:
| Option | Description |
|---|---|
| Current View | Only elements visible in the currently active view |
| Current Selection | Elements in the current Revit selection |
| Entire Project | All elements in the document regardless of view |
Changing the scope reloads the grid automatically.
Step 2 — Review the Grid
The grid columns are:
| Column | Description |
|---|---|
| Type | Internal (same-model monitoring) or External (linked-file monitoring) |
| Id | Element ID of the element in this model |
| Name | Element name |
| Category | Revit category of the element |
| Copy Id | Element ID of the monitored counterpart |
| Copy Name | Name of the monitored counterpart |
| Copy Category | Category of the monitored counterpart |
| Select | Checkbox to include this row in bulk actions |
Click any column header to sort. Sorting by Type separates internal from external relationships.
Step 3 — Select Elements
Choose elements to work with:
- Checkbox: click the checkbox in a row to select it individually.
- Drag + Ctrl: highlight multiple rows, then click Select Selected to toggle their checkboxes.
- Select All: selects all rows.
- Select None: clears all selections.
- Isolate: hides unselected rows from the grid (click Reset to restore all rows).
The Selected counter updates dynamically.
Step 4 — Navigate or Export
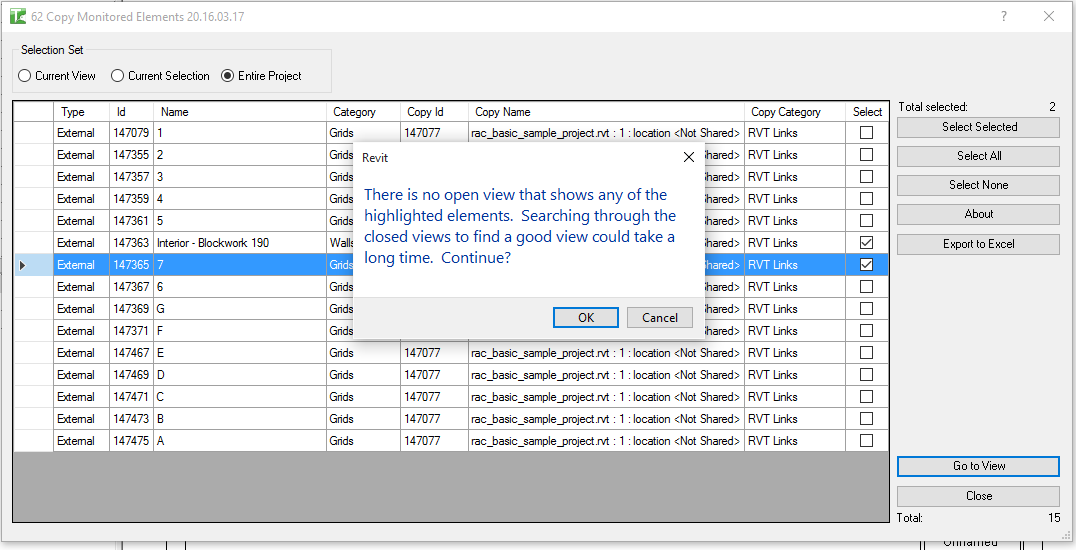
Go to View — with rows selected, click this button to switch to the Revit canvas and highlight all selected elements. If the selected elements span multiple views, Revit opens the last applicable view.
Export to Excel / Export to CSV — exports the full grid (all rows, not just selected) for use in coordination reports or spreadsheet analysis.
Tips and Best Practices
- Run with Entire Project scope for a full audit. The Current View scope is useful during modelling, but for a coordination audit you want to see every monitoring relationship regardless of view.
- Sort by Type to separate concerns. Internal relationships (e.g. grids monitored from another grid) and External relationships (e.g. columns monitored from a structural link) often require different coordination workflows.
- Load linked files before running. External monitoring rows will still appear with the linked data populated only if the link is loaded. Unloaded links will leave Copy Name and Copy Category blank.
- Export to CSV after a design change. After receiving a new linked model revision, run the tool and export. Compare with the previous export to identify any monitoring relationships that have been broken or added.
- Use Go to View to inspect warnings. If Revit is reporting copy/monitor warnings, use the tool to find and navigate to the specific elements generating those warnings.
Common Use Cases
Full project monitoring audit — Set scope to Entire Project and export to CSV. Share with the BIM coordinator as evidence of all active copy/monitor relationships.
Checking grids and levels after model receipt — When a new linked model version arrives, run the tool to confirm that all grid and level monitoring relationships are still intact.
Identifying orphaned monitors — If elements appear in the list but their Copy Name is blank, the monitored counterpart may have been deleted. These orphaned relationships should be investigated and resolved.
Navigating to elements with monitor warnings — Select rows in the grid and click Go to View to jump directly to the elements in Revit for visual inspection.
Reporting for clash/coordination meetings — Export the list to Excel to include in a coordination issue register or present during a BIM coordination meeting.
Troubleshooting
Grid is empty after loading No copy/monitored elements were found in the selected scope. Switch scope to Entire Project to confirm there are no relationships in the model, or check that the active view contains elements with monitoring relationships.
Copy Name and Copy Category columns are blank for External rows The linked Revit file is unloaded or not attached. Load the link and click Reset to reload the grid.
Go to View opens the wrong view or doesn't navigate The element may be on a level or in a view not currently open. Revit will open the most appropriate view it can find. If the element is in 3D only, open a 3D view before using Go to View.
Tool not available The tool cannot run in the Family Editor. Open or switch to a project document and try again.