060 View Underlay
Chris McKeown / July 1, 2025
Sheet & View Manipulation
Overview
View Underlay displays all plan views in your project — Floor Plans, Area Plans, Ceiling Plans, and Engineering Plans — in a sortable grid showing each view's current underlay setting. You can select any combination of views and update their underlay to a different level or remove it entirely in a single bulk operation. This saves significant time compared to opening each view's properties individually to make the same change.
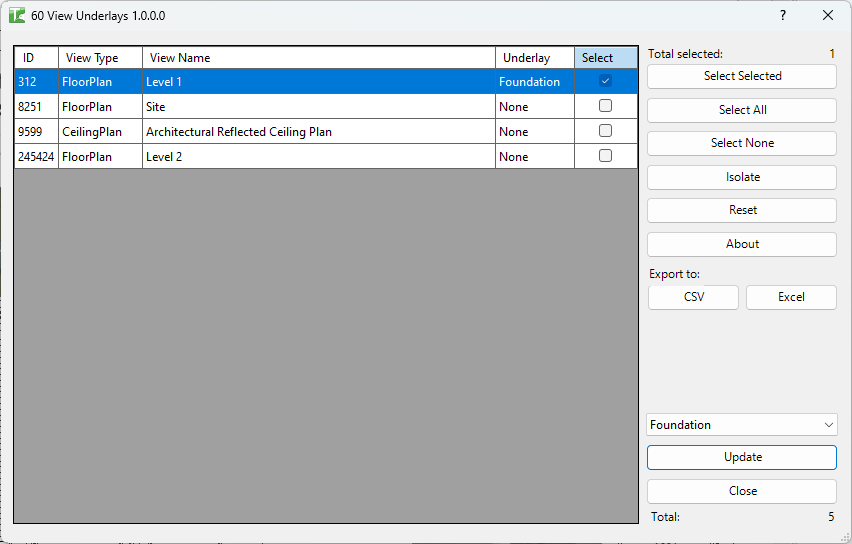
Table of Contents
Key Features
- Lists all non-template plan views (Floor Plan, Area Plan, Ceiling Plan, Engineering Plan) in a sortable grid
- Displays current underlay for each view
- Grid columns: ID, View Type, View Name, Underlay, Select
- Select views individually by checkbox or in bulk with Select All / Select None
- Highlight multiple rows with mouse drag and Ctrl, then toggle with Select Selected button
- Single dropdown to choose the new target underlay level (or
Noneto remove the underlay) - Bulk update applies the same underlay to all selected views in one transaction
- Isolate button hides unselected rows to focus on the working set
- Export grid to Excel or CSV for reporting
- Progress bar with cancel support; updates underlay column in the grid after each change
Requirements
- Must be run in a project document — not available in the Family Editor
- Processes plan-type views only: Floor Plan, Area Plan, Ceiling Plan, Engineering Plan
- View Templates are excluded from the list
Running the Tool
Launch
Find View Underlay on the Bonus Tools ribbon or use 115 Search Tools.
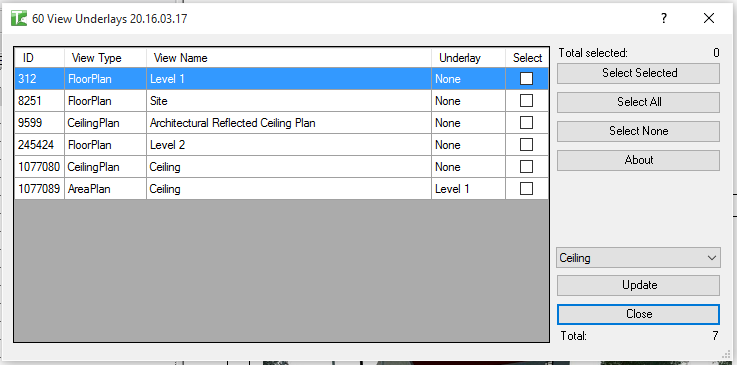
The dialog opens and immediately loads all qualifying plan views into the grid.
Step 1 — Review the Grid
The grid shows one row per plan view with the following columns:
| Column | Description |
|---|---|
| (checkbox) | Select this view for update |
| ID | Revit element ID of the view |
| View Type | FloorPlan, AreaPlan, CeilingPlan, or EngineeringPlan |
| View Name | The view's name as shown in the Project Browser |
| Underlay | The view's current underlay level (or None) |
Click any column header to sort the grid. This is useful for grouping all views that currently share the same underlay.
Step 2 — Select Views
Choose which views to update:
- Checkbox: click the checkbox in a row to select or deselect it individually.
- Drag + Ctrl: highlight multiple rows, then click Select Selected to toggle their checkboxes.
- Select All: selects every row in the grid.
- Select None: deselects all rows.
- Isolate: removes unselected rows from the grid view to simplify the working set (click Reset to restore all rows).
The Selected counter at the bottom updates as you make changes.
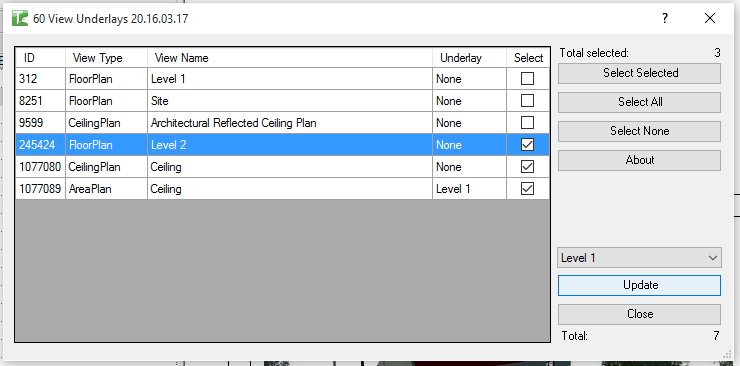
Step 3 — Choose the New Underlay
Use the Underlay dropdown at the top of the dialog to select the target level. The dropdown lists all levels in the project, plus None at the top to remove the underlay.
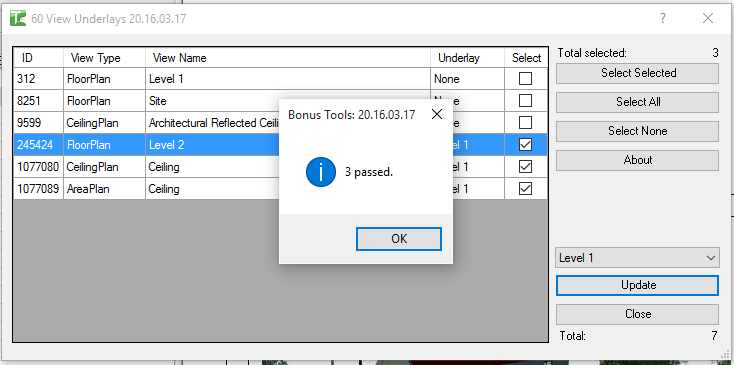
Step 4 — Update
Click Update to apply the chosen underlay to all selected views. A progress bar tracks the operation. When complete, a message confirms how many views were updated, and the Underlay column in the grid refreshes to show the new values.
Tips and Best Practices
- Sort by Underlay before selecting. Sorting the grid by the Underlay column groups views with the same current underlay together, making it easy to select all views you want to change in one go.
- Use Isolate to focus. If you only want to review a subset, select those rows and click Isolate. The grid shows only your selection. Click Reset to bring all views back.
- Set underlays to
Nonein bulk. To clear underlays project-wide, click Select All, chooseNonein the dropdown, and click Update. - Export before changing. Use Export to Excel or CSV to capture the current state of all view underlays as a record before making bulk changes — useful for auditing or reverting.
- Check ownership in workshared models. If some updates fail, you may need to borrow or check out the affected views. The failure message indicates ownership issues.
Common Use Cases
Standardising underlays after level restructure — After renaming or adding levels, use the tool to quickly reassign all affected plan views to their new underlay levels rather than editing each view individually.
Removing all underlays for issue — Before issuing drawings, select all views and set the underlay to None to ensure no unwanted ghost levels appear on printed sheets.
Reviewing what underlays are set — Open the tool and sort by Underlay to immediately see which views have overlays set and which have None. Export to CSV for a project-wide audit.
Setting same underlay for a floor — Select all floor plan views for a given level and set the underlay to the level below, standardising the display across all views for that floor.
Fixing views after copy/monitor setup — After setting up copy/monitor between models, use the tool to batch-assign the correct underlay to all structural plan views.
Troubleshooting
"View Underlays failed. Gain ownership of elements and try again." In a workshared model, one or more views are owned by another user. Borrow or check out the affected views (or ask the owner to relinquish them) and run the update again.
"Operation Failed." An unexpected error occurred during the transaction. Check the Revit journal for details. Ensure the project is not read-only and that the document is not in a degraded state.
No views appear in the grid The project contains no non-template plan views of the supported types (Floor Plan, Area Plan, Ceiling Plan, Engineering Plan). Verify that at least one such view exists and is not a View Template.
Underlay dropdown shows no levels The project has no levels defined. Add at least one level before running the tool.
Tool not available The tool cannot run in the Family Editor. Open or switch to a project document and try again.