057 DWF Markups
Chris McKeown / July 1, 2025
Lists
Overview
DWF Markups lists all DWF markup import instances in the current project in a searchable, sortable grid. Each row shows the originating Sheet, markup status, notes, history, label, creator, creation date, modification date, and name — giving a complete audit trail of all markups received. Select markups and navigate directly to the associated Sheet view, or export the full list to CSV or Excel.
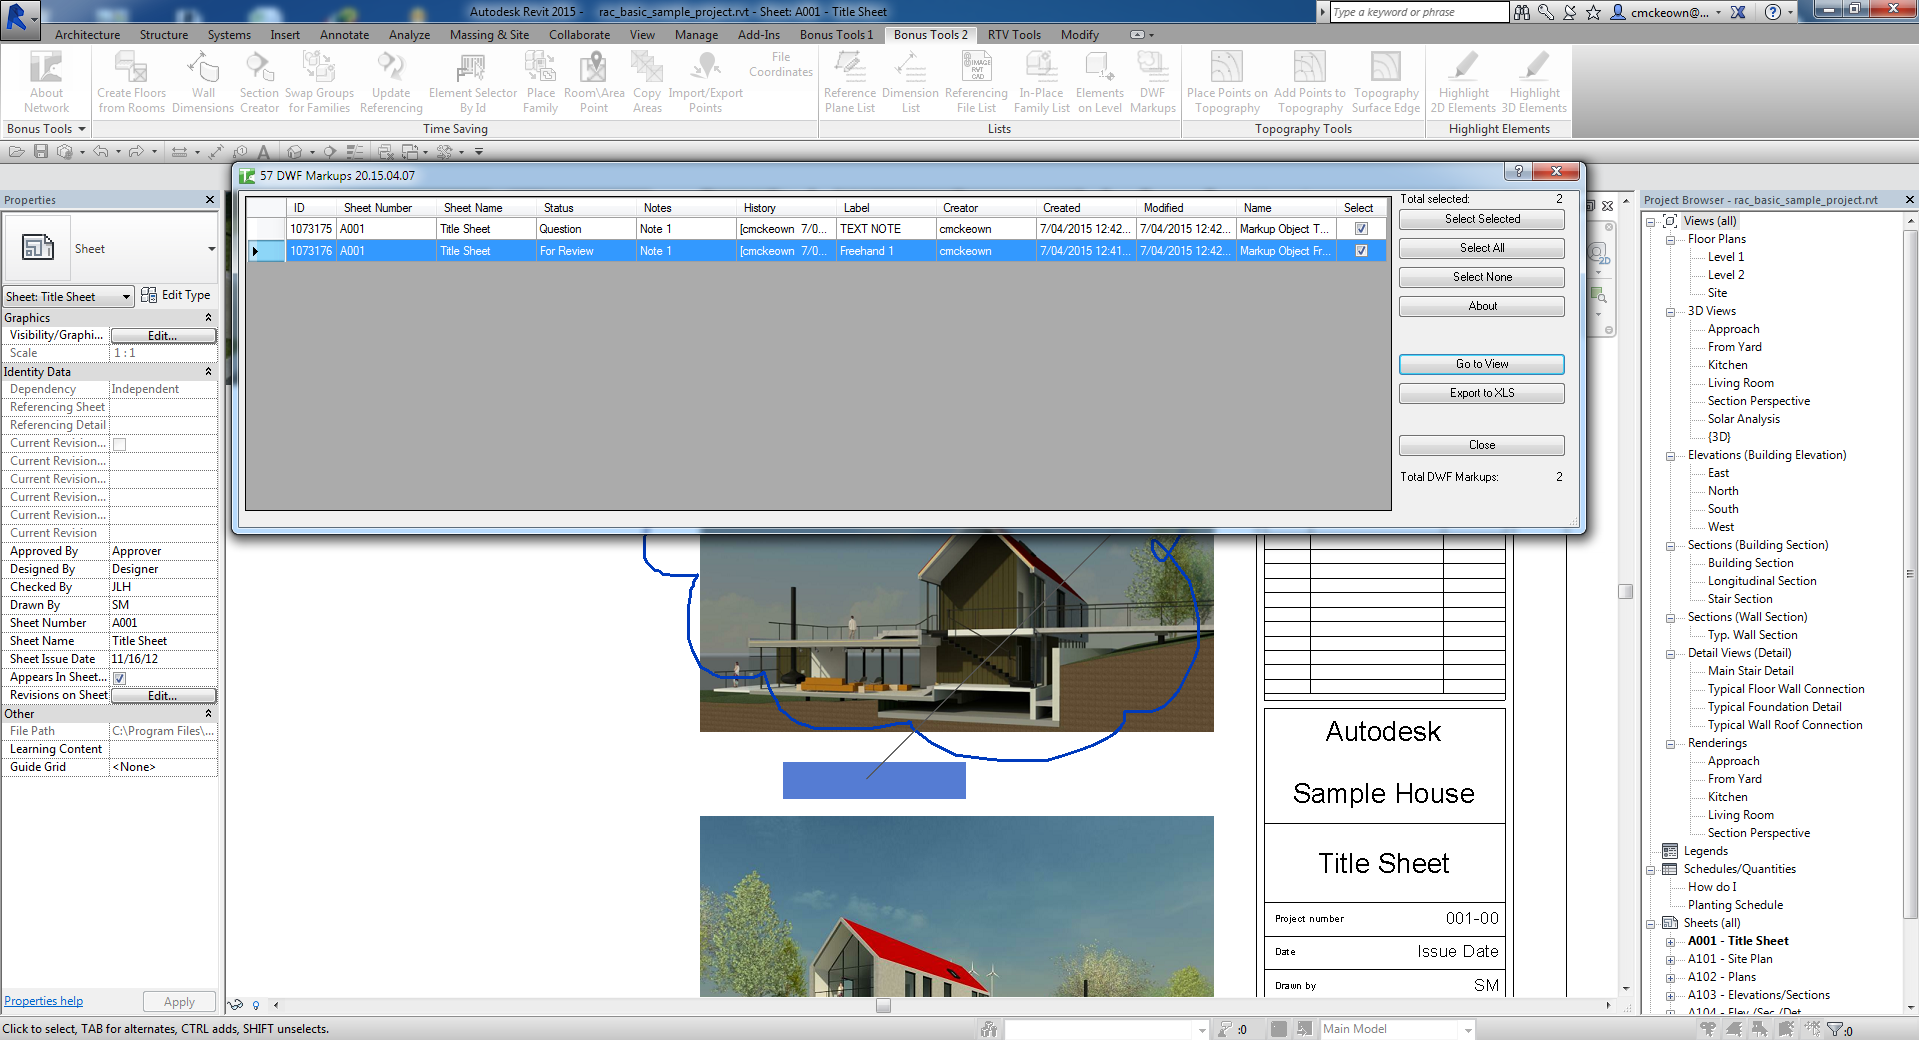
Table of Contents
Key Features
- Lists all DWF markup import instances in the project (excludes DWG imports)
- Grid columns: ID, Sheet Number, Sheet Name, Status, Notes, History, Label, Creator, Created, Modified, Name
- Click any column header to sort the list
- Go to View navigates to the Sheet containing the selected markup(s) and zooms to the element
- Bulk selection controls: Select All, Select None, Select Selected (toggle highlighted rows)
- Isolate button hides unselected rows to focus on a subset
- Reset reloads the full markup list from the project
- Export to CSV or Excel for external review and sign-off tracking
- Total count and selected count displayed at all times
- Compatible with all Revit versions that support DWF markup imports
Requirements
- DWF markups must already be imported into the project (via Insert → Link or Import → DWF Markup)
- No active view or selection required — the tool scans the entire project
- Must be run in a project file (not a Family document)
Running the Tool
Launch
Find DWF Markups on the Bonus Tools Ribbon or use 115 Search Tools.
The dialog opens and immediately loads all DWF markup instances found in the project.
Step 1 — Review the Markup List
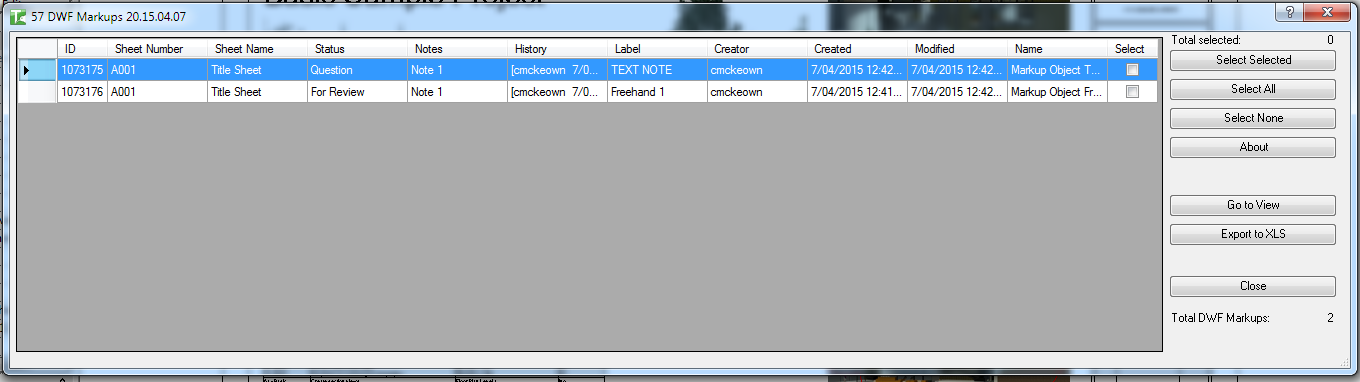
The grid displays one row per markup import instance. Each row shows:
| Column | Description |
|---|---|
| ID | Revit Element ID of the import instance |
| Sheet Number | Number of the Sheet the markup is placed on |
| Sheet Name | Name of the Sheet |
| Status | DWF markup status value |
| Notes | Notes attached to the markup |
| History | History text from the markup |
| Label | Label text |
| Creator | Name of the markup creator |
| Created | Creation date/time |
| Modified | Last modification date/time |
| Name | Name of the markup import |
Click any column header to sort the list by that column.
Step 2 — Select Markups
Check the Select checkbox for the markups you want to work with:
- Select All — checks every row
- Select None — unchecks all rows
- Select Selected — toggles the checkbox for currently highlighted rows
- Isolate — removes unchecked rows from view (use Reset to restore)
Step 3 — Navigate to View (Optional)
With one or more markups selected, click Go to View to open the associated Sheet and zoom to the markup element in Revit.
Note: if markups from multiple Sheets are selected, the view navigates to the last Sheet in the selection.
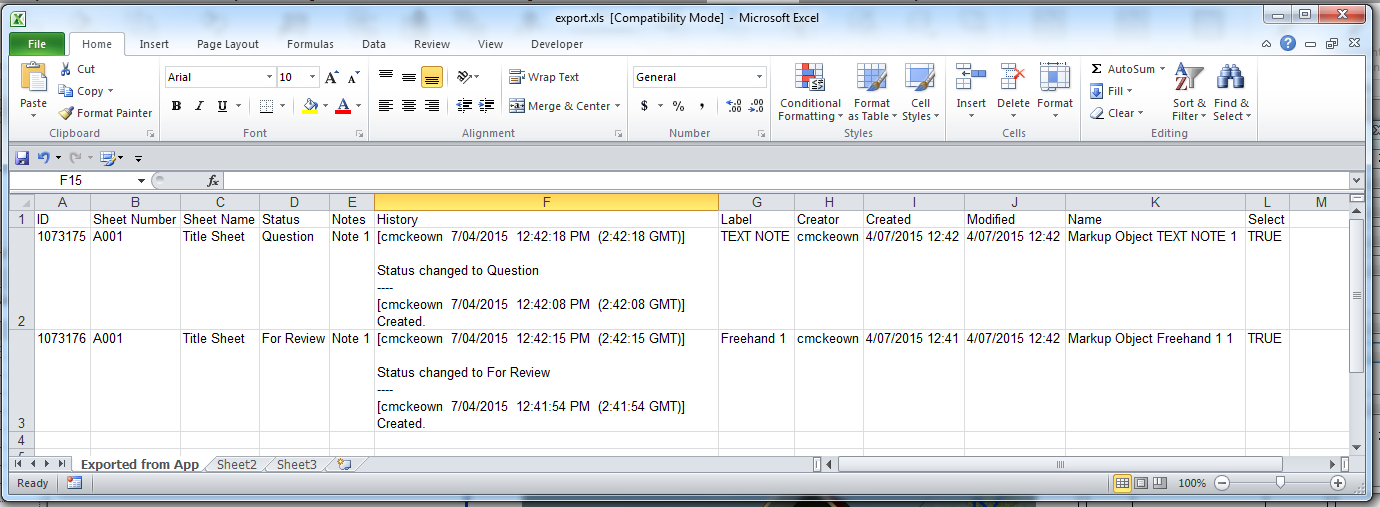
Step 4 — Export (Optional)
Click CSV or Excel to export the current grid contents (including any active Isolate filter) to a file for external distribution or sign-off tracking.
Tips and Best Practices
- Sort by Status to find outstanding markups. Markups with a pending or open status sort together, making it easy to identify unresolved items.
- Sort by Creator to review markups by reviewer. Group all markups from a specific consultant or reviewer with a single column click.
- Use Isolate to focus on a subset. Select all markups for a single sheet or a single creator, click Isolate, then export just that subset to CSV.
- Export before clearing markups. Keep an Excel record of all markups before deleting import instances from the project so there is a permanent audit trail.
- Go to View navigates to the Sheet, not a view. The Sheet itself opens in Revit. Zoom in manually if needed to inspect the markup detail.
Common Use Cases
Auditing all received DWF markups — Launch the tool and immediately export to Excel to create a record of every markup in the project, including creation dates and creator names, for the project register.
Locating markups by reviewer — Sort by the Creator column to group all markups from a specific reviewer, select them all, and click Go to View to step through each one in turn.
Tracking markup resolution status — Sort by Status to identify which markups have been actioned and which remain open. Export to CSV to share a status report with the project team.
Troubleshooting
The grid is empty after the tool loads No DWF markup import instances exist in the project. Import DWF markup files via Insert → DWF Markup before running the tool.
Some Sheets show no Sheet Number or Sheet Name The markup is not placed on a Sheet — it may be placed in a non-sheet view. The Sheet columns will be empty for these rows.
Go to View does nothing No rows are checked in the Select column. Check at least one row before clicking Go to View.
Exported Excel file is blank The Isolate filter may be active with no rows visible. Click Reset to restore all rows, then export again.