052 Renumber Category
Chris McKeown / July 1, 2025
Parameters
Overview
Renumber Category eliminates duplicate Mark/Number warnings in Revit by resetting the Mark or Number parameter of every element in selected categories to its unique Element ID or GUID. The tool scans the project (or just the active view or current selection) for categories that carry a Mark or Number parameter, then batch-renumbers them — making each value guaranteed unique and clearing all related warnings in a single click.
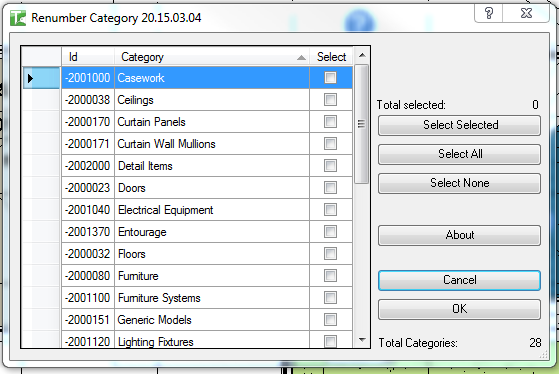
Table of Contents
Key Features
- Renumbers Mark or Number parameters for any Revit category in one operation
- Three scope modes: Current View, Current Selection, or Entire Project
- Choice of value written: Element ID (integer) or Element GUID (unique string)
- Alternative target: write to any Project/Shared Parameter instead of built-in Mark/Number
- Category grid shows all categories with eligible elements; tick the ones to process
- Bulk selection controls: Select All, Select None, Select Selected (toggle highlighted rows)
- Isolate button hides unchecked rows to focus on the selected categories
- Reset reloads the category list to reflect the current scope
- Export category list to CSV or Excel for reporting
- Per-category pass/fail count reported on completion
- Detailed output log in the Bonus Tools Output dialog
Requirements
- Must be run in a project file (not a Family document)
- Elements to renumber must have a writable Mark (DOOR_NUMBER) or Number (ROOM_NUMBER) built-in parameter, or a writable Project/Shared Parameter must be selected
- Elements inside Groups cannot be renumbered — they are skipped and reported
- Compatible with Revit 2014 and newer
Running the Tool
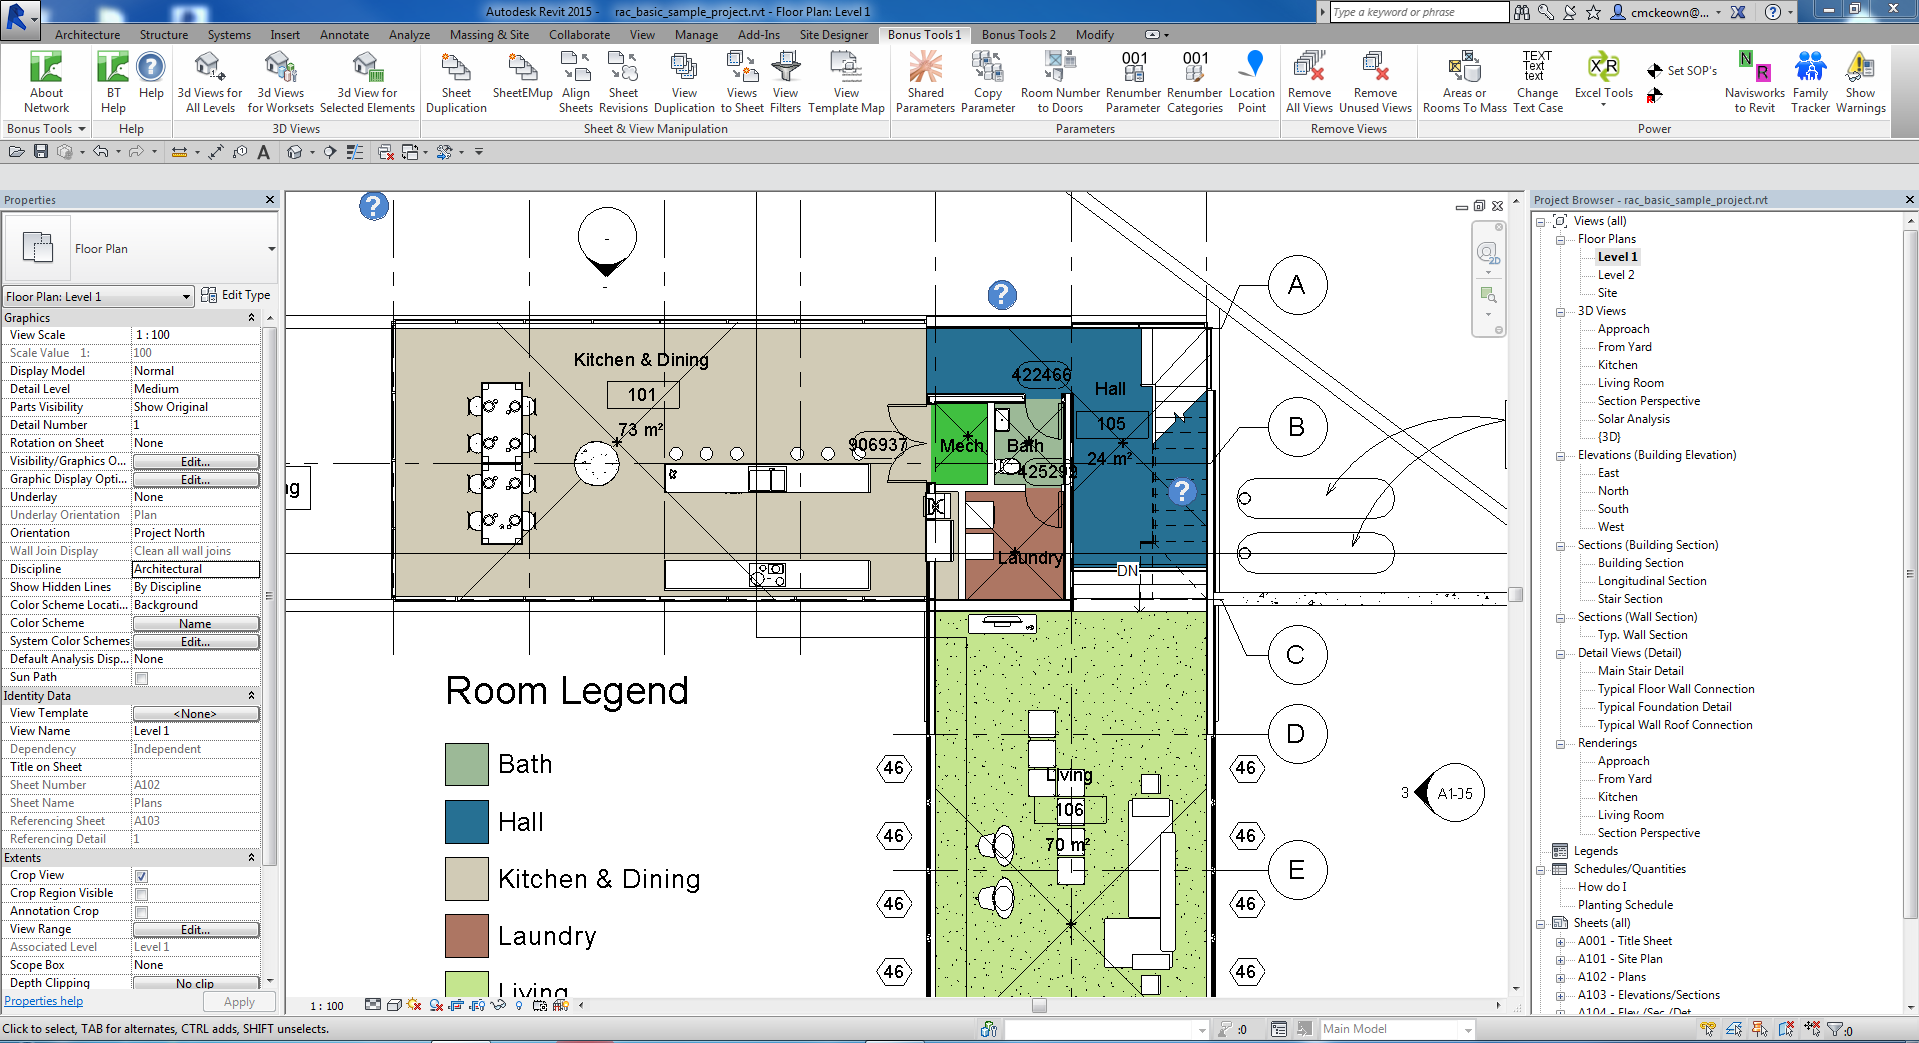
Launch
Find Renumber Category on the Bonus Tools Ribbon or use 115 Search Tools.
Step 1 — Set the Scope
In the Selection Set group, choose which elements to scan:
- Current View — only elements visible in the active view (default)
- Current Selection — only elements you pre-selected before launching
- Entire Project — all model elements regardless of view
The category list reloads automatically when you change the scope.
Step 2 — Choose the ID Type
In the ID Type group, select what value to write:
- Element ID — writes the integer Revit Element ID (default, recommended for most workflows)
- Element GUID — writes the full UniqueId string (longer, but stable across file transfers)
Step 3 — Choose the Parameter Target
In the Parameter Selection group, choose where to write the value:
- Mark/Number — writes to the built-in Mark (for most categories) or Number (for Rooms/Spaces/Areas) parameter (default)
- Project/Shared Parameter — writes to any shared parameter you select from the dropdown; useful when you need a custom field to hold the unique value
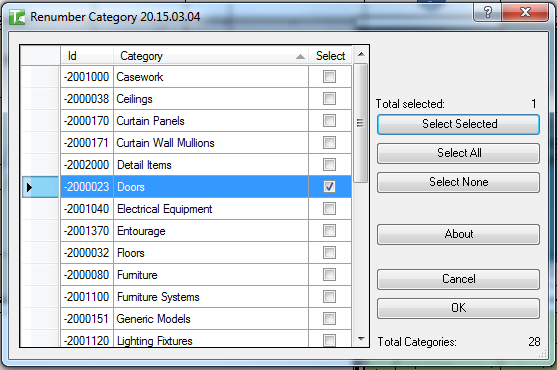
Step 4 — Select Categories
The grid lists all categories that have at least one element with an eligible parameter. Check the Select checkbox for each category to process. Use the buttons on the right to manage the selection:
- Select All — checks all rows
- Select None — unchecks all rows
- Select Selected — toggles the checkbox for currently highlighted rows
- Isolate — removes unchecked rows from the visible list (use Reset to restore)
The Total selected counter updates as you change checkboxes.
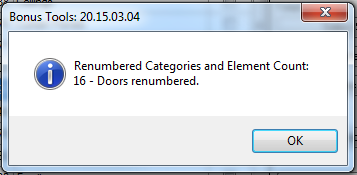
Step 5 — Run and Review
Click OK. A progress bar processes each selected category in turn. On completion, a message lists each category with its passed and failed counts.
Check the Bonus Tools Output dialog for detailed per-element results (green = passed, red = failed).
Tips and Best Practices
- Run on the Entire Project scope to clear all duplicate warnings. Current View may leave duplicates on other floors or in other views.
- Use Element ID for most projects. It is short, readable, and guaranteed unique within the file.
- Use Element GUID when exchanging data across files. The GUID remains stable even after the model is transferred or linked.
- Elements in Groups are skipped. Ungroup the elements, renumber, then re-group if you need those elements renumbered.
- Export to Excel before running. Use the Export button to capture the current Mark/Number values as a backup before overwriting them.
- Workshared models — gain ownership first. Elements owned by another user will fail. Synchronise and take ownership before running.
Common Use Cases
Clearing duplicate Mark warnings after a paste or import — After pasting elements from another project, Revit often flags duplicate Mark values. Run Renumber Category on the affected categories across the Entire Project to assign unique IDs to every element and clear all warnings.
Setting up a unique key field for data export — When exporting Revit data to external databases or BIM tools, use Renumber Category to write the Element GUID to a custom shared parameter, providing a stable unique identifier for each element.
Resolving duplicate Room Numbers — After reorganising rooms across floors, Number warnings accumulate. Run the tool on the Rooms category scoped to the Entire Project to assign unique numbers, then manually rename them to the desired values.
Troubleshooting
A category I expect does not appear in the list The category has no elements with a writable Mark or Number parameter in the selected scope. Try switching to Entire Project scope, or switch the parameter target to a custom Project/Shared Parameter.
"X failed" for a category after running Elements in that category are either inside Groups (cannot be written to) or are owned by another user in a workshared model. Review the Output dialog for individual element results.
"[Category] failed. Gain ownership of elements and try again." Another user owns the elements. Reload Latest, synchronise, and obtain ownership before re-running.
The parameter target dropdown is greyed out The dropdown only activates when Project/Shared Parameter is selected in the Parameter Selection group. Switch to that option to enable it.