046 Highlight 3D Elements
Chris McKeown / July 1, 2025
Highlight Elements
Overview
Highlight 3D Elements reads the distinct values of a chosen parameter for elements in a selected category, then assigns a colour to each value. Colours are randomly assigned initially and can be changed by clicking the colour button for each row. When you click OK, the tool applies Revit view graphic overrides to every element whose parameter matches each value — colouring them in the active view. The overrides can target Cut Fill, Cut Line, Projection Fill, and/or Projection Line independently.
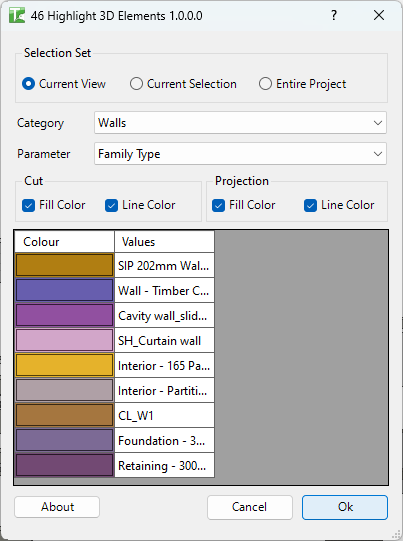
Table of Contents
Key Features
- Parameter-driven colour coding — automatically discovers all unique values for the selected parameter and assigns a colour to each
- Built-in special parameters — in addition to element parameters, special options include Family, Family Type, and Family and Type for type-level colour coding
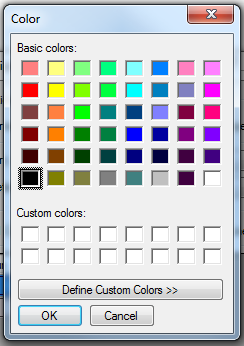
- Customisable colours — click the Colour button in any row to open a colour picker and choose a specific colour
- Selective override targets — apply overrides to Cut Fill, Cut Line, Projection Fill, and Projection Line independently via checkboxes
- Selection Set scope — limit elements to Current View, Current Selection, or Entire Project
- Solid fill pattern — fill overrides use the solid fill pattern from the project for clean, solid colour blocks
- Cancel support — a progress bar with a Cancel button allows stopping mid-run
Requirements
- Project document (not available in the Family Editor)
- The active view must support graphic overrides (floor plans, sections, elevations, 3D views)
- A valid Kiwi Codes Bonus Tools licence must be active
Important: Highlight 3D Elements overrides graphics in the active view. These overrides take precedence over existing view graphics settings for affected elements.
Running the Tool
Launch
Find Highlight 3D Elements on the Bonus Tools Ribbon or use 115 Search Tools.
Step 1 — Choose Selection Set
| Option | Elements included |
|---|---|
| Current View | Elements visible in the active view |
| Current Selection | Elements currently selected in Revit |
| Entire Project | All elements in the project |
Changing the selection set refreshes the Category and Parameter lists.
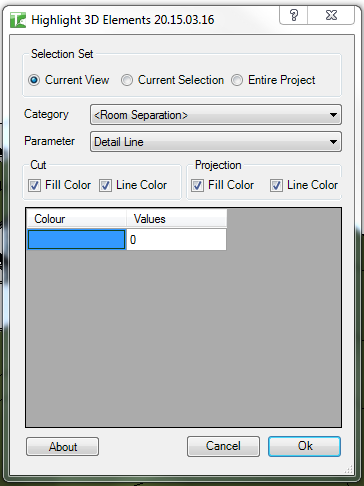
Step 2 — Select a category
Choose a category from the Category dropdown. The dropdown is populated from elements in the chosen scope.
Step 3 — Select a parameter
Choose a parameter from the Parameter dropdown. In addition to element parameters, three special options are always available:
| Special parameter | Colour coding basis |
|---|---|
| Family | Colours elements by their family name |
| Family Type | Colours elements by their type name |
| Family and Type | Colours elements by "FamilyName TypeName" |
Changing the parameter refreshes the Values grid with distinct values found in the scope.
Step 4 — Assign colours
The Values grid shows one row per distinct parameter value. Each row has:
- Colour — a colour button (click to open the colour picker); the button background shows the assigned colour
- Values — the parameter value text
Click any Colour button to open the colour dialog and choose a specific colour. Colours are randomly assigned on load.
Step 5 — Select override targets
In the Cut group and Projection group, tick which graphic properties to override:
| Group | Options |
|---|---|
| Cut | Fill Color, Line Color |
| Projection | Fill Color, Line Color |
All four are checked by default. Untick any you want to leave unchanged.
Step 6 — Click OK
Click OK. A progress bar shows the operation in progress. The tool applies view overrides to all matching elements in the active view.
A confirmation reports:
X passed. Y failed.
The colour overrides are applied immediately in the active view — elements with the same parameter value share the same colour:

Tips and Best Practices
- Use in a dedicated 3D view or floor plan. The overrides are applied to the active view only. Duplicate your view before running if you want to keep an unmodified version.
- Isolate the category first. Use Revit's Isolate Category function before running to make the colour-coded elements stand out visually against a neutral background.
- Limit scope with Current Selection for large projects. Entire Project scope on a large model can take time. Select the relevant elements first and use Current Selection for faster results.
- Remove overrides with Revit's Reset Graphic Overrides. To remove all overrides applied by this tool, use Revit's View → Reset Graphic Overrides or manually clear overrides in the Visibility/Graphic Overrides dialog.
- Family and Family Type parameters are always available. Even if elements have no shared parameters, Family and Family Type are always in the Parameter dropdown — useful for quickly colour-coding by family type without any parameter setup.
- Use with 3D views for presentations. Apply colour coding in a 3D view to produce a visually clear element-by-type breakdown for client presentations or internal reviews.
Common Use Cases
Colour-coding elements by phase — Select the Phase Created or Phase Demolished parameter to visually distinguish elements from different project phases in a single view.
Visualising system types in MEP models — Colour-code duct or pipe elements by System Type to quickly identify which system each run belongs to in a 3D view.
Reviewing structural frame materials — Select Structural Framing elements and colour by Material to instantly visualise the distribution of steel, concrete, and timber members across the model.
Family usage audit — Use the Family or Family Type parameter to colour-code all elements in the project by family, revealing which families are used where and helping identify redundant or non-standard families.
Clash visualisation by discipline — Colour-code elements from different disciplines (identified by a custom parameter) to make clashes visually obvious in a coordination 3D view.
Troubleshooting
"X passed. Y failed." with failures Some elements could not be overridden. This may be because the element is owned by another user in a workshared model, is part of a group, or is in a linked file. Gain ownership of affected elements and retry.
"Highlight 3D Elements failed. Gain ownership of elements and try again." The Revit transaction could not be committed. Gain ownership of all elements in the selection scope via Worksets or Editing Requests.
"Operation Failed." An unexpected error occurred during the override application. Check the Revit journal for details.
"No elements in the project of Category type: X" No elements of the selected category exist in the current scope. Change the Selection Set or choose a different category.
Values grid shows "No Values" The selected parameter has no values (all elements have an empty or null value for that parameter). Select a different parameter or populate the parameter values first.
Colours applied but not visible in view Check that the view's Visibility/Graphic Overrides are not suppressing the overrides. Also verify the view discipline and detail level are appropriate — some overrides only appear at certain detail levels.