042 Wall Dimensions
Chris McKeown / July 1, 2025
Time Saving
Overview
Wall Dimensions automatically places a dimension string referencing the exterior faces of all selected parallel walls in a single click. Instead of manually placing individual dimensions and snapping to each wall face, you pre-select the walls, run the tool, and the dimension string is created instantly. This saves significant time when documenting structural grids, room layouts, or any parallel wall arrangement.
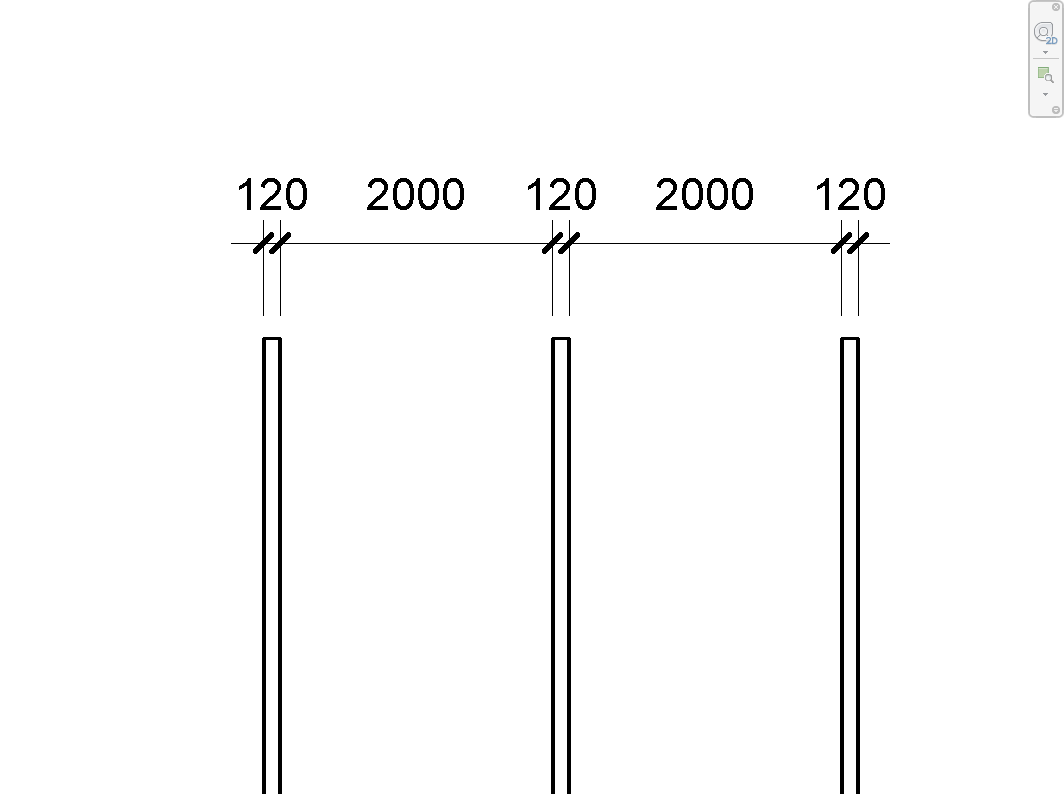
Table of Contents
Key Features
- Dimensions across the exterior faces of all selected walls in one operation
- Works with two or more parallel straight walls
- Dimension string placed along the line between the first wall's exterior faces
- Uses Revit's native dimension API — fully editable after creation
- Recorded in undo history as "Dimension Two Walls"
- Skips curved and non-wall elements silently — only processes valid straight walls
- Blocked in Family documents with a clear message
Requirements
- Must be run from a project document (not a Family environment)
- Select two or more parallel straight walls before running — the selection must be active when the tool launches
- All walls must be straight (not arc or spline walls) — curved walls in the selection are skipped automatically
- The active view must support dimension elements (floor plan, section, elevation, or detail views)
Running the Tool
Launch
Find Wall Dimensions on the Bonus Tools Ribbon or use 115 Search Tools.

Step 1 — Select Parallel Walls
Before running the tool, select two or more parallel straight walls in the active view. Hold Ctrl and click each wall, or use a crossing selection.
Walls must be parallel to each other. Curved walls and non-wall elements in the selection are automatically ignored.

Step 2 — Run the Tool
With the walls selected, click Wall Dimensions on the Bonus Tools Ribbon. No dialog opens — the dimension string is placed immediately.
The dimension references the exterior face of each wall and spans all selected walls in a single string.
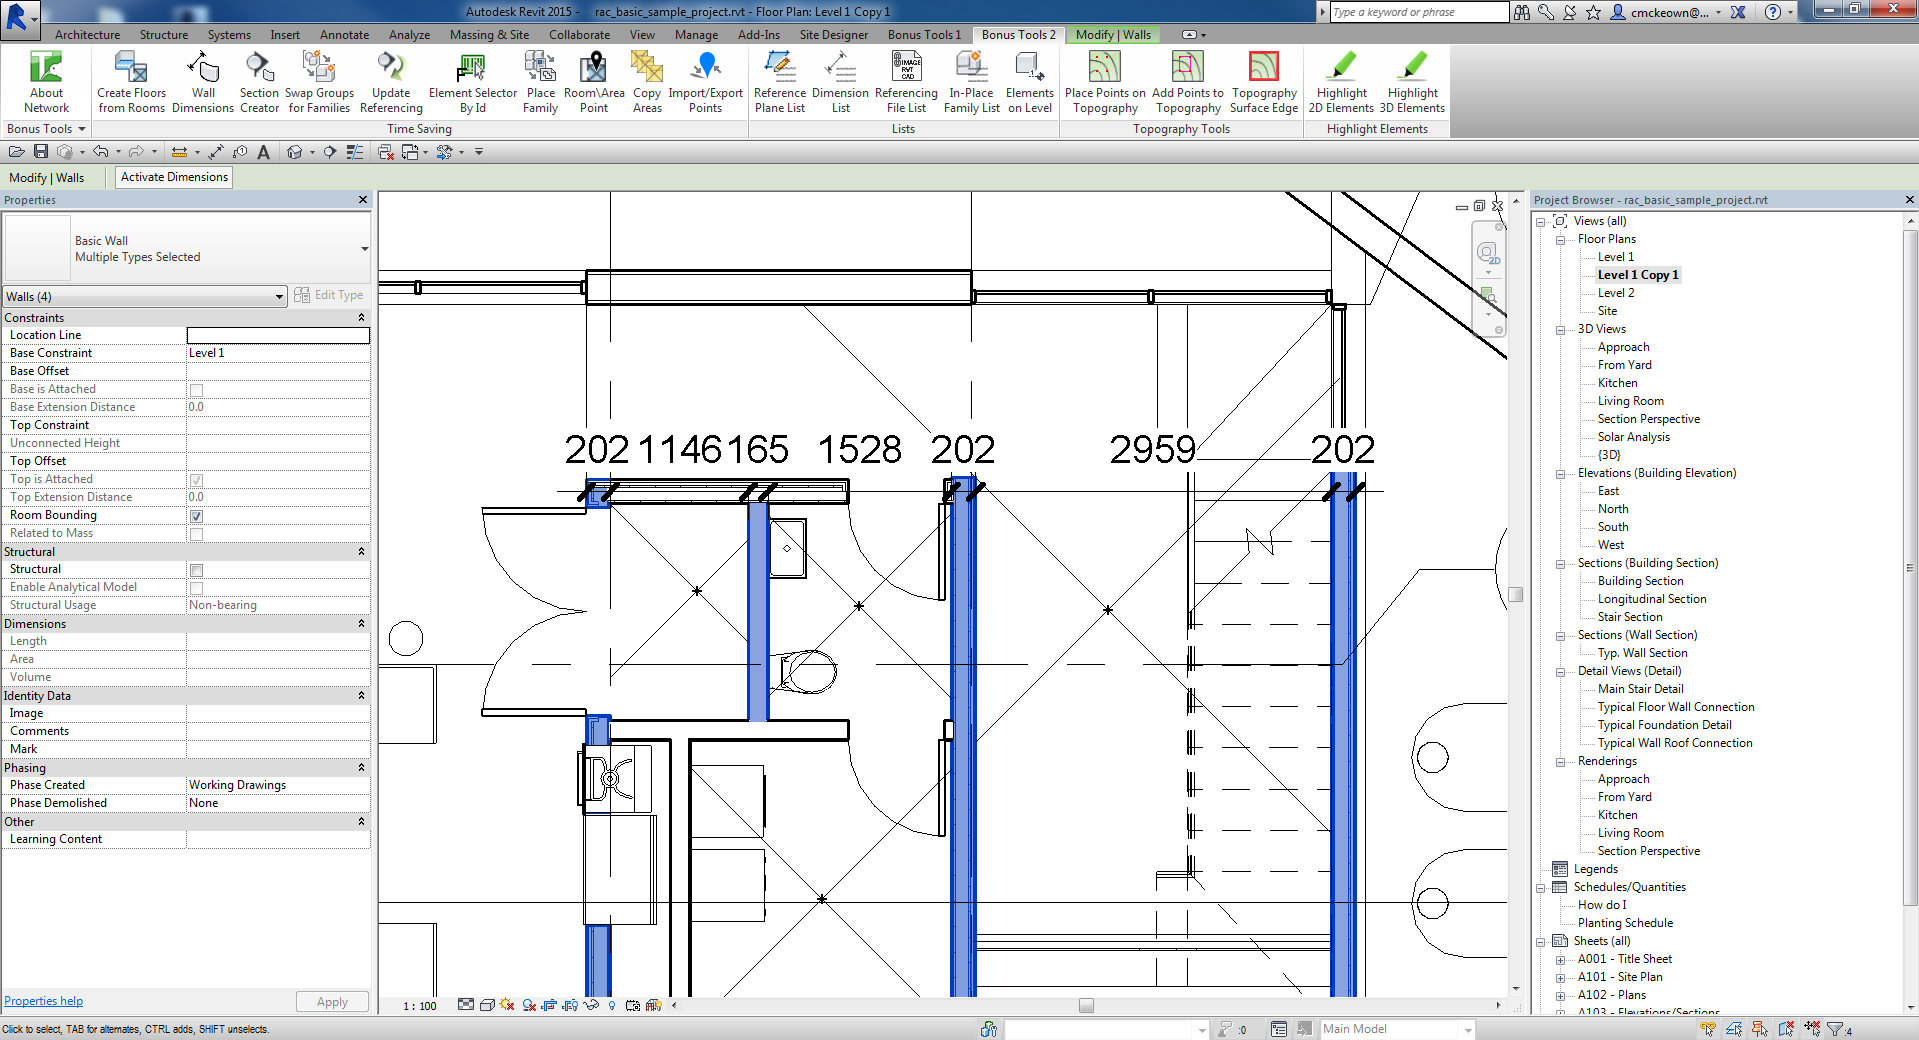
Step 3 — Reposition if Needed
The created dimension is a standard Revit linear dimension. Select it and drag it to the correct annotation position in your view.
Tips and Best Practices
- Pre-select all walls before running. There is no interactive pick step — the tool reads whatever is selected at launch.
- Run from a plan view. Dimensions created in plan views are easiest to reposition and annotate.
- Include all relevant walls in one selection. The tool processes the entire selection in a single pass — selecting all walls at once is faster than running multiple times.
- Curved walls are silently skipped. If you have mixed straight and curved walls selected, only the straight parallel walls are dimensioned. Verify the result includes all expected references.
- Move the string rather than re-running. After creation, drag the dimension string to the correct location — it is faster than re-selecting and re-running.
Common Use Cases
Structural grid documentation — Select all parallel structural walls on a floor plan, run Wall Dimensions, then drag the string to the annotation zone outside the plan boundary.
Room layout dimensions — In an apartment or office layout, select the parallel bounding walls of a room to get an exterior-face width or depth dimension in one step.
Design verification — After moving walls during design development, quickly re-dimension to confirm spacing against design intent without manually snapping to each face.
Troubleshooting
"Please select atleast two parallel opposing straight walls." The tool ran with fewer than two walls in the selection, or all selected elements are not walls (e.g. grids, columns). Select at least two straight wall elements before clicking the tool.
No dimension is created and no message appears The selected walls may not be truly parallel — even a small rotation difference prevents the tool from computing valid face references. Check the wall orientation in the Properties panel.
Tool shows "Action not available in the Family environment." The tool cannot run inside the Family Editor. Close the family, open a project document, and retry.
Dimension placed in unexpected location The dimension line position is derived from the first wall's face geometry. Select the dimension and drag it to the correct annotation position after creation.