040 Copy Parameter Values
Chris McKeown / July 1, 2025
Parameters
Overview
Copy Parameter Values reads a parameter value from each element (or its host or level) and writes it to another parameter on the same element. Before writing, you can optionally transform the value — replace text, crop characters from either end, or insert text at a position — giving you fine-grained control over how the value is transferred. The tool works across any element category in the project, making it useful for bulk data migration and parameter population workflows.
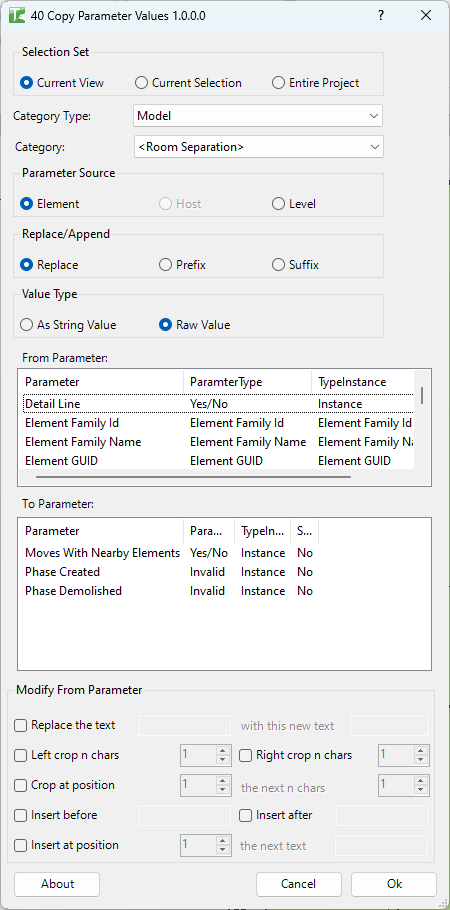
Table of Contents
Key Features
- Flexible source selection — copy from any instance or type parameter, or from built-in synthetic sources: Element Id, Element Family Id, Element GUID, Element Type Name, Element Type Id, Element Family Name
- Host and Level sources — for family instances, copy from a host element's parameter; for elements with a level, copy from the associated level parameter
- Replace, Prefix, or Suffix modes — overwrite the destination parameter, prepend text, or append text to the existing value
- String value or raw value — write the display string or the internal raw value of the source parameter
- Text transforms — seven independent optional operations: Replace, Left Crop, Right Crop, Crop at Position, Insert Before, Insert After, Insert at Position
- Category Type filter — narrow elements to Model, Annotation, AnalyticalModel, or Internal categories
- Selection Set scope — operate on Current View, Current Selection, or Entire Project
Requirements
- Project document (not available in the Family Editor)
- Target parameter must not be read-only
- A valid Kiwi Codes Bonus Tools licence must be active
Running the Tool
Launch
Find Copy Parameter Values on the Bonus Tools Ribbon or use 115 Search Tools.
Step 1 — Choose Selection Set and Category
Select the scope:
| Option | Elements included |
|---|---|
| Current View | All elements visible in the active view |
| Current Selection | Elements currently selected in Revit |
| Entire Project | All elements in the project |

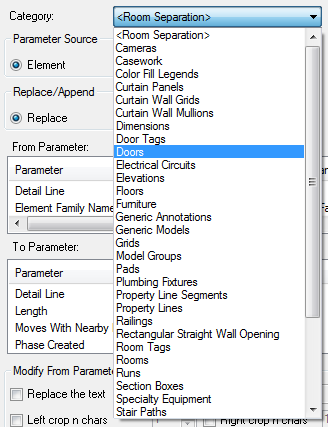
Then select a Category Type (Model, Annotation, AnalyticalModel, or Internal) and a Category from the populated dropdown. The From and To Parameter lists refresh to show parameters from elements in that category.
Step 2 — Choose a Parameter Source
Select the source for the value being read:
| Source | When available |
|---|---|
| Element | Always available — reads from the element itself |
| Host | Only for Family Instances — reads from the host element |
| Level | Only when the element has a LevelId — reads from the associated level |
Step 3 — Select From Parameter
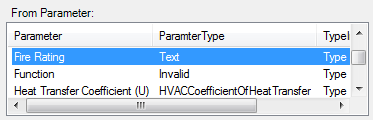
From the From Parameter list, select the parameter whose value you want to copy. The list includes:
- All instance and type parameters on elements in scope
- Built-in synthetic sources:
- Element Id — the Revit element ID integer
- Element Family Id — the family type element ID
- Element GUID — the element's unique identifier
- Element Type Name — the type name string
- Element Type Id — the type element ID
- Element Family Name — the family name string
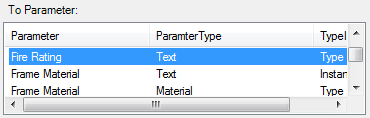
Step 4 — Select To Parameter
From the To Parameter list, select the parameter to write the value into. Read-only parameters are excluded from this list.
Step 5 — Choose Replace/Append mode
| Mode | Behaviour |
|---|---|
| Replace | Overwrites the destination parameter with the (transformed) source value |
| Prefix | Prepends the source value to the existing destination value |
| Suffix | Appends the source value to the existing destination value |
Step 6 — Choose Value Type
| Option | Behaviour |
|---|---|
| As String Value | Writes the display string (formatted as shown in Revit) |
| Raw Value | Writes the internal raw value (e.g., feet instead of millimetres) |
Step 7 — Apply Text Transforms (optional)
Use the Modify From Parameter group to transform the value before writing. Each transform is independent and can be combined:
| Transform | Description |
|---|---|
| Replace text | Replaces an occurrence of a substring with new text |
| Left crop n chars | Removes the first n characters |
| Right crop n chars | Removes the last n characters |
| Crop at position | Extracts n characters starting at a given position |
| Insert before | Inserts text before the value |
| Insert after | Inserts text after the value |
| Insert at position | Inserts text at a specific character position |
Tick the checkbox next to each transform you want to apply and enter the required values.
Step 8 — Run
Click OK. The tool processes all elements in scope and writes the (optionally transformed) source value to the destination parameter.
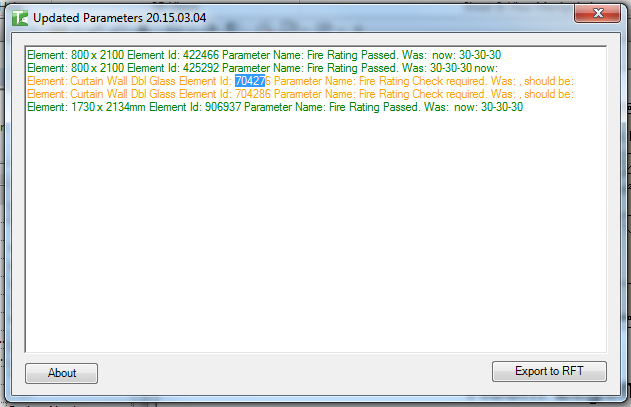
A confirmation reports the result:
X passed. Y failed.
The results dialog lists each element individually — green rows indicate success, orange rows indicate failures with the reason.
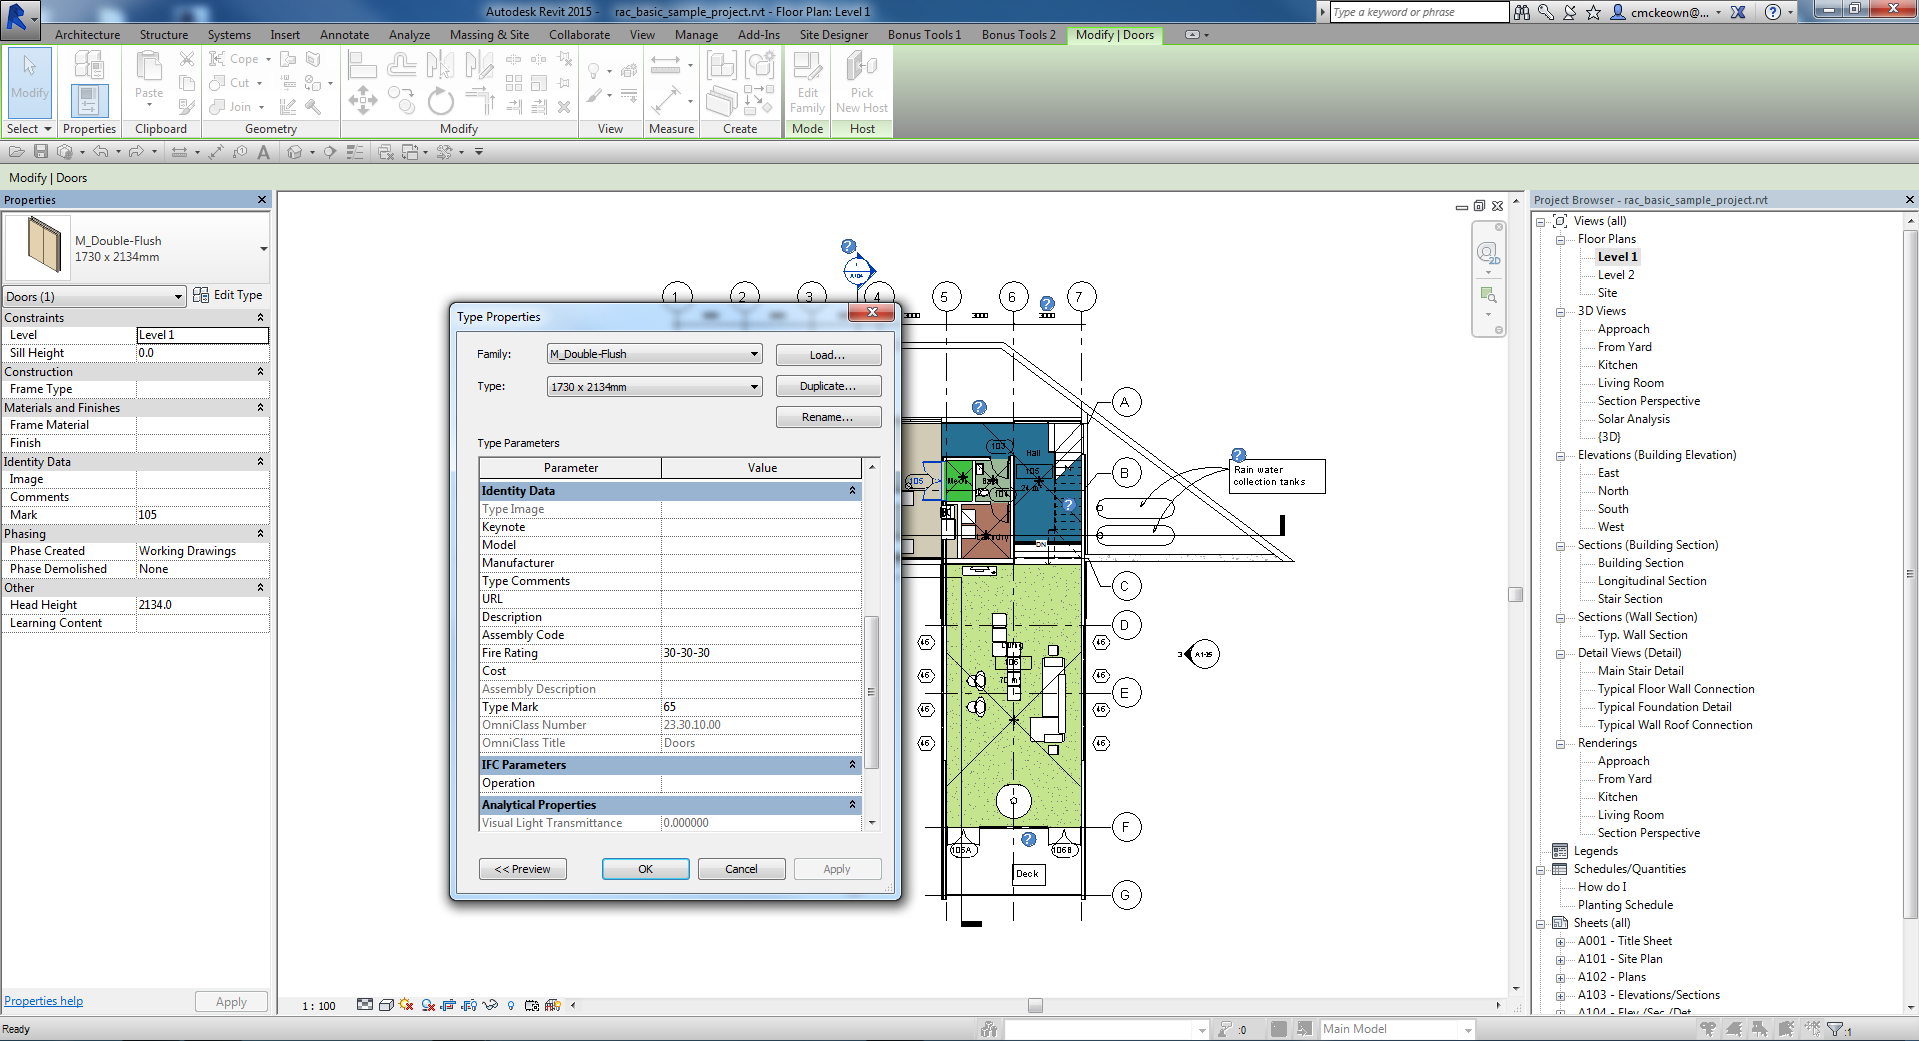
After running, you can verify the updated values directly in element properties.
Tips and Best Practices
- Use the Entire Project scope carefully. If you change your mind, use Ctrl+Z to undo — the tool runs in a single transaction named "Setting Parameters".
- Test on Current Selection first. Select a few elements and run the tool to verify the output before expanding scope to the Entire Project.
- Combine transforms for complex mappings. For example, Left Crop + Insert Before can strip a discipline code and replace it with a new one in one pass.
- Use Raw Value for unit-sensitive parameters. If the destination parameter is numeric (Length, Area, etc.), Raw Value avoids unit conversion errors.
- Built-in sources don't require shared parameters. Element GUID and Element Id are always available without needing to add shared parameters to the project.
- Host source is only available for Family Instances. If you select Host for non-hosted elements, those elements will be skipped.
Common Use Cases
Populating a schedule parameter from the type name — Set From Parameter to Element Type Name, To Parameter to a custom text parameter, and run across the Entire Project to stamp every element with its type name for schedules or exports.
Copying room numbers to doors — Select From Room via the room's associated parameter, choose the Mark or custom door number parameter as the destination, and run to bulk-populate door identifiers from their rooms. (For a dedicated room-to-door tool see 041 Room Number to Doors and Windows.)
Stripping a prefix from parameter values — Use Left Crop to remove a fixed number of characters from the start of an existing value (e.g., removing a "XX-" discipline code before copying to a destination parameter).
Migrating data between parameters after a standard change — When an office standard renames a shared parameter, use Copy Parameter Values to copy all values from the old parameter to the new one across the entire project.
Tagging elements with their host level name — Set Source to Level, From Parameter to Level Name, and write it to a text parameter on the element for use in custom schedules.
Troubleshooting
"Must select one from Parameter and one to Parameter." No From Parameter or no To Parameter is selected in the list. Click one item in each list before clicking OK.
"Copy Parameters failed. Gain ownership of elements and try again." One or more elements are owned by another user in a workshared model. Use Worksets or Editing Requests to gain ownership of the affected elements, then retry.
"X passed. Y failed." with failures Some elements could not be updated. Common causes: the destination parameter is read-only on certain types, the element is part of a group, or the value type is incompatible. Check the Revit output window for details on which elements failed.
"Operation Failed." An unexpected error occurred. Check the Revit journal for details. Ensure the project is not in a corrupted state and retry.
No parameters appear in the From or To lists The selected Category has no elements in scope, or all parameters on those elements are read-only (To list). Change the Selection Set or Category, or verify elements exist in the current view.
Host source is grayed out The selected elements are not Family Instances, or they have no host. The Host radio button is only enabled when elements in scope are hosted family instances.