037 Highlight 2D Elements
Chris McKeown / July 1, 2025
Highlight Elements
Overview
Highlight 2D Elements scans every view in your Revit project and reports how many 2D annotation elements — Text Notes, Lines, Filled Regions, Detail Components, and Keynotes — exist in each one. Optionally, the tool applies colour-coded Override Graphics in View overrides so problematic annotation patches are immediately visible in the viewport. Results are exported to Excel for review and sign-off.
Important: This tool modifies view graphics using Override Graphics in View by Element. Run it on a copy of the project file if you intend to use the highlighting option.
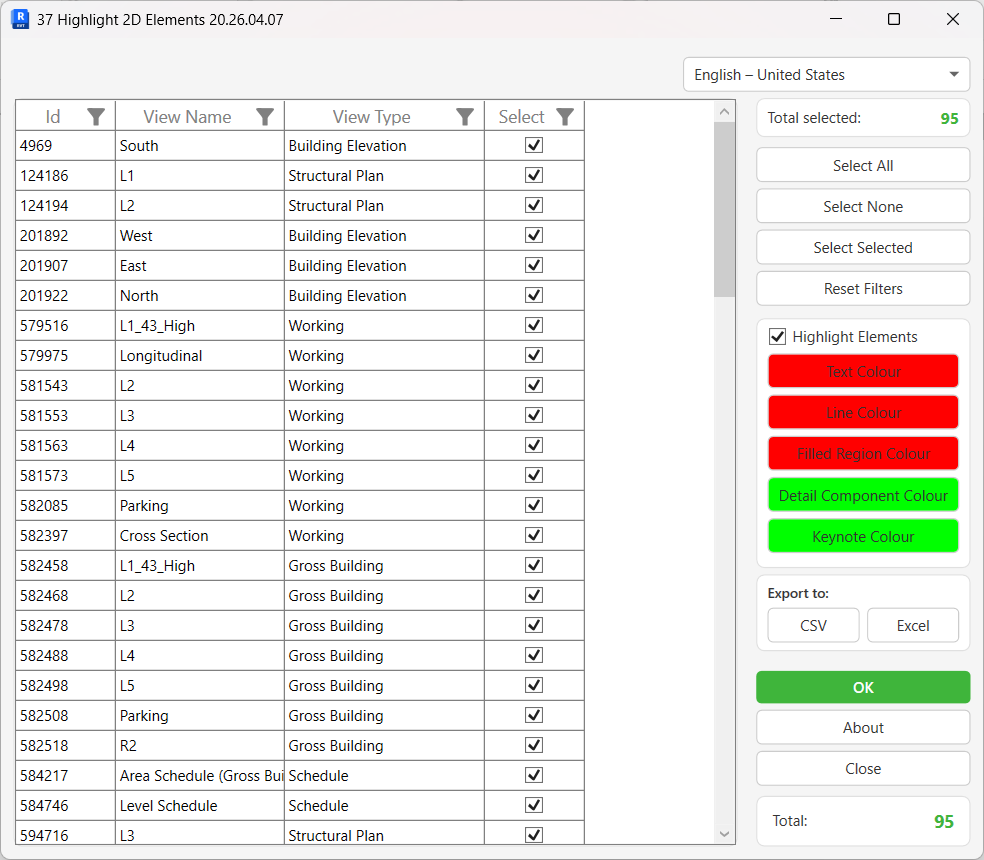
Table of Contents
Key Features
- Lists every non-template view in the project with Id, View Name, and View Type
- Counts five 2D element categories per view: Text Notes, Lines, Filled Regions, Detail Components, and Keynotes
- Optional colour highlighting via Override Graphics in View by Element — one configurable colour per element type
- Default colour scheme distinguishes annotation patches (red) from intentional detail (green)
- Fully customisable highlight colours via a standard colour-picker dialog
- Real-time Total and Total Selected counters update as you check or filter views
- Built-in column filtering and multi-select on the view list
- Export the view list to CSV or Excel at any time
- Results (with full element counts per view) automatically exported to Excel after processing
- Progress bar with cancel support — safe to abort mid-run
Requirements
- Must be run in a project file — the tool is not available in the Family Editor
- View Templates are excluded automatically; only regular (non-template) views are processed
- No shared parameters or external dependencies required
Running the Tool
Launch
Find Highlight 2D Elements on the Bonus Tools Ribbon or use 115 Search Tools.
The dialog opens and immediately loads all views in the project. A progress bar is shown during the load.
Step 1 — Review the View List
The main grid lists every view in the project with four columns:
| Column | Description |
|---|---|
| Id | Revit Element Id for the view |
| View Name | View name as it appears in the Project Browser |
| View Type | View family type (Floor Plan, Section, Detail, etc.) |
| Select | Checkbox — tick to include this view in processing |
All views are selected by default. Use the column filter icons to narrow the list by View Name or View Type before running.
Selection buttons (right panel):
| Button | Action |
|---|---|
| Select All | Tick every view in the list |
| Select None | Untick every view |
| Select Selected | Toggle the tick for rows highlighted in the grid |
| Reset Filters | Clear all active column filters |
The Total counter (bottom right) shows how many views are in the list. The Total Selected counter (top right) updates as you change selections.
Step 2 — Configure Highlight Options (Optional)
To visually colour-code 2D elements in the views, tick Highlight Elements. This enables five colour buttons — one per element type:
| Button | Element Type | Default Colour |
|---|---|---|
| Text Colour | Text Notes | Red (255, 0, 0) |
| Line Colour | Lines / Curve elements | Red (255, 0, 0) |
| Filled Region Colour | Filled Regions | Red (255, 0, 0) |
| Detail Component Colour | Detail Components | Green (0, 255, 0) |
| Keynote Colour | Keynote Tags | Green (0, 255, 0) |
Click any colour button to open a standard colour-picker and choose a replacement colour. The button background updates to reflect your selection.
Leave Highlight Elements unchecked if you only want the element count report without modifying view graphics.
Step 3 — Export the View List (Optional)
Before processing, you can export the current view list (Id, View Name, View Type, Select state) to a file using the Export to section:
- CSV — plain comma-separated file
- Excel — formatted spreadsheet
This is useful for sharing the scope of the audit before committing to changes.
Step 4 — Run (OK)
Click OK to process all selected views. A progress bar tracks each view; click Cancel at any time to roll back all changes safely.
For each selected non-template view the tool:
- Collects all elements of each 2D type present in the view
- If Highlight Elements is ticked, applies a colour override to every element of that type in the view
- Records: Sheet Number, Sheet Name, View Name, Total Elements, Text count, Lines count, Filled Regions count, Detail Components count, Keynotes count
After processing completes, an Excel report is automatically exported containing the full element count breakdown for every processed view.
Tips and Best Practices
- Run on a copy of the project. The highlight option writes Override Graphics in View by Element overrides to every selected view. These are permanent until manually cleared or overridden again.
- Uncheck Highlight Elements for a read-only audit. You still get the full Excel export of element counts per view without touching any graphics.
- Use the default colour scheme as a standard. Red for Text, Lines, and Filled Regions flags annotation-heavy views that may need reworking. Green for Detail Components and Keynotes marks intentional, standards-compliant detailing.
- Filter before running. Use the View Type column filter to restrict processing to Detail Views or Drafting Views rather than running across every plan, section, and elevation in the project.
- Select None then filter to build a targeted list — deselect all, filter to the view type you want to audit, then use Select All on the filtered result.
- Review the Excel export immediately. Views with a high Text or Line count and zero Detail Components may be candidates for re-detailing with family-based components.
- Check sheets vs. un-placed views separately. Views with Sheet Number = "NA" are not placed on a sheet — consider whether those views need to exist at all.
Common Use Cases
Project QA audit — Before issuing drawings, run the tool across all Detail and Drafting views to identify how many 2D patches (Text, Lines, Filled Regions) exist versus proper Detail Components and Keynotes. Export the counts to Excel and review with the project team.
Enforcing keynoting standards — Set Detail Component and Keynote colours to green and Text/Line colours to red. Run across all views and visually inspect any view that shows red — these are views where annotation has been placed directly rather than through the keynote system.
Quantifying rework scope — Use the Excel export to sum Text and Line counts across all views. This gives a measurable starting point for estimating the effort required to replace 2D annotation with family-based content.
Scoped view type audit — Filter the view list to a single type (e.g. Detail Views) and run only on those. This keeps processing fast and the export focused on the area of concern.
Before and after comparison — Export to Excel before rework begins, then run again after. Compare the two exports to verify that 2D element counts have reduced and Detail Component / Keynote counts have increased.
Troubleshooting
Tool is greyed out or shows "Action not available in the Family environment" Highlight 2D Elements cannot run while a Family document is active. Switch to a project file and try again.
View list is empty or loads very slowly Very large projects with hundreds of views may take time to load. The progress bar tracks loading — wait for it to complete. If the list appears empty after loading, check that the project contains non-template views.
Highlight Elements checkbox does nothing The checkbox must be ticked to enable the colour buttons. If the buttons remain greyed out, ensure the checkbox is actually checked (not just clicked and released).
Excel export does not open automatically
The export relies on Excel being installed and associated with .xlsx files. If the export silently fails, check that Microsoft Excel (or a compatible application) is installed. The exported file may also be blocked by your organisation's file save location policies.
View graphics remain highlighted after closing the tool The overrides are applied as permanent element-level overrides in each view. To remove them, use Revit's Override Graphics in View dialog (select elements → right-click → Override Graphics in View → By Element → Reset to restore defaults), or use Visibility/Graphics Overrides to clear element overrides project-wide.
Cancel during processing left some views highlighted Cancelling mid-run triggers a transaction rollback, which should undo all overrides applied in that run. If some overrides remain, it may indicate the cancel was triggered after the transaction committed. Use the reset approach above to clear any residual overrides.
Sheet Number shows "NA" for all views Views not placed on a Sheet will always show "NA" for Sheet Number and Sheet Name. This is expected behaviour — it confirms those views are un-placed.