033g Excel Tools Import New Rooms
Chris McKeown / July 1, 2025
Excel Tools
Overview
Import New Rooms reads an Excel file formatted by 033f Export Room Template and creates a new unplaced Room placeholder in Revit for each data row. Parameters from each row (Name, Number, Department, and any custom parameters) are applied to the new room. Rooms with a Phase value are created in the matching project phase; rows without a phase use the first available phase. After import, the new rooms appear in your Room Schedule as "Not Placed" — ready to be placed on the required level.
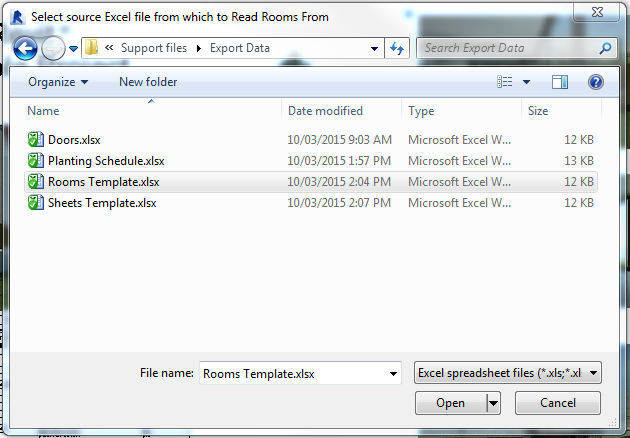
Table of Contents
Key Features
- Creates new unplaced Room placeholders — does not modify existing rooms
- Reads the Phase column to assign rooms to the correct project phase
- Falls back to the first project phase if Phase is blank or not matched
- Applies all non-empty column values to Room parameters by matching column header to parameter name
- Progress bar with Cancel button; rolls back all changes on cancel
- Confirms the number of rooms created on completion
Requirements
- The Excel file must be formatted using 033f Export Room Template — row 1 must be parameter names, data from row 3 onwards
- The project must have at least one Phase defined
- Must be run in a project document (not a Family document)
- A valid Kiwi Codes Bonus Tools licence must be active
Running the Tool
Launch
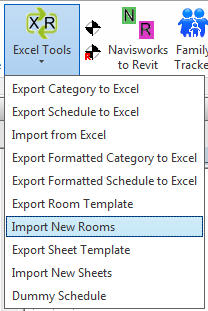
Find Import New Rooms on the Bonus Tools Ribbon under the Excel Tools dropdown, or use 115 Search Tools.
Step 1 — Select the Excel file
An Open File dialog appears. Navigate to and select the Excel file exported by Export Room Template and populated with room data.
The tool reads the first worksheet of the workbook. Rows 1 and 2 are treated as headers (parameter name and type). Data begins at row 3.
Step 2 — Monitor progress
A progress bar tracks creation of each room. Click Cancel to roll back all rooms created so far and return the project to its original state.
Step 3 — Review results
A message confirms the number of rooms created (e.g. "42 Rooms created."). The Output log (dockable panel) lists any rows that encountered errors.
Open your Room Schedule in Revit — the new rooms appear as "Not Placed" entries. Place them on the required levels using Revit's standard room placement workflow.
Tips and Best Practices
- Use a Room Schedule to review after import. Create or open a Room Schedule that includes the Name, Number, Department, and Phase columns to verify all imported data is correct before placing rooms.
- Phase must match exactly. The Phase column value must match the project phase name character for character (case-sensitive). If the phase name in the Excel file does not match any project phase, the room is created in the first phase. Verify phase names in Revit before populating the template.
- Empty cells are skipped. If a cell in the data rows is empty, that parameter is left at its default value. Only non-empty cells are applied.
- Do not modify the header rows. Row 1 (parameter names) must remain exactly as generated by Export Room Template. Adding or renaming columns in row 1 may prevent parameters from being applied.
- Import creates, not updates. This tool only creates new rooms — it does not update existing ones. Use 033c Import from Excel to update existing room parameters.
Common Use Cases
Bulk room creation from client brief — Receive room data as a spreadsheet, reformat to match the template structure, and import to create all placeholder rooms for a new project in seconds.
Adding rooms for a new phase — Populate the template with Phase set to the new phase name, import to create all new rooms, and then place them on the appropriate levels.
Multi-level room setup — Create all rooms for multiple floors at once by running a single import with the Phase column set appropriately, then place them level by level.
Troubleshooting
"Action not available in the Family environment." Close the Family Editor and run from within a project document.
"Error whilst running the tool. If the problem persists please contact chris@kiwicodes.com" An unexpected error occurred. Check the Revit journal for detail and contact support at chris@kiwicodes.com.
Rooms created but parameters not applied The column header in row 1 of the Excel file does not match the parameter name in Revit. Re-export a fresh template and repopulate the data, ensuring header names match exactly.
"0 Rooms created." All rows in the file were empty (only whitespace in all columns). Ensure data rows start at row 3 and contain at least one non-empty cell.
Rooms created in the wrong phase The Phase column value does not exactly match the project phase name. Check the project phases in Revit (Manage → Phases) and update the Phase column in the Excel file to match.