033j Excel Tools Dummy Schedule
Chris McKeown / July 1, 2025
Excel Tools
Overview
Dummy Schedule converts a formatted Excel worksheet into a Revit schedule view that can be placed on a sheet. The tool reads the Excel file's Print Area, recreates the cell grid as a Revit schedule header, and maps each cell's text, font styling, background colour, alignment, merged cells, and borders into the corresponding Revit table cell style. Fourteen configurable Line Style dropdowns let you map Excel border weights to the Revit graphic line styles used in your project. The result is a Revit schedule view that looks like the original Excel table and can be placed on any sheet.
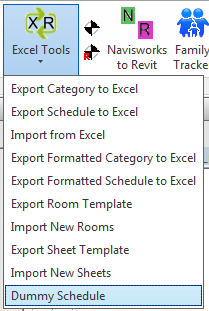
Table of Contents
Key Features
- Converts an Excel worksheet's Print Area into a Revit schedule header
- Recreates: cell text, font (bold, italic, underline, size, colour), background colour, horizontal and vertical alignment, text rotation, merged cells, and column/row dimensions
- Fourteen line style mappings (Style01–Style14) let you map Excel border weights to Revit graphic line styles
- Supports embedded images in cells (PNG, JPG, JPEG, GIF, BMP referenced by file path)
- Handles existing schedule names — prompts to overwrite if a schedule with the same name already exists
- Persistent file list — add multiple Excel files and worksheets; the list is saved to Revit Extensible Storage in the document
- Batch load — select multiple files and load them all in one operation
- Progress bar with Cancel button
Requirements
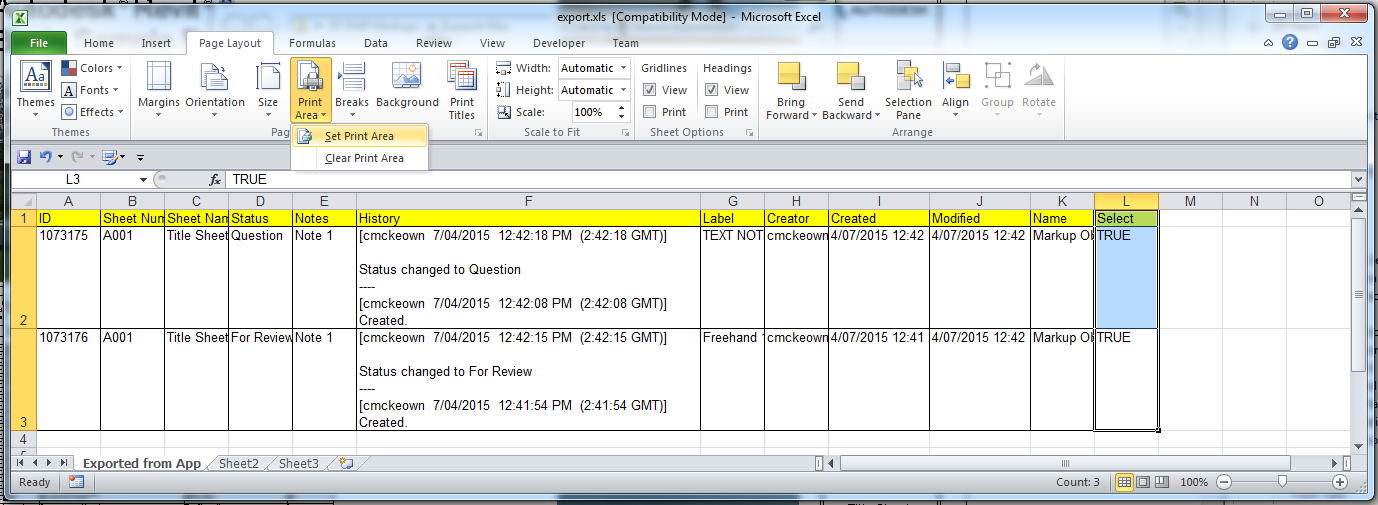
- Each Excel worksheet must have a Print Area set (Excel → Page Layout → Print Area → Set Print Area) — the tool uses this to define the cell grid boundaries
- Must be run in a project document (not a Family document)
- Revit line styles must exist in the project for border mapping — the line style dropdowns are populated from the project's Lines subcategories
- A valid Kiwi Codes Bonus Tools licence must be active
Running the Tool
Launch
Find Dummy Schedule on the Bonus Tools Ribbon under the Excel Tools dropdown, or use 115 Search Tools.
Before running: ensure each Excel worksheet has a Print Area set. In Excel: Page Layout → Print Area → Set Print Area.
Step 1 — Add Excel files to the list
The dialog shows a grid of Excel files and their worksheets. Click Add to insert a new row, then click the … button in the Excel File Name column to browse to an Excel file. Once selected, the Excel Sheet Name column populates with a dropdown of all worksheets in that workbook. Select the worksheet to import.
Previously added files are remembered in the project and reappear when the dialog is reopened.
Click Remove Selected to delete selected rows from the list. Select All and Select None control which rows are checked for the Load Selected operation.
Step 2 — Map border line styles
The fourteen Line Style dropdowns (Style01 through Style14) map Excel border weights to Revit line styles:
| Style slot | Excel border weight |
|---|---|
| Style01 | None |
| Style02 | Hair |
| Style03 | Dotted |
| Style04 | DashDotDot |
| Style05 | DashDot |
| Style06 | Dashed |
| Style07 | Thin |
| Style08 | MediumDashDotDot |
| Style09 | (reserved) |
| Style10 | MediumDashDot |
| Style11 | MediumDashed |
| Style12 | Medium |
| Style13 | Thick |
| Style14 | Double |
Set each dropdown to the Revit line style that best represents that Excel border weight. Select None to remove borders for that weight entirely.
Line style selections are saved to the project and restored on next open.
Step 3 — Load Selected
Check the rows you want to process (use Select All or check individually) and click Load Selected.
For each selected row, the tool:
- Reads the Excel worksheet's Print Area
- Creates a new Revit schedule (Generic Model category) named after the worksheet, or prompts to overwrite if the name exists
- Rebuilds the cell grid — adding rows and columns to match the Print Area dimensions
- Applies merged cells, column widths, and row heights
- Fills each cell with text (or an image), font styling, background colour, alignment, and border line styles
- Applies a filter that keeps the schedule body empty (no actual Revit elements)
A progress bar tracks each file. A message reports how many schedules were added or updated.
Step 4 — Place the schedule on a sheet
Open the new schedule view from the Project Browser (it will be listed under Schedules/Quantities → Generic Model). Drag it onto a sheet like any other schedule view.
The schedule body is intentionally empty — only the header section contains the recreated Excel table. This is by design.
Tips and Best Practices
- Set the Print Area in Excel before running the tool. The tool will report an error ("Please set Print Area.") and skip the worksheet if no Print Area is defined. In Excel: Page Layout → Print Area → Set Print Area, selecting only the cells you want to recreate.
- Keep the Excel table simple for best results. Very complex formatting (gradients, custom fonts not installed on the Revit machine, complex conditional formatting) may not transfer perfectly. Stick to standard fonts and solid fill colours.
- Map your heaviest border to the correct Revit line style. The most important mapping is usually Thin → your standard line style and Medium → your medium/heavy line style. Test with a simple table first.
- Use image references by file path. To embed an image in a cell, put the full file path (e.g.
C:\Logos\logo.png) in the cell text. Supported formats: PNG, JPG, JPEG, GIF, BMP. - Overwrite to update. If the Excel source is edited, re-run Load Selected and choose to overwrite the existing schedule. The schedule is rebuilt with the latest data.
- The schedule body stays empty. The Generic Model schedule filter ensures no actual elements appear in the body — only the header (your table) is visible. This is intentional and correct behaviour.
Common Use Cases
Project information sheet — Build a project details table in Excel (project name, address, architect, consultants) and import it as a Dummy Schedule to place on the cover sheet without manually recreating the table in Revit.
Legend / key table — Design a drawing legend in Excel with hatching images and descriptions, import as a Dummy Schedule, and place it on all sheets that need a legend.
Consultant co-ordination matrix — Maintain a responsibility matrix in Excel and import it into Revit as a Dummy Schedule to keep the latest version on the co-ordination sheet.
Specification table on sheet — Place a formatted specification note table directly on a sheet, styled to match your practice's standard sheet layout — without using a Revit Text Note or Detail Component.
Troubleshooting
"Please set Print Area." The Excel worksheet has no Print Area defined. Open the file in Excel, select the cell range to import, and go to Page Layout → Print Area → Set Print Area. Save the file and run the tool again.
"Worksheet: [name] not found." The worksheet name stored in the dialog no longer exists in the Excel file (perhaps it was renamed). Remove the row from the list, re-add the file, and select the correct worksheet.
"Action not available in the Family environment." Close the Family Editor and run from within a project document.
Schedule appears blank / no header content Check that the Excel Print Area covers the cells you intended. If the Print Area is set to a single cell or an empty range, the resulting schedule will be empty.
Borders are not showing in Revit The line style mappings are set to None for the border weights used in the Excel file. Set the relevant Style dropdowns to a valid Revit line style and reload the schedule.
Cell text is missing or truncated The Revit table cell may be too narrow for the text. Column widths are calculated from the Excel column width — if the column is very narrow in Excel, the Revit column will also be narrow. Widen the column in Excel and reload.
Images are not appearing Check that the cell contains a valid file path to an image file (PNG, JPG, JPEG, GIF, BMP) and that the file exists at that path. Relative paths are not supported — use the full absolute path.