032 Navisworks to Revit
Chris McKeown / July 1, 2025
Time Saving
Overview
Navisworks to Revit reads a Navisworks XML clash report and creates a full set of documentation inside Revit: a generic family instance at each clash point, a named 3D view for each clash, and (optionally) sheets with those views placed in a grid layout. It eliminates the manual effort of cross-referencing Navisworks clash reports against Revit models by embedding the clash data — including clash name, assigned-to, status, and element Ids — directly as shared parameters on each marker family.
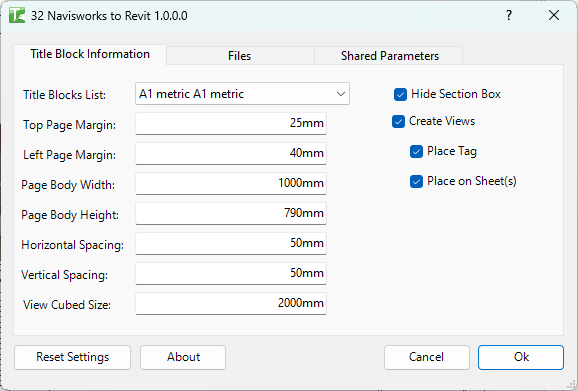
Table of Contents
Key Features
- Reads standard Navisworks XML clash export files
- Places a generic family instance at each clash coordinate (Project Internal or Shared coordinates)
- Creates a named 3D view for each clash, optionally with section box hidden
- Places a tag on each clash marker
- Optionally places views on sheets in a configurable grid layout using a chosen title block
- Configurable sheet layout: margins, body dimensions, spacing, and view cube size
- Three configuration tabs: Title Block, Files, and Shared Parameters
- Reset Settings button to restore recommended defaults
- Clash data written to shared parameters: Clash Result Name, Assigned To, Result Status, Element Id 1, Element Id 2, X/Y/Z coordinates
- Results shown in a text output window with a per-clash summary
Requirements
- A Navisworks XML clash report exported from Navisworks Manage or Simulate
- A Generic Family (
.rfa) to use as the clash point marker - A Generic Family Tag (
.rfa) to use as the tag for each marker - Shared parameters matching the GUIDs configured in Tab 3 must be loaded into the project (or the default Bonus Tools shared parameters file must be in use)
- Any Revit project document
- A valid Kiwi Codes Bonus Tools licence must be active
Running the Tool
Launch
Find Navisworks to Revit on the Bonus Tools Ribbon or use 115 Search Tools.
The dialog opens on Tab 1 — Title Block Information.
Tab 1 — Title Block Information
Configure the sheet layout for the generated views:
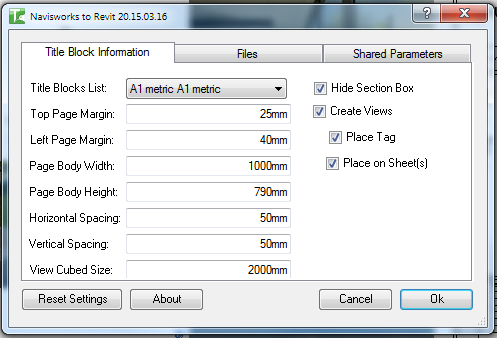
| Setting | Description |
|---|---|
| Title Block | The title block family to use for generated sheets |
| Top Margin / Left Margin | Page margins in millimetres |
| Body Width / Body Height | Available drawing area on the sheet |
| Horizontal Spacing / Vertical Spacing | Gap between views in the grid layout |
| View Cube Size | Size of each 3D view viewport |
| Hide Section Box | Hide the section box in each generated 3D view |
| Create Views | Create a named 3D view for each clash |
| Place Tag | Place the tag family on each clash marker |
| Place on Sheet | Place the generated views onto sheets |
Click Reset Settings at any time to restore all three tabs to the recommended default values.
Tab 2 — Files
Specify the source data and family files:
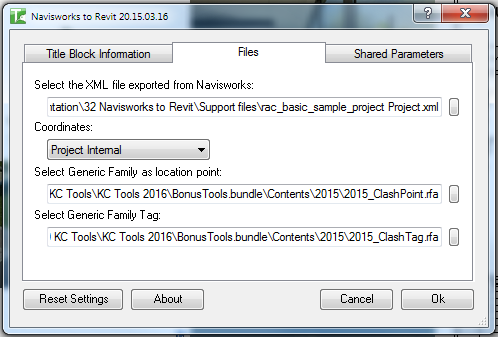
| Setting | Description |
|---|---|
| XML File | Path to the Navisworks XML clash report (use Browse to locate) |
| Coordinates | Coordinate system: Project Internal or Shared |
| Generic Family | Path to the clash point marker family (.rfa) |
| Generic Family Tag | Path to the clash tag family (.rfa) |
Ensure all three file paths exist on disk before proceeding — the tool validates them before running.
Tab 3 — Shared Parameters
Map the Navisworks clash data fields to shared parameter GUIDs in your project:
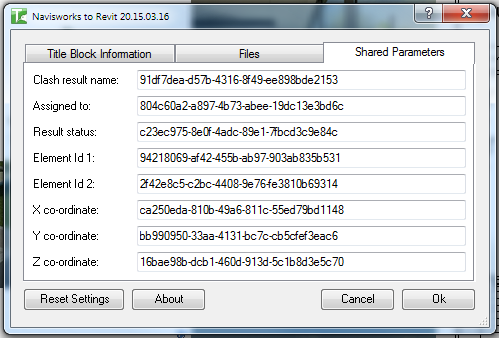
| Parameter | GUID |
|---|---|
| Clash Result Name | GUID for the clash name parameter |
| Assigned To | GUID for the assigned-to parameter |
| Result Status | GUID for the status parameter |
| Element Id 1 | GUID for the first clashing element Id |
| Element Id 2 | GUID for the second clashing element Id |
| X co-ordinate | GUID for the X position parameter |
| Y co-ordinate | GUID for the Y position parameter |
| Z co-ordinate | GUID for the Z position parameter |
Use Reset Settings to populate the default GUIDs that match the Bonus Tools shared parameters file. If your project uses a different shared parameters file, update the GUIDs to match.
Running the import
Once all three tabs are configured, click OK. The tool processes the XML and creates all elements. A text output window shows a summary of the results:
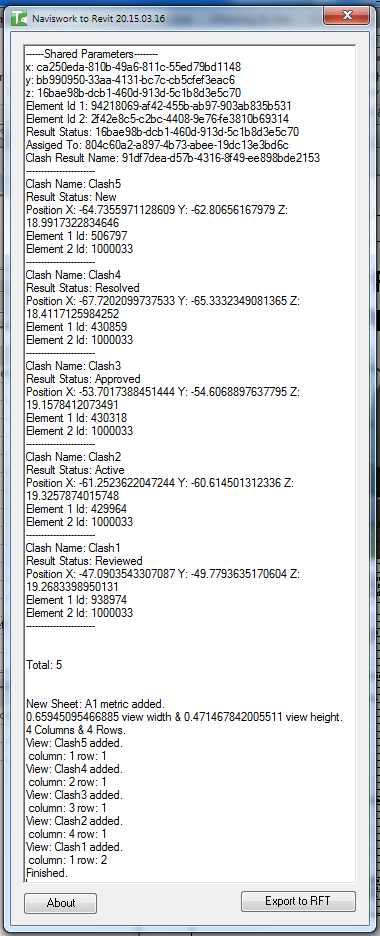
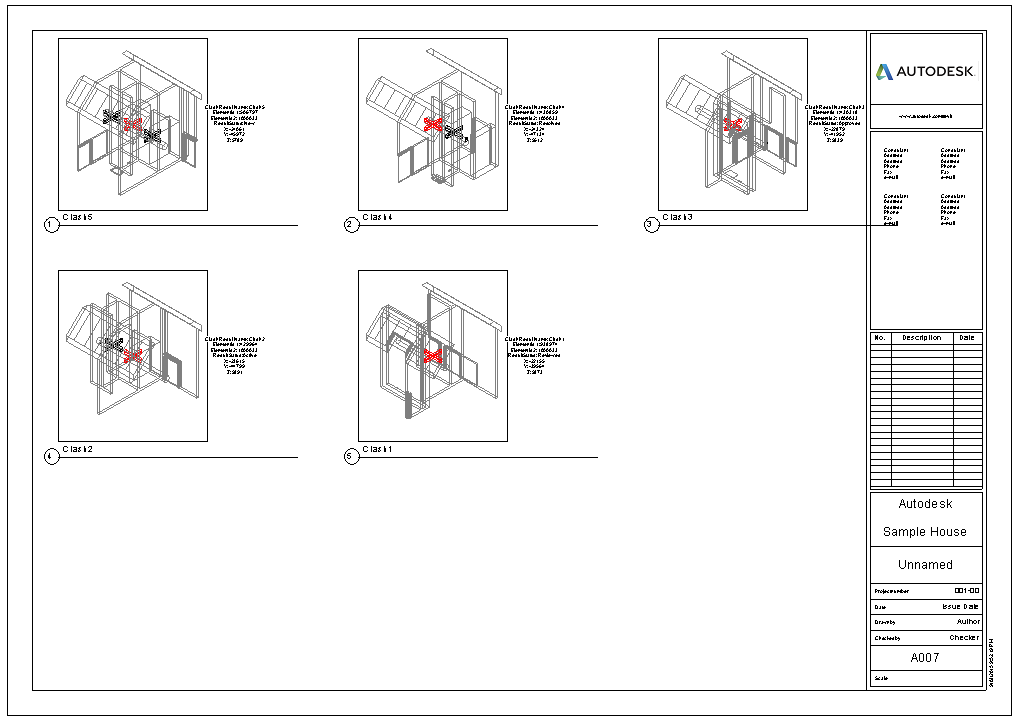
If Place on Sheet was enabled, sheets are created with the clash views arranged in the configured grid:
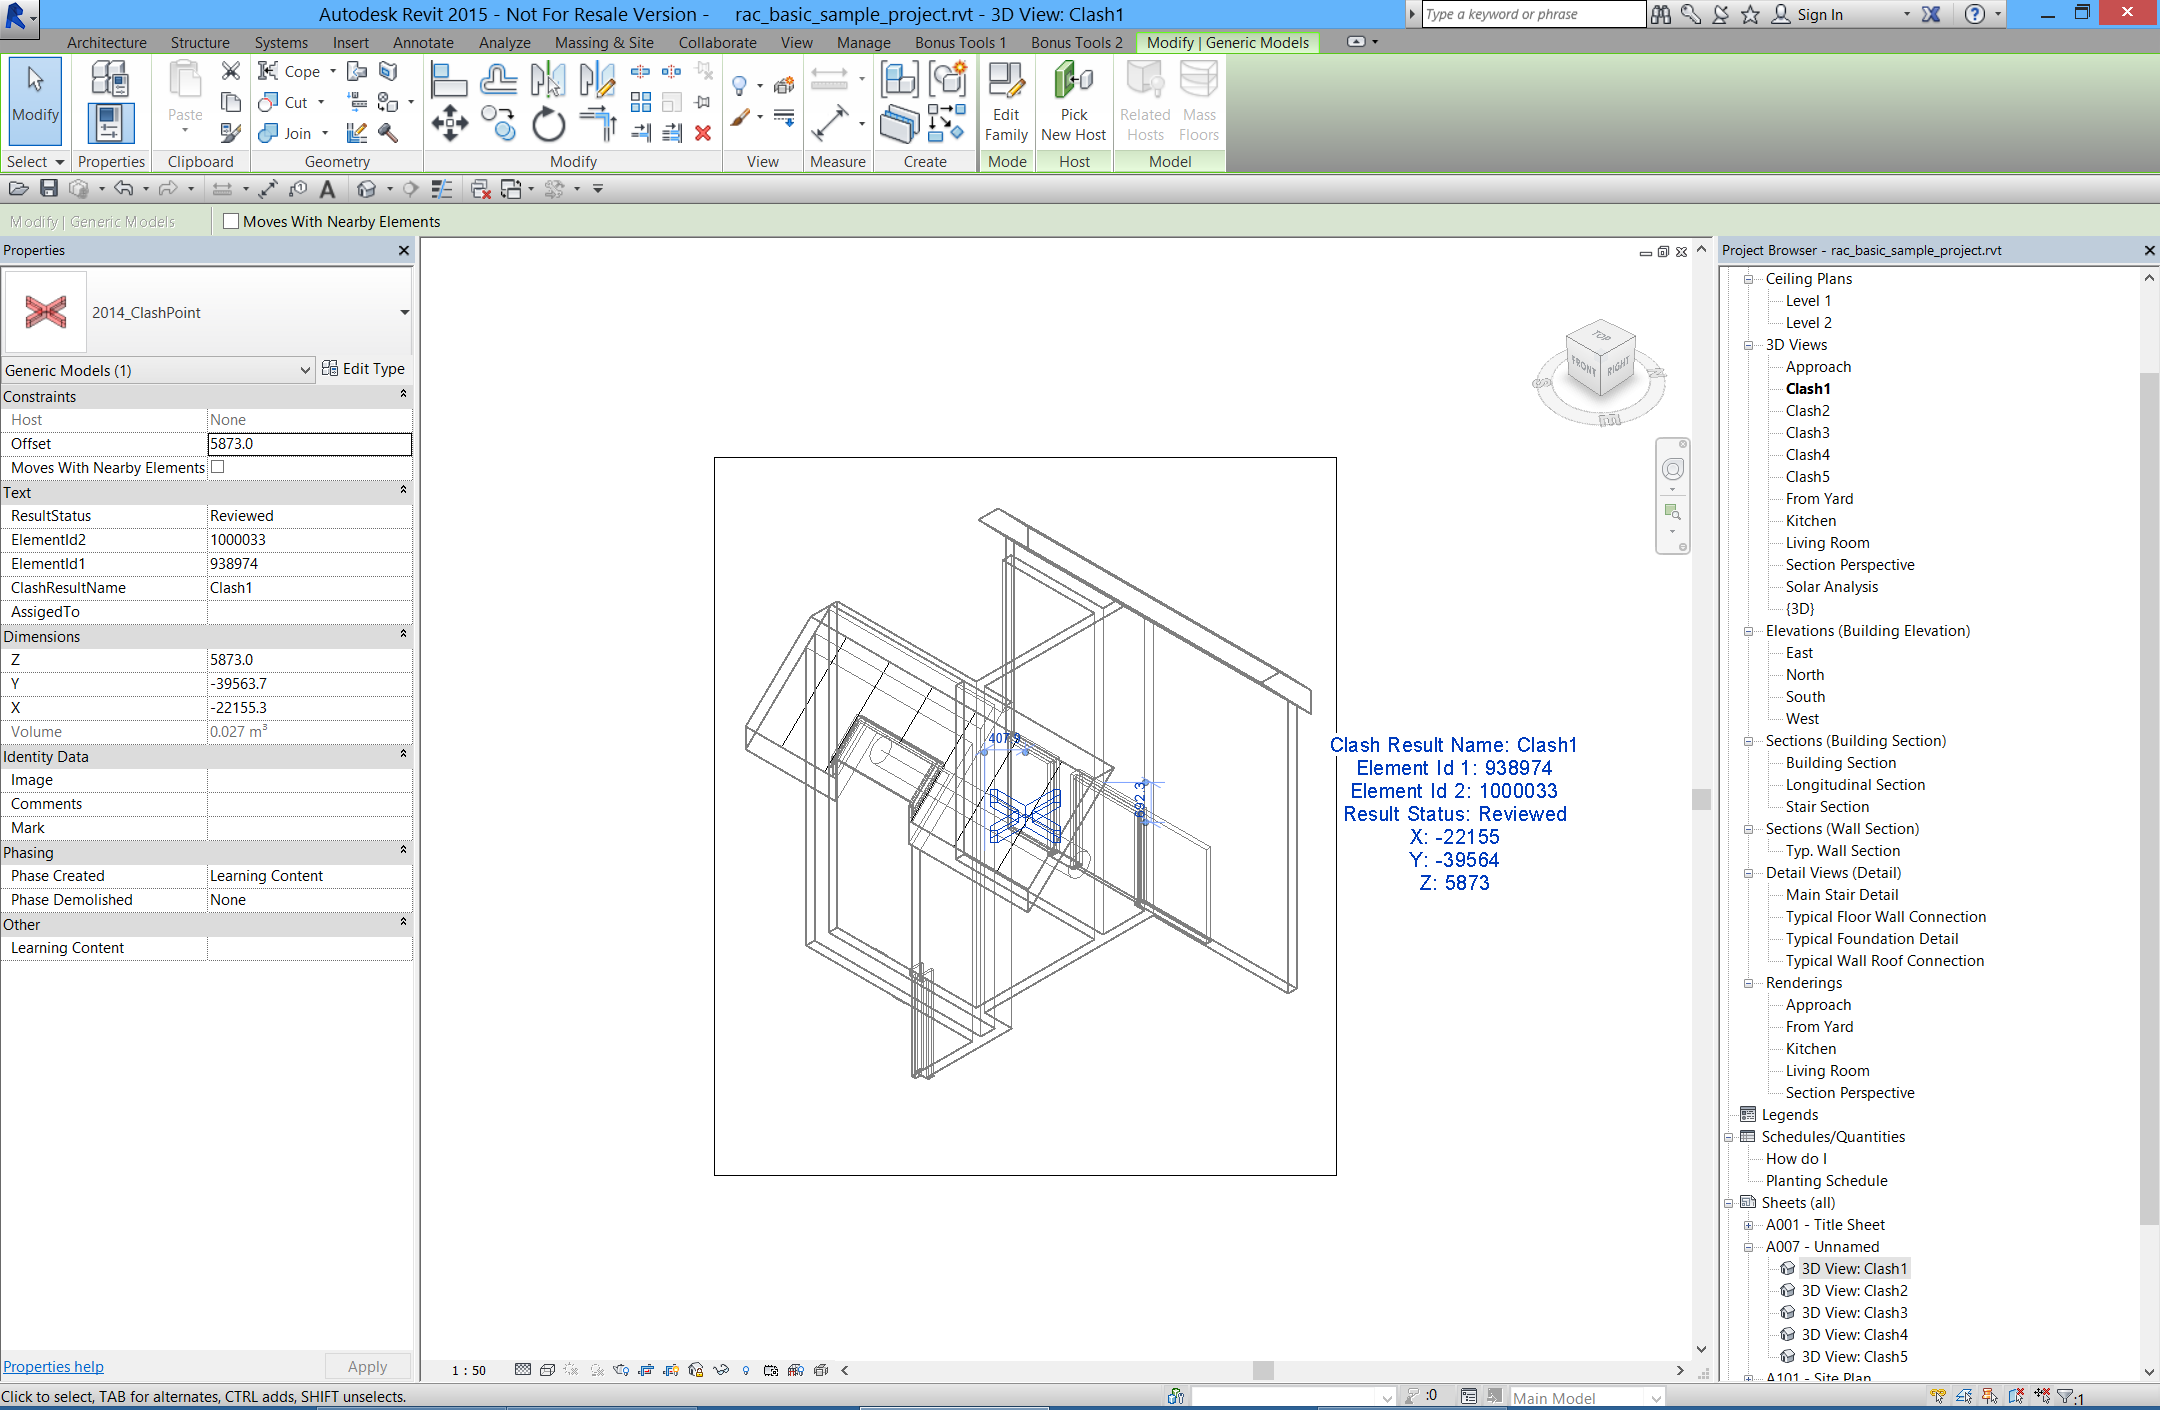
Each clash is visible as a named 3D view with the marker family placed at the clash coordinate:
Tips and Best Practices
- Export from Navisworks as XML. Use Navisworks Manage's built-in clash export — ensure the output format is XML (not HTML or other formats).
- Use Reset Settings on first run. The defaults load the standard Bonus Tools clash point family and shared parameter GUIDs, giving you a working setup to test with before customising.
- Match your coordinate system. If your Revit model uses Shared Coordinates (linked with a survey point), select Shared. For models without survey coordinates, use Project Internal.
- Load shared parameters before running. The generic family must have the shared parameters loaded. If the family reports a parameter error, verify the parameter GUIDs match what is in the family.
- Check View Cube Size against your title block. If the body dimensions and spacing result in views that don't fit on the sheet, reduce the View Cube Size or increase the body dimensions.
- Run on a local copy first. The import creates many elements and views. Test on a local or detached copy before running against the central model.
Common Use Cases
Clash review documentation — Import a full clash report from Navisworks and distribute Revit sheets to the relevant design teams, with each clash visible in a named 3D view at the correct model location.
BIM coordination meetings — Generate clash sheets automatically before each coordination meeting, with all clashes placed and tagged on sheets ready for annotation and issue tracking.
Clash data in schedules — Because clash metadata (name, status, assigned-to) is stored as shared parameters, you can create a Revit schedule of all clash markers to track resolution status directly inside Revit.
Troubleshooting
"File not found" or path validation error All three file paths in Tab 2 must exist on disk. Verify the XML, generic family, and tag family paths are correct and accessible from the current machine.
GUID mismatch / parameters not populating The shared parameter GUIDs in Tab 3 must match the GUIDs of the parameters loaded into the clash point family. Open the family in the Family Editor, check the shared parameters, and update the GUIDs in Tab 3 accordingly. Or use Reset Settings to switch to the Bonus Tools default parameter set.
Clashes placed at wrong location Check whether the Navisworks export used Project Internal or Shared Coordinates and ensure the Coordinates dropdown in Tab 2 matches.
Views not appearing on sheets Ensure Place on Sheet is checked in Tab 1 and that a valid title block is selected. If the grid calculations result in views that exceed the sheet boundary, adjust the body dimensions, spacing, or view cube size.
No sheets or views created despite successful run Verify Create Views and Place on Sheet checkboxes are enabled in Tab 1.