030 Element Selector – By Id
Chris McKeown / July 1, 2025
Time Saving
Overview
Element Selector – By Id is a quick-access utility for locating any element in a Revit project without manually searching the model. Enter the Revit Element Id or part of an element's name, and the tool immediately reports what was found and offers to delete it. It is particularly useful for diagnosing Revit warnings, resolving element references from journals or scripts, or removing a specific element by Id.
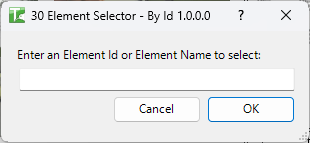
Table of Contents
Key Features
- Dual lookup mode — enter a numeric value to search by Element Id; enter text to search by element name
- Instant result — reports the found element's name and Id in a confirmation dialog
- Optional deletion — prompts to delete the found element immediately in the same step
- Lightweight single-field interface — no scope configuration required
Requirements
- Any Revit project document
- A valid Kiwi Codes Bonus Tools licence must be active
Running the Tool
Launch
Find Element Selector – By Id on the Bonus Tools Ribbon or use 115 Search Tools.
The dialog opens with a single input field.
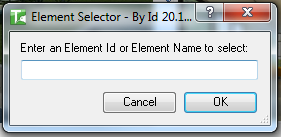
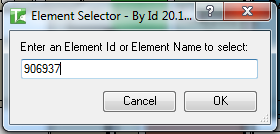
Step 1 — Enter an Element Id or element name
Type into the input field:
| Input type | How the tool searches |
|---|---|
Numeric (e.g. 906937) | Looks up the element by its Revit Element Id |
Text (e.g. Concrete Wall) | Searches all elements by name |
Click OK.
Step 2 — Review the result
If the element is found, a dialog reports its name and Element Id and asks whether to delete it:
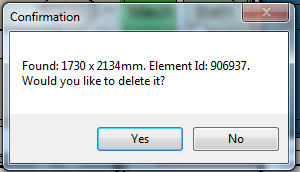
- Click Yes to delete the element immediately.
- Click No to dismiss without making any changes.
If no element matches the input, the tool reports "No element found."
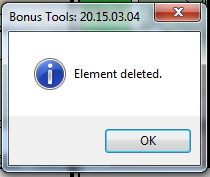
Step 3 — Deletion confirmation
If you clicked Yes, the element is deleted and a confirmation is shown:
Tips and Best Practices
- Use Element Id for precision. When you have an exact Id from a Revit warning, journal file, or another Bonus Tool, numeric lookup is instant and unambiguous.
- Name search returns the first match. If multiple elements share the same name, only the first match is returned. Use Element Id when you need a specific element.
- Undo is available. The deletion is committed as a standard Revit transaction — use Ctrl+Z immediately after closing the tool if you need to recover the element.
- Element Ids change after file upgrades. If you saved an Id from a previous file version, verify it still refers to the correct element before deleting.
Common Use Cases
Tracking down a Revit warning element — Copy the Element Id shown in a Revit warning dialog, paste it into Element Selector, and delete the offending element without hunting through the model manually.
Removing a specific element by Id — When a colleague, script, or schedule report provides an Element Id that needs to be cleaned up, use this tool to confirm the element and remove it in a single step.
Quick element lookup during scripting — BIM managers and developers can verify what element a given Id refers to during Dynamo or macro development without leaving the Revit session.
Troubleshooting
"No element found." The Id does not exist in the current document, or the name text did not match any element's name. Verify the Id is correct or check the spelling and try again. Note that Element Ids are document-specific — an Id from a linked file will not be found in the host.
Element found but deletion fails The element may be pinned, part of a group, owned by another user in a workshared model, or protected by Revit. Check element ownership and unpin if needed before retrying.
Wrong element deleted Use Ctrl+Z to undo the deletion immediately after closing the dialog.