013 Dimensions List
Chris McKeown / July 1, 2025
Lists
Overview
The Dimensions List tool collects every Dimension element in your Revit project — or a scoped subset — and displays them in a sortable, filterable grid. From the grid you can navigate directly to the host view of any Dimension, remove unwanted Dimensions in bulk, and immediately spot any Dimension whose value has been manually overridden — a common source of documentation risk.
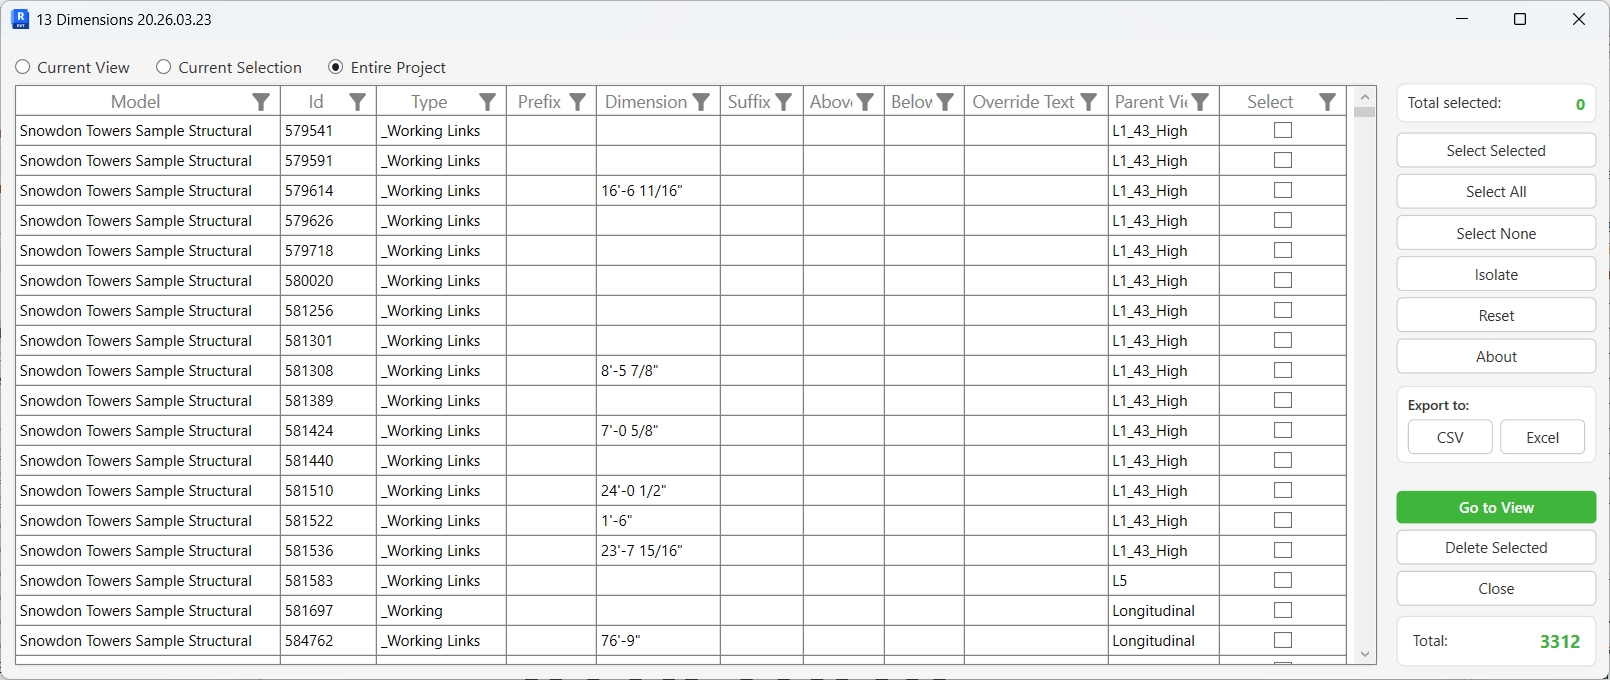
Table of Contents
Key Features
- Scope control — switch between Current View, Current Selection, and Entire Project without closing the dialog
- Full dimension data per row: Model, Element ID, Type, Prefix, Value, Suffix, Above text, Below text, Override Text, and Parent View
- Override Text column instantly identifies any Dimension whose numeric value has been replaced with freehand text
- Multi-select rows using standard mouse, drag, and Ctrl/Shift operations, then bulk-apply selections with Select Selected
- Isolate button removes all unchecked rows from the grid view for focused analysis
- Go to View opens the host view in Revit and highlights the selected Dimensions
- Delete Selected removes Dimensions inside a transaction with per-element sub-transactions — failed deletions are rolled back individually without aborting the batch
- Export the full grid to CSV or Excel for offline reporting
- Total and Total Selected counters update live as you check and uncheck rows
- Window size and position are saved and restored between sessions
Requirements
- Must be run in a Project document — not available in the Family Editor
- A Revit project must be open and active
- Current View and Current Selection scopes require an active view to be open
- No shared parameters or linked files required — linked model Dimensions are included automatically and labelled by model title in the Model column
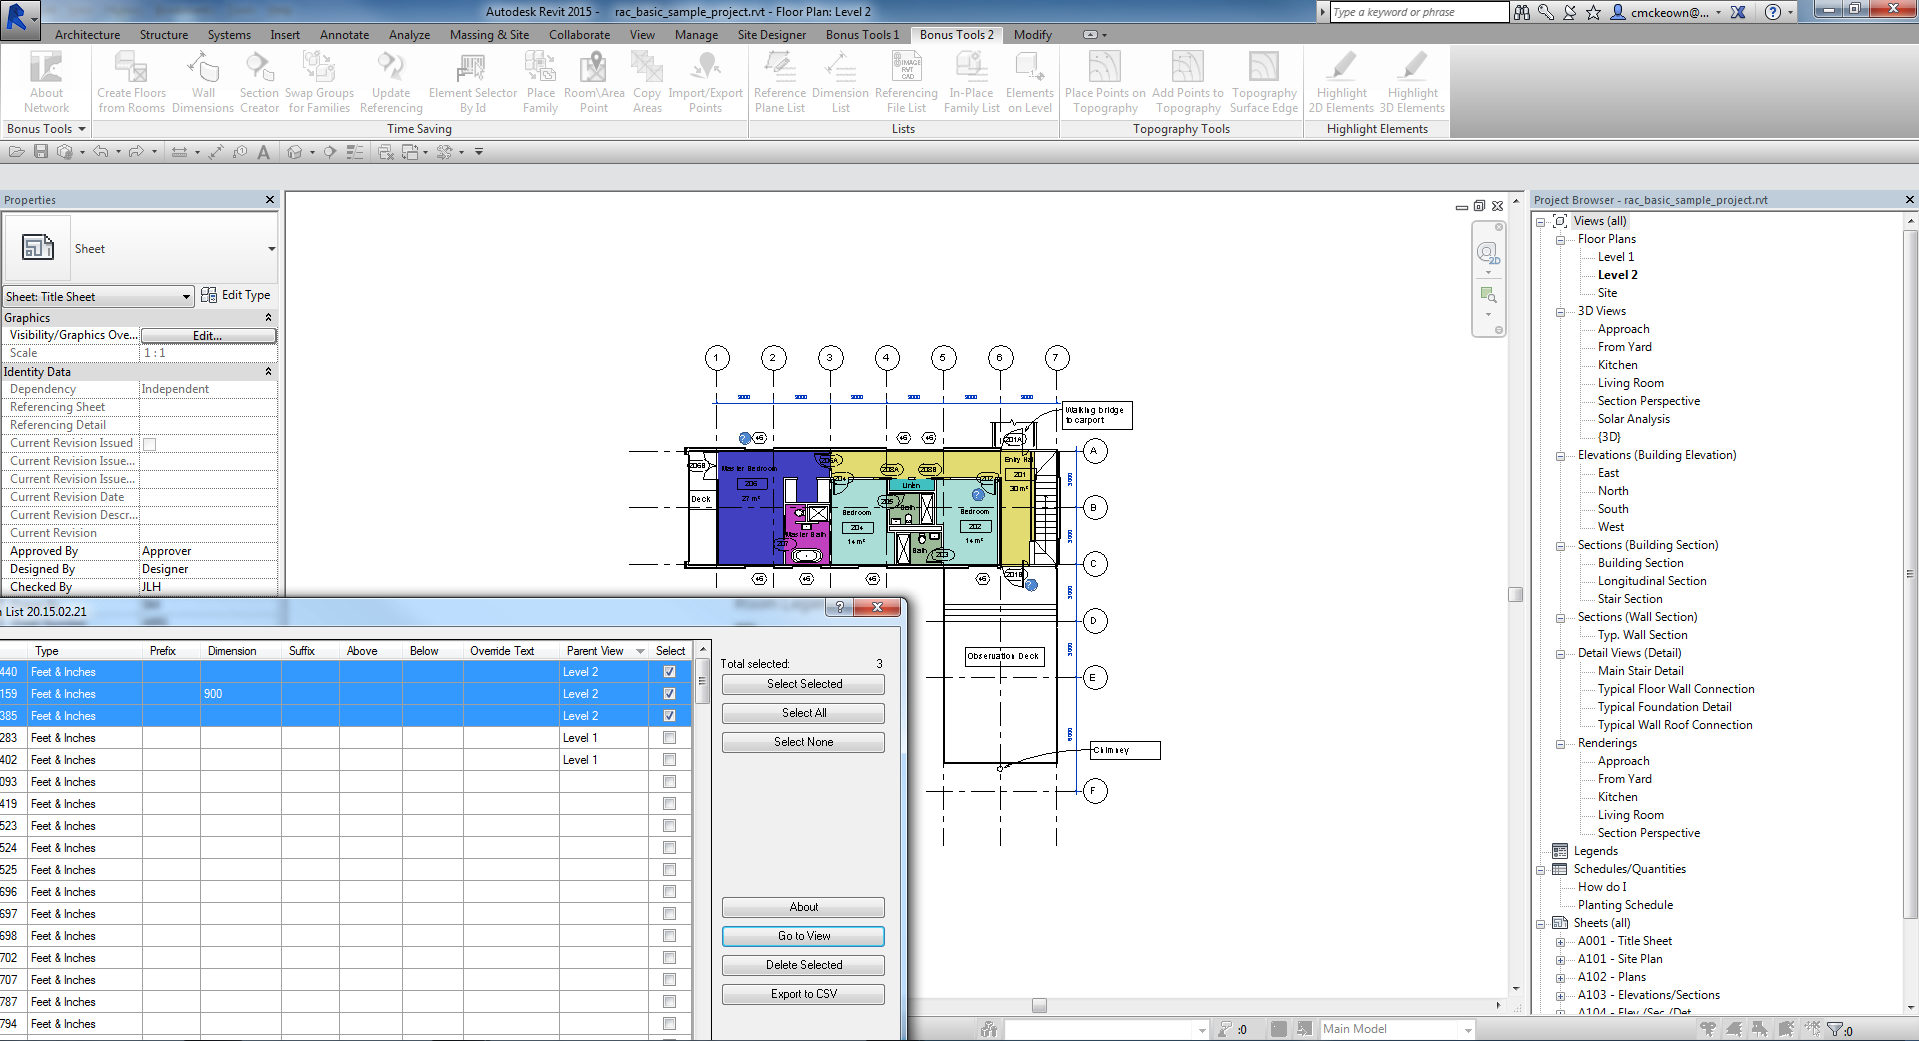
Running the Tool
Launch
Find Dimensions List on the Bonus Tools ribbon, or use 115 Search Tools to locate it by name.
The dialog opens and immediately loads Dimensions based on the active scope radio button.
Step 1 — Choose a Scope
Three radio buttons at the top of the dialog control which Dimensions are loaded into the grid:
| Option | What is collected |
|---|---|
| Current View | All Dimensions visible in the currently active Revit view |
| Current Selection | Only Dimensions within the current Revit selection set |
| Entire Project | All Dimensions in the host model and any linked models |
Switching scope reloads the grid immediately. A progress bar tracks loading for large models.
If the Parent View column is blank for a Dimension, it likely resides inside an in-place family or a non-view-specific context.
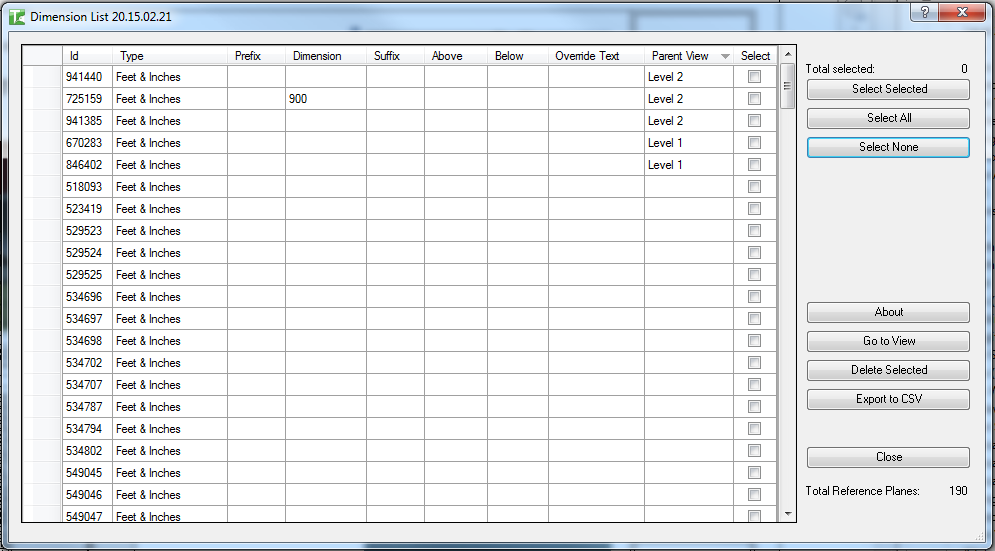
Step 2 — Review the Grid
Each row represents one Dimension element. The columns are:
| Column | Description |
|---|---|
| Model | Document title — useful when linked models are included |
| Id | Revit Element ID |
| Type | Dimension Type name (e.g. Linear - 3mm Arial) |
| Prefix | Text prepended to the dimension value |
| Dimension | The measured value string (e.g. 3600) |
| Suffix | Text appended to the dimension value |
| Above | Text placed above the dimension line |
| Below | Text placed below the dimension line |
| Override Text | Manual text replacement — non-empty values indicate a quality-control risk |
| Parent View or Reference Name | The view the Dimension belongs to, or referenced element names for non-view-specific Dimensions |
| Select | Checkbox for bulk operations |
Click any column header to sort ascending/descending. Use the built-in Syncfusion column filter (▼) to filter by any value.
Step 3 — Select Dimensions
Use any combination of the selection controls on the right panel:
- Select Selected — toggles the Select checkbox for every row highlighted in the grid (use Ctrl+click or Shift+click to highlight multiple rows first)
- Select All — checks all rows currently visible after any active column filters
- Select None — unchecks all rows
- Isolate — removes all unchecked rows from the grid, leaving only your checked subset for focused work
The Total Selected counter at the top of the right panel updates as you check rows.
Step 4 — Navigate to a Dimension
Check the Select checkbox on one or more rows, then click Go to View.
Revit will switch to the host view and highlight the selected Dimensions.
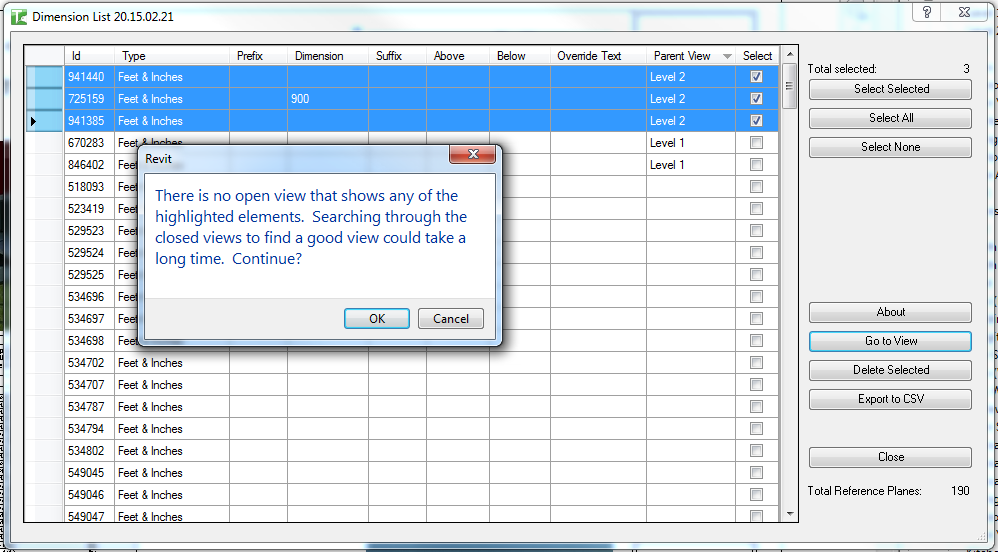
If a view is not currently open in Revit, you will see the standard "There is no open view…" message — click OK and Revit will open the appropriate view.
If selected Dimensions span multiple views, Revit will navigate to and highlight Dimensions in all relevant views — the last view in the selection will be the active view when navigation completes.
Step 5 — Delete Selected Dimensions
Check the Select checkbox on the Dimensions to remove, then click Delete Selected.
A confirmation dialog will appear:
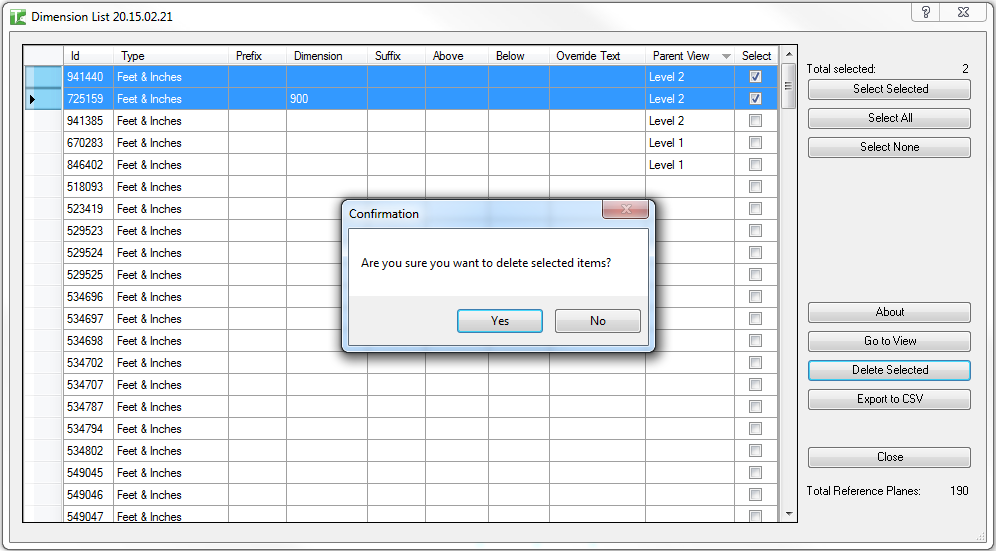
Click Yes to proceed. A progress bar tracks each deletion. Each element is deleted inside its own sub-transaction — if a single Dimension cannot be deleted, that failure is rolled back and logged without affecting the rest of the batch.
Results are written to the Dockable Output Dialog (112) — successfully deleted Dimensions are shown in green.
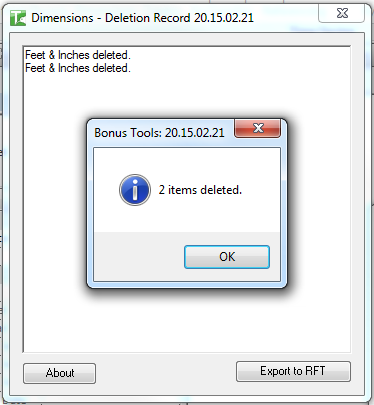
The deleted rows are also removed from the grid automatically, and the Total counter updates.
Step 6 — Export the Grid (Optional)
To export the current grid contents for offline review or reporting:
- CSV — saves a comma-separated file compatible with any spreadsheet application
- Excel — saves a formatted
.xlsxfile
Both buttons are in the Export to: panel on the right side of the dialog. The export includes all rows currently in the grid (subject to any active Isolate filtering).
Tips and Best Practices
- Use Override Text as a QA filter. Sort or filter the Override Text column to instantly find every Dimension where the real value has been replaced — these are the highest-risk items in a documentation audit.
- Scope to Current View first. On large projects, loading the Entire Project can take time. Start with Current View to investigate a specific area, then broaden the scope if needed.
- Combine Isolate with Delete. Check only the Dimensions you want to keep visible, click Isolate to clear the rest from view, then review before deleting — this is safer than selecting everything blindly.
- Use Select Selected with grid highlighting. Click a column header to sort, then Shift+click a range of rows to highlight them, then click Select Selected to check that entire range efficiently.
- Reset restores the full grid. Clicking Reset (or switching scope) reloads Dimensions from Revit — use it to recover from an Isolate operation without closing the dialog.
- Export before bulk deleting. Export to CSV or Excel before running a large deletion. If you need to reference what was removed, the export provides a complete record.
- Linked model Dimensions are read-only. Dimensions in linked files appear in the grid with the linked model's name in the Model column, but cannot be deleted — the Delete Selected button will skip them with a logged failure.
Common Use Cases
Documentation quality audit — Run with scope set to Entire Project, then sort by Override Text to review every Dimension that has had its value manually replaced. Flag or remove overrides that no longer reflect the actual geometry.
Pre-issue clean-up — Before issuing a drawing set, switch to Current View and scan for Dimensions with blank Parent Views (indicating in-place family contexts) or unexpected Override Text entries that could misrepresent measurements.
Bulk removal of unused dimension types — Sort by the Type column to group Dimensions by type, then select an entire type's rows using column filtering and Select All, and delete them in one pass to clean up legacy dimension styles.
Linked model audit — Load with Entire Project scope and filter the Model column to a linked file name. Review whether that model contains overridden Dimensions that may affect coordination.
Targeted navigation — Use Current Selection scope to list only the Dimensions you have pre-selected in Revit, then use Go to View to cycle through their host views quickly during a review session.
Troubleshooting
"Action not available in the Family Environment" The tool cannot run inside the Family Editor. Close the family, open a project document, and relaunch.
Grid is empty after loading If using Current View or Current Selection scope, ensure a view is active and — for Current Selection — that at least one Dimension is included in the current selection. Switch to Entire Project to confirm there are Dimensions in the model.
Go to View does nothing or shows "no open view" message Click OK on the prompt — Revit will open the required view automatically. This message appears when the target view was not already open as a tab in the Revit window.
Dimensions from linked models appear but cannot be deleted Linked model elements are read-only from the host. The Delete Selected operation will skip them and log a failure in the Output dialog. To remove Dimensions from a linked model, open that model directly.
Delete Selected partially fails Each Dimension is deleted in its own sub-transaction. If Revit prevents deletion of a specific element (e.g. it is part of a locked constraint or a pinned group), that element is rolled back individually and logged in the Output dialog. The remaining selected Dimensions are still processed.
Progress bar appears but the grid stays empty after loading This can occur if the active view contains no Dimensions matching the current scope. Try switching to Entire Project to confirm. If the project genuinely has no Dimensions, the grid will remain empty.
Export produces an empty file Export captures the current grid contents. If Isolate has been used and all rows have been removed from the grid view, the export will be empty. Click Reset to reload the full set before exporting.