119 Areas To Rooms
Chris McKeown / July 1, 2025
Time Saving
Overview
Areas to Rooms scans the active Area Plan view (or the current selection) for placed Area elements and creates a matching Room at each Area's location point on the same level. All compatible parameters — Name, Number, Department, and any shared parameters common to both element types — are transferred automatically. This removes the need to manually recreate room data that already exists in an area scheme, making it ideal for projects transitioning from area planning to detailed room-by-room design.
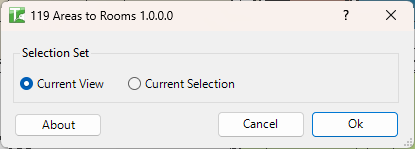
Table of Contents
Key Features
- Converts placed Area elements into Room elements at the same UV position
- Two scope options: Current View (all Areas in the active plan) or Current Selection (only selected Areas)
- Transfers all compatible parameters by name-matching — Name, Number, Department, and any shared parameters present on both element types
- Read-only parameters are silently skipped; writable parameters are set directly
- Each conversion runs in its own SubTransaction — a failure on one Area does not prevent the others from converting
- Progress bar with Cancel button — cancelling rolls back all changes made in the current run
- Output log records any individual conversion failures in red with the element name and error reason
- Completion message reports the total count of passed and failed conversions
Requirements
- The active view must be an Area Plan with an associated level (
GenLevel) — the new rooms are placed on that level - Areas must be placed (have a valid location point) — unplaced Areas are skipped
- Must be run in a project document (not a Family document)
- Room boundaries (walls, room separation lines, or area boundaries) should be in place on the target level to avoid "Room is not in a properly enclosed region" warnings
- A valid Kiwi Codes Bonus Tools licence must be active
Running the Tool
Launch
Find Areas to Rooms on the Bonus Tools Ribbon or use 115 Search Tools.
Open the Area Plan view you want to convert before launching the tool — the active view determines which level the new rooms are placed on.
Step 1 — Choose the scope
The 119 Areas to Rooms dialog opens with a Selection Set group:
| Option | Behaviour |
|---|---|
| Current View | Converts all placed Areas visible in the active Area Plan view (default) |
| Current Selection | Converts only the Area elements that are currently selected in Revit |
Use Current Selection when you want to convert a subset of Areas — select them in the canvas before launching the tool, then choose this option.
Step 2 — Run the conversion
Click Ok. A progress bar tracks each Area as it is converted. For each placed Area:
- A new Room is created at the Area's XY location on the active view's level
- All parameters shared by name between the Area and the Room are transferred
- The result (pass or fail) is logged to the Output panel
Click Cancel at any time to stop and roll back all changes — no rooms are created.
Step 3 — Review results
When complete, a message reports the totals: "X passed. Y failed."
Check the Output log (dockable panel) for any red entries — each failed conversion shows the Area name and the reason it could not be converted.
Tips and Best Practices
- Place room boundaries first. If walls or room separation lines are not present on the target level, Revit will warn that the new rooms are not in an enclosed region. Pre-placing boundaries eliminates these warnings and ensures rooms bind correctly on creation.
- Use Current Selection for partial conversions. If you only need to convert a specific set of Areas (e.g. a single zone or floor), pre-select them and use the Current Selection option rather than converting the entire view at once.
- Shared parameters transfer automatically. Any shared parameter that exists on both the Area and Room category with the same name will be transferred. Add shared parameters to the Room category in advance if you need custom Area data to carry over.
- Read-only parameters are skipped silently. Built-in computed parameters (such as Area, Perimeter, Volume) cannot be written to Room elements — they will not appear in the failure log; they are simply not transferred.
- The active view's level determines room placement. If you need rooms on a specific level, ensure you are working in the Area Plan for that level before running the tool.
- Review the Output log after a partial failure. Failed conversions appear in red. Common causes include Areas placed outside valid room boundary regions or areas with invalid geometry.
- Rooms appear as "Not Placed" in schedules until bounded. If no enclosing boundaries exist, the created rooms will appear unplaced in the Room Schedule. Place walls or room separation lines and then use Revit's Room Separation tool to bound them.
Common Use Cases
Project stage transition — from area planning to room design — A project starts with an area scheme for gross area calculations. Once the design progresses to a stage requiring room-by-room data, run Areas to Rooms to create Room elements at all existing Area locations without re-entering names, numbers, or department data.
Migrating data from an area scheme to a room schedule — Area data (room names, department assignments, area numbers) has been maintained in an Area Plan. Running Areas to Rooms transfers this information directly into Room elements, ready for use in door schedules, finish schedules, and room data sheets.
Bulk room population for a new level — Create Areas across a floor plate in the Area Plan with all names and numbers populated, then convert them all to Rooms in one step instead of placing each Room individually.
Checking coverage before converting — Select a subset of Areas to verify the conversion works as expected (using Current Selection), then run again on the full view once confirmed.
Troubleshooting
"Action not available in the Family environment." Close the Family Editor and run from within a project document.
"Copy Areas failed. Gain ownership of elements and try again." In a workshared project, the tool could not commit the transaction because some elements were owned by another user. Request or borrow ownership of the relevant elements (or use Synchronise and reload the model) and try again.
"Operation Failed." An unexpected error occurred before any conversions could start. Check that the active view is an Area Plan with a valid associated level and try again. If the problem persists, contact support at chris@kiwicodes.com.
"Failed to convert: [name] [error]" in the Output log An individual Area could not be converted. Common causes:
- The Area has an invalid or null location point (it may appear placed but have geometry issues)
- Revit rejected the Room creation at that coordinate (e.g. the point falls outside the model extents)
"X passed. 0 failed." but rooms appear unbound The rooms were created successfully but there are no enclosing walls or room separation lines on the level. Place boundaries around the rooms and use Revit's Room Separation tool to close any open regions.
0 passed — no conversions occurred The selected scope contained no placed Area elements. Check that:
- The active view is an Area Plan with placed Areas (not just Area boundaries)
- If using Current Selection, that the selected elements include at least one Area
Parameters not transferred to the new rooms The parameter exists on the Area but not on the Room category (or the Room's parameter is read-only). Add the shared parameter to the Room category in Revit's Shared Parameters settings, then re-run the conversion.