109 Topo To Follow Topo
Chris McKeown / July 1, 2025
Site
Overview
Topo To Follow Topo lets you align one topography surface (the surface to modify) so its points match the elevation of another topography surface (the surface to follow). The tool uses vertical ray-casting to find the exact elevation of the source surface at each point location, then updates the target surface accordingly. It supports both the legacy TopographySurface type and the newer Toposolid type introduced in Revit 2025.
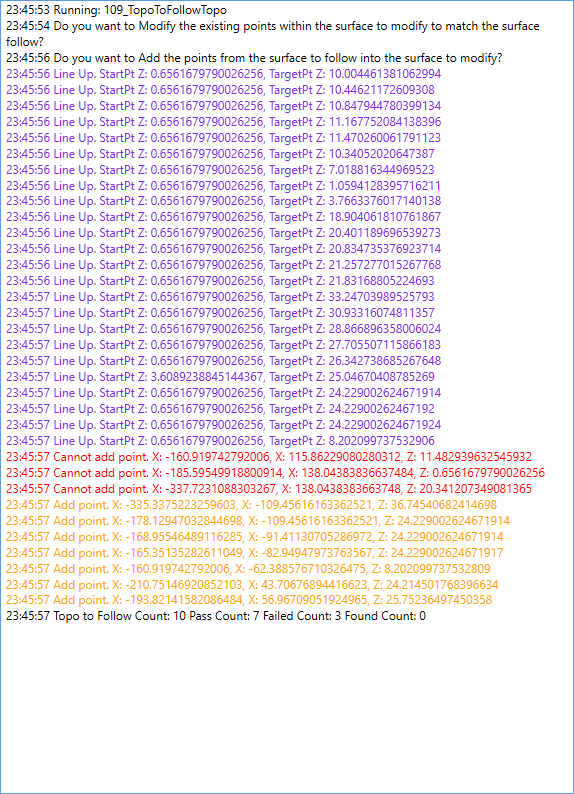
Table of Contents
Key Features
- Pick any two topography surfaces directly in the 3D view — no dialog required
- Modify existing points: moves each existing point in the target surface to match the elevation of the source surface
- Add new points: copies points from the source surface into the target surface (only where the point falls within the target surface boundary)
- Vertical ray-casting in both up and down directions ensures accurate elevation matching even when surfaces overlap
- Handles topography sub-regions — also checks sub-region surfaces when the main surface has no intersection
- Supports both
TopographySurface(Revit 2024 and earlier) andToposolid(Revit 2025+) - Reports a summary count of total, passed, failed, and already-existing points after completion
Requirements
- Must be run from a 3D view — the tool requires a 3D view for ray-casting to work
- Must be run from a Revit project document — not available in the Family Editor
- Both selected elements must be the same type: either both
TopographySurfaceor bothToposolid - The active 3D view must have visibility of both topography surfaces for ray intersection to succeed
Running the Tool
Launch
Find Topo To Follow Topo on the Bonus Tools Ribbon or use 115 Search Tools.
You must be in a 3D view before running this tool. If the active view is not a 3D view, the tool will prompt you to switch.
Step 1 — Select the Source Topography (Surface to Follow)
The Revit selection cursor activates. Click on the topography surface whose elevation you want to copy from.

The status bar shows: "Select a Topography to follow."
Step 2 — Select the Target Topography (Surface to Modify)
Click on the second topography surface — the one whose points you want to update.

The status bar shows: "Select a Topography to modify."
Step 3 — Choose Whether to Modify Existing Points
A dialog appears:
"Do you want to Modify the existing points within the surface to modify to match the surface follow?"
- Yes — each existing point in the target surface is moved vertically to match the elevation where a vertical ray from that point intersects the source surface
- No — existing points are left unchanged

Step 4 — Choose Whether to Add New Points
A second dialog appears:
"Do you want to Add the points from the surface to follow into the surface to modify?"
- Yes — each point in the source surface is added to the target surface, but only if the point falls within the target surface boundary (checked by casting a ray through the target surface at that XY location). Points that already exist in the target are skipped
- No — no new points are added

Step 5 — Review the Results
When complete, a summary message is displayed:
Topo to Follow Count: [total] Pass Count: [passed] Failed Count: [failed] Found Count: [already existed]
| Count | Meaning |
|---|---|
| Total | Number of points processed |
| Pass | Points successfully moved or added |
| Failed | Points that could not be processed (exceptions) |
| Found | Points that already existed in the target (skipped) |
Tips and Best Practices
- Run in a 3D view with both topos visible. Ray-casting relies on the active 3D view to find intersections — if a surface is hidden, the tool cannot find the correct elevation.
- Modify points before adding. If you want both operations, answer Yes to "Modify" first. The tool processes them in sequence — modifying first gives better results before new points are added.
- Use on overlapping surfaces only. If the surfaces do not overlap in plan, the ray-cast finds no intersection and points are not moved or added. Ensure the surfaces share at least a portion of their plan footprint.
- Check the result summary. A high Failed Count indicates that many points could not be matched — verify both surfaces are visible in the 3D view and try again.
- Toposolid support (Revit 2025+). The tool automatically detects whether you are using the newer Toposolid type and uses the appropriate API. You do not need to change any settings.
- Undo is available. Each operation (Modify and Add) runs as a separate Revit transaction — you can undo each step individually using Ctrl+Z.
Common Use Cases
Matching a pad to an existing site topo — A proposed building pad toposolid needs its boundary and internal points to follow the existing site contours. Select the site topo as "follow" and the pad topo as "modify". Enable Modify Points to snap the pad edges to site elevation.
Blending two adjacent site areas — Two independently modelled topo surfaces need to meet at a shared boundary. Select one as the source and the other as the target, then add and modify points along the shared edge.
Copying topo contour detail from a survey surface — A detailed survey topography has been linked in and modelled as a native Revit surface. Use Topo To Follow Topo to transfer its point density into a simplified design surface, then refine as needed.
Updating a design topo after site changes — The site survey surface has been updated. Re-run the tool with the updated survey as the source to propagate elevation changes into the design surface automatically.
Troubleshooting
"Please go to a 3D View before running this tool." The active view is not a 3D view. Switch to any 3D view and run the tool again.
Tool is not available (greyed out) Topo To Follow Topo cannot run in a Family Document. Open a project file and try again.
Pass Count is 0 even though the surfaces overlap Ensure both topography surfaces are visible in the active 3D view. If either surface is hidden by a View Filter, Workset visibility, or the section box, the ray-caster cannot detect it. Temporarily disable any section box and confirm both surfaces are visible.
Points are moved but the elevation looks wrong The tool moves points to the elevation of the nearest intersection found by casting a ray vertically (up then down). If the source surface has a sub-region at that location, the sub-region elevation is used. Check whether a sub-region is causing an unexpected elevation.
Failed Count is high Some points may fall outside the plan footprint of the source surface, returning no intersection. This is expected for points in the target that have no corresponding area in the source. Review which points failed by examining the model after running.
Both selections must be the same type
Selecting a TopographySurface as one pick and a Toposolid as the other is not supported — the tool requires both to be the same type. Ensure you are selecting matching element types.